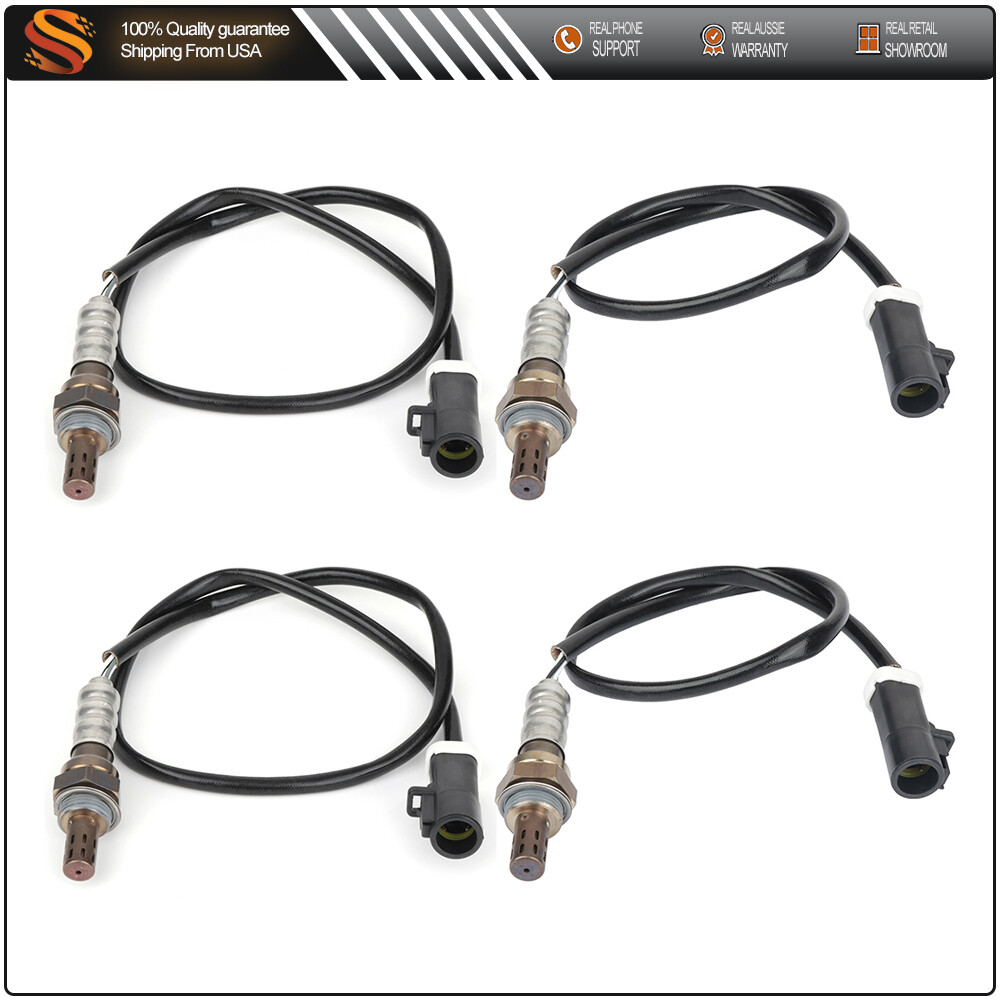
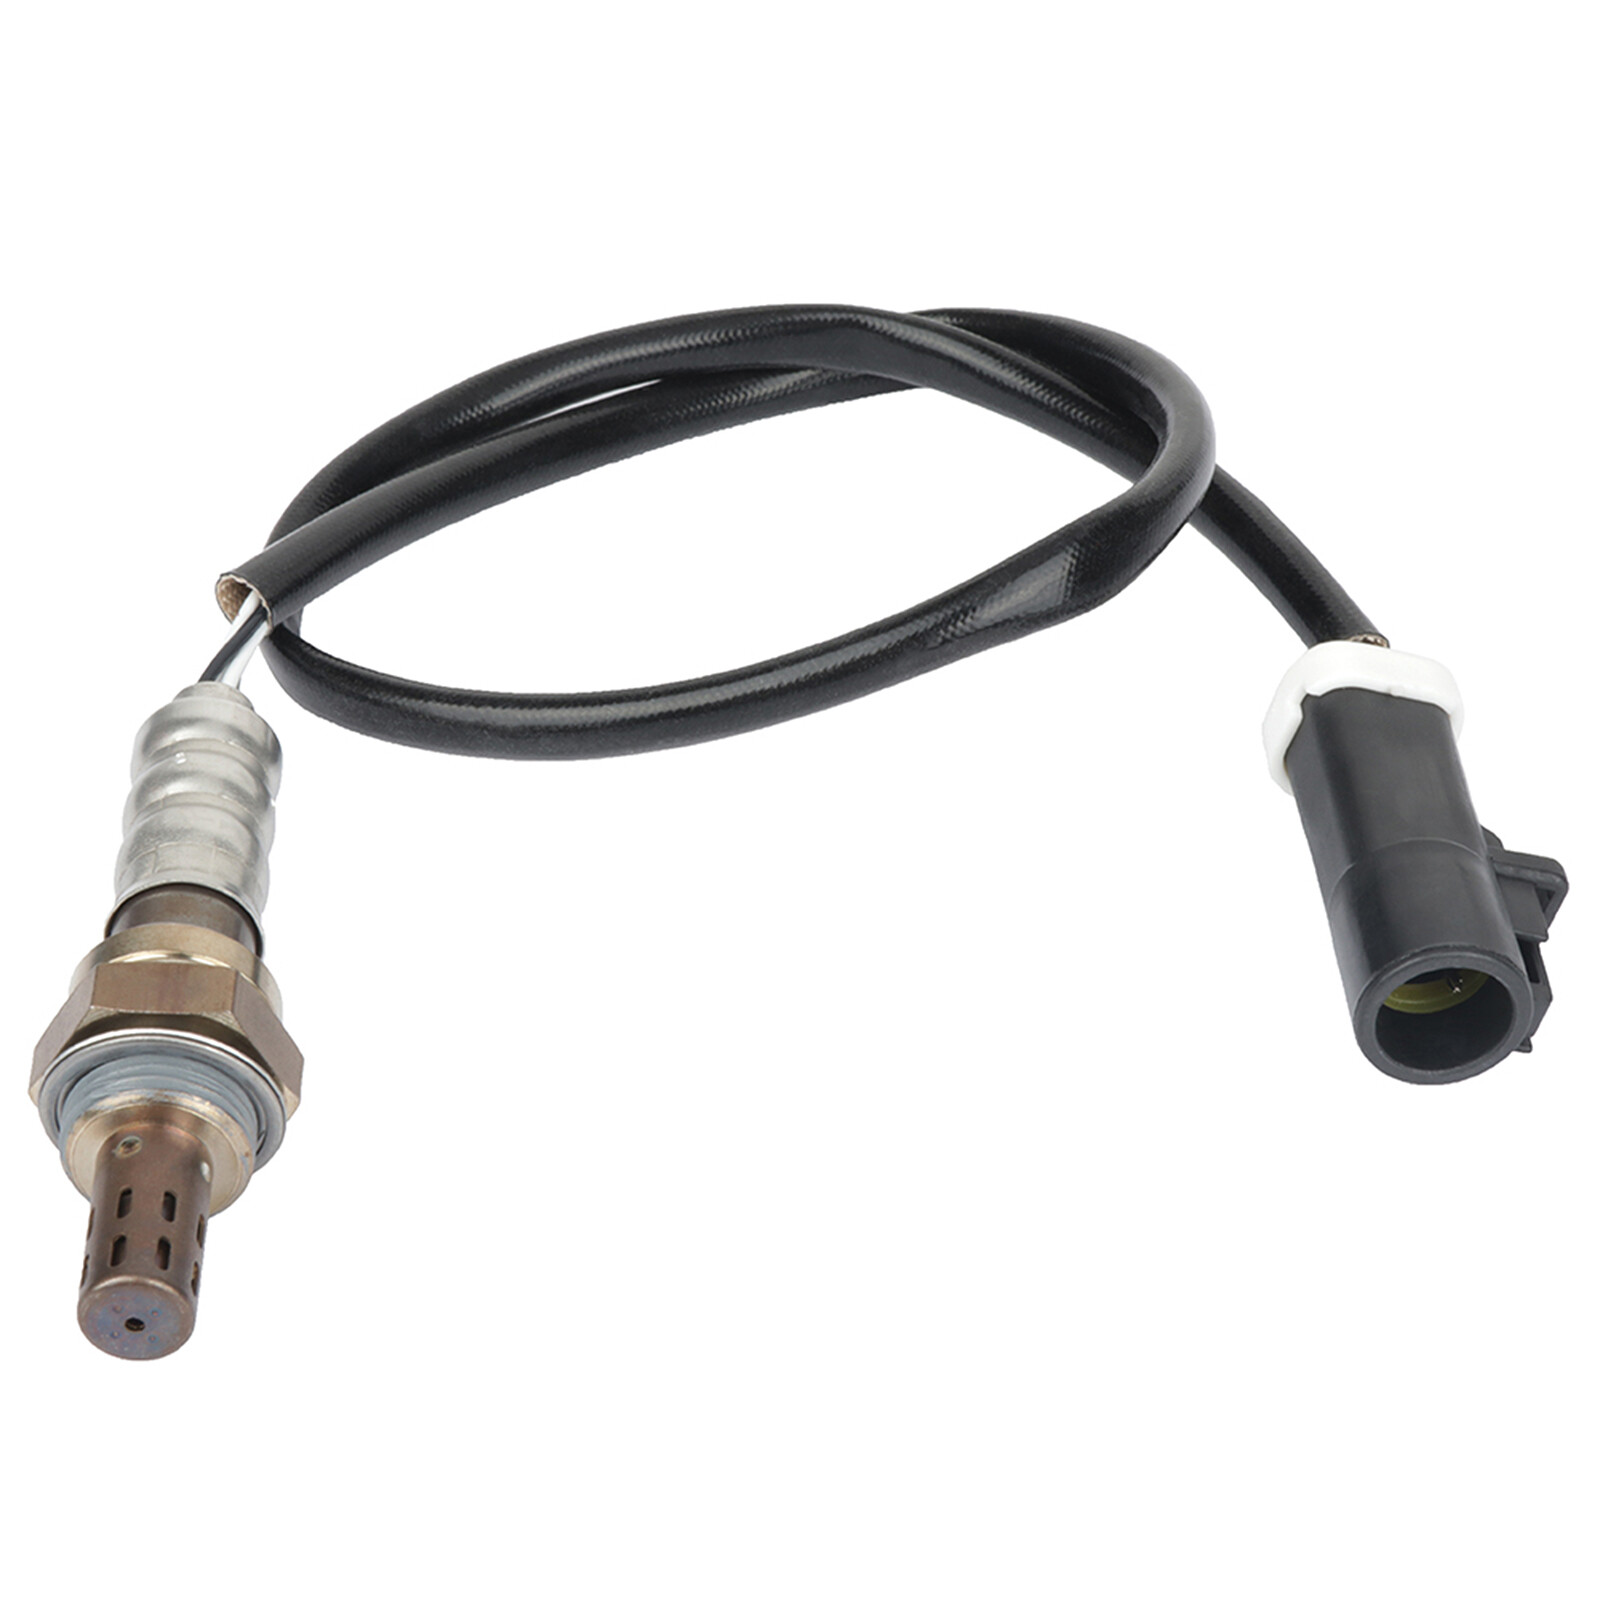
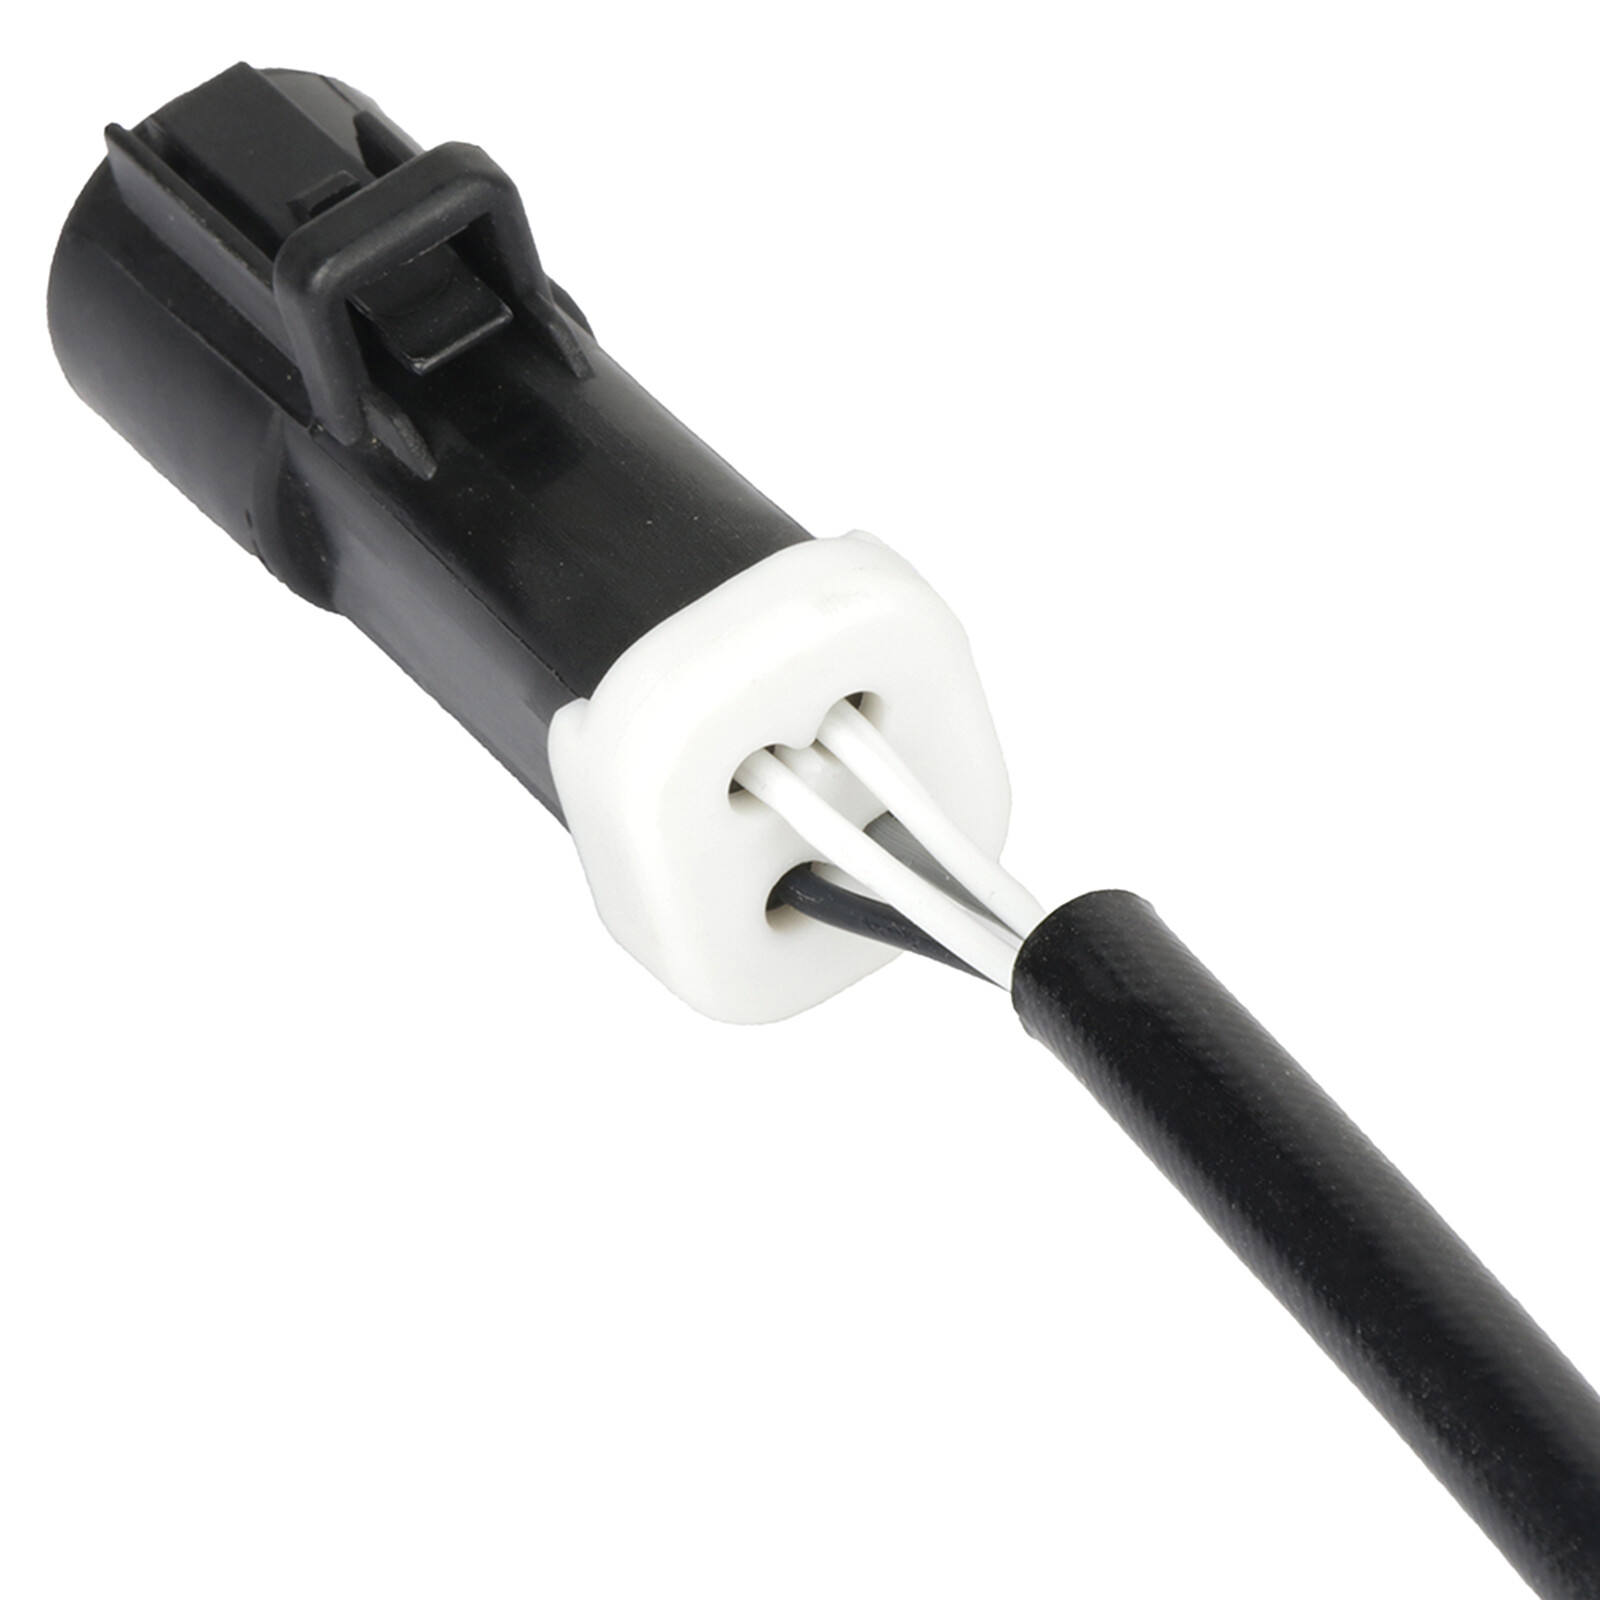
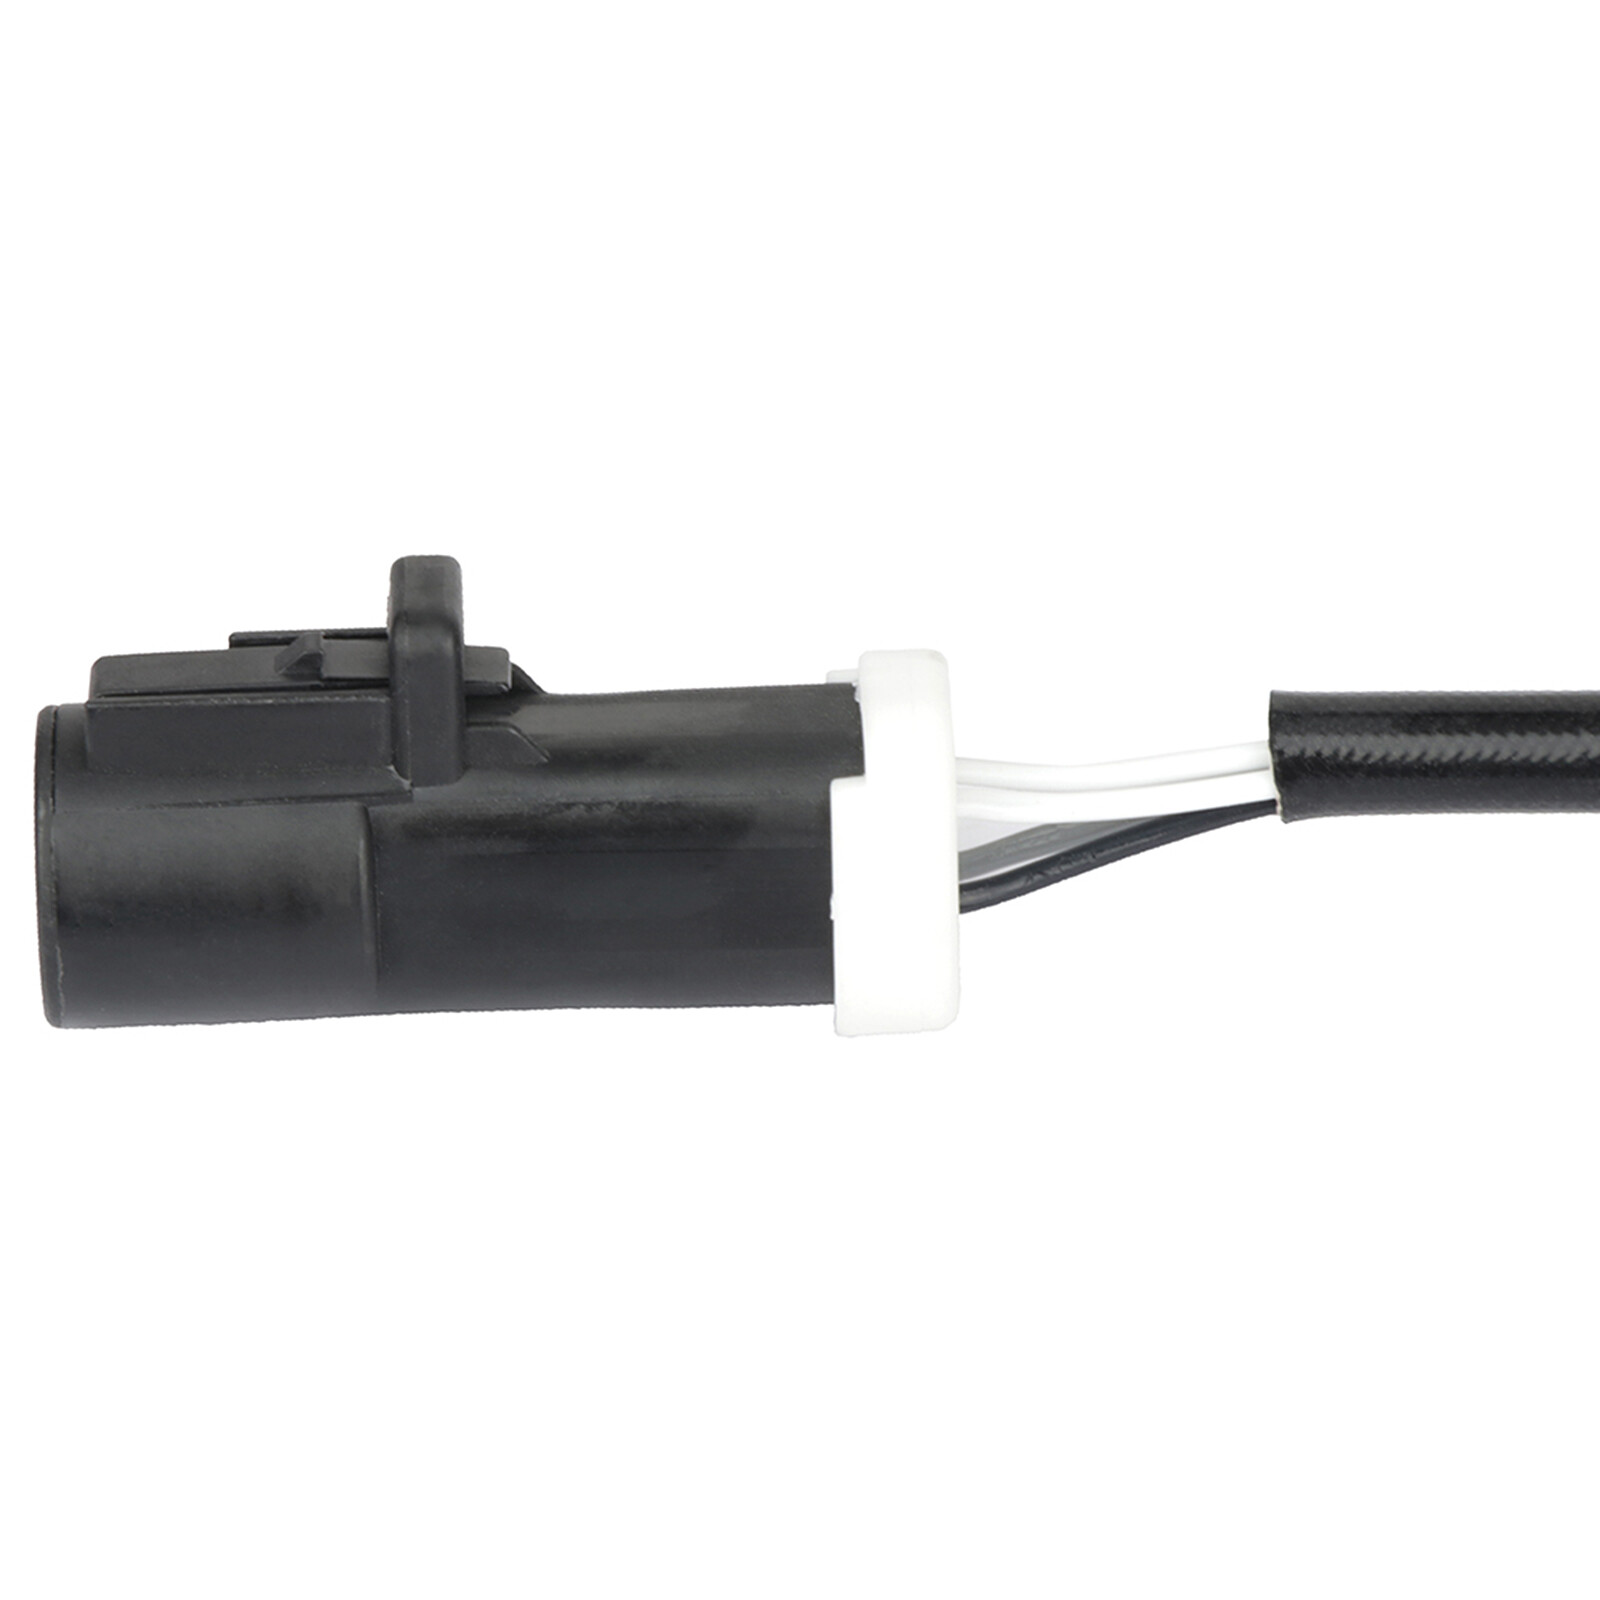
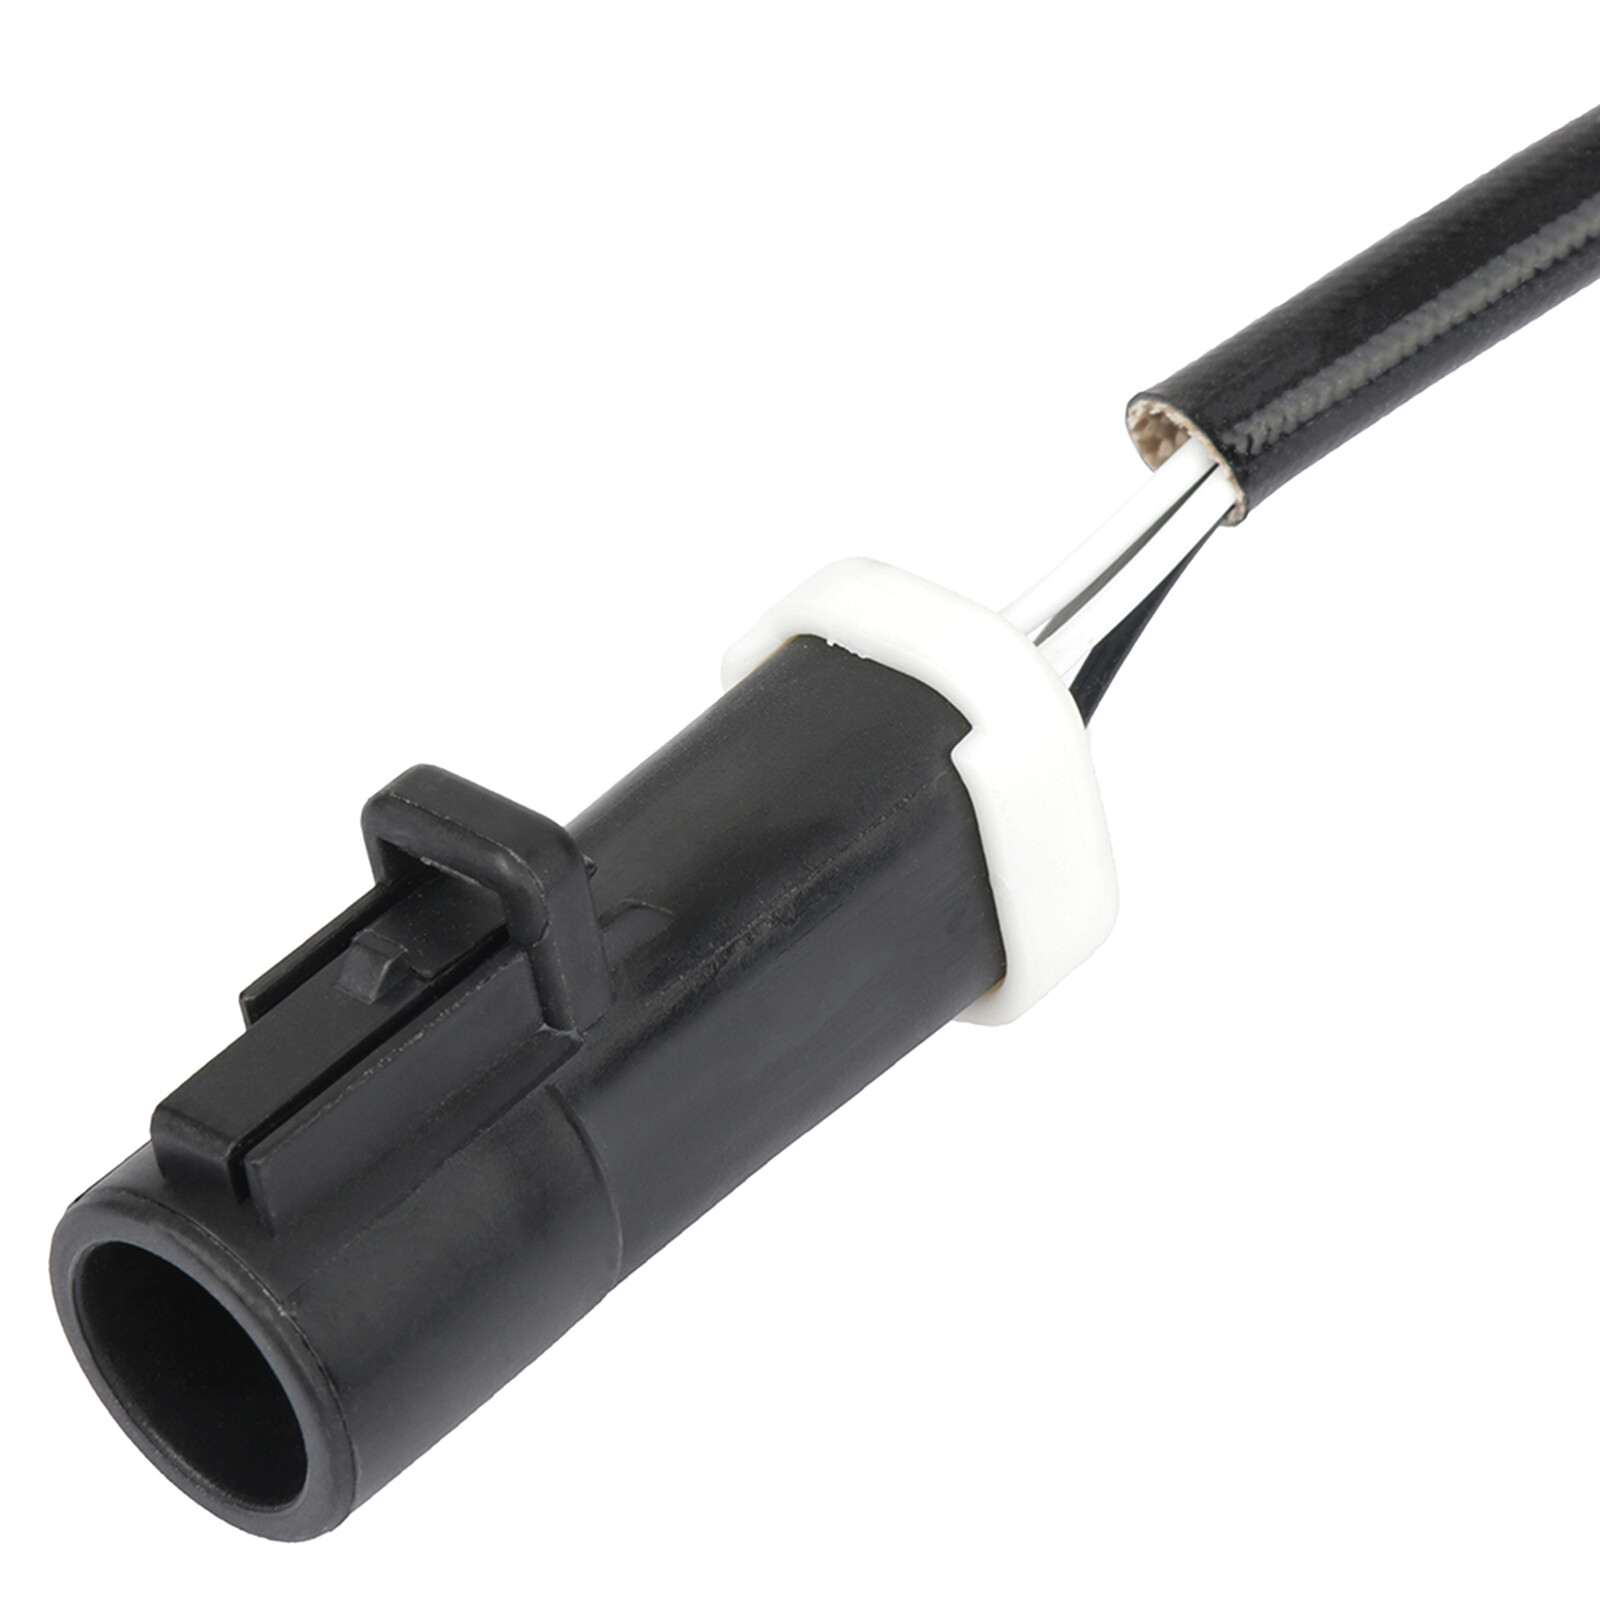
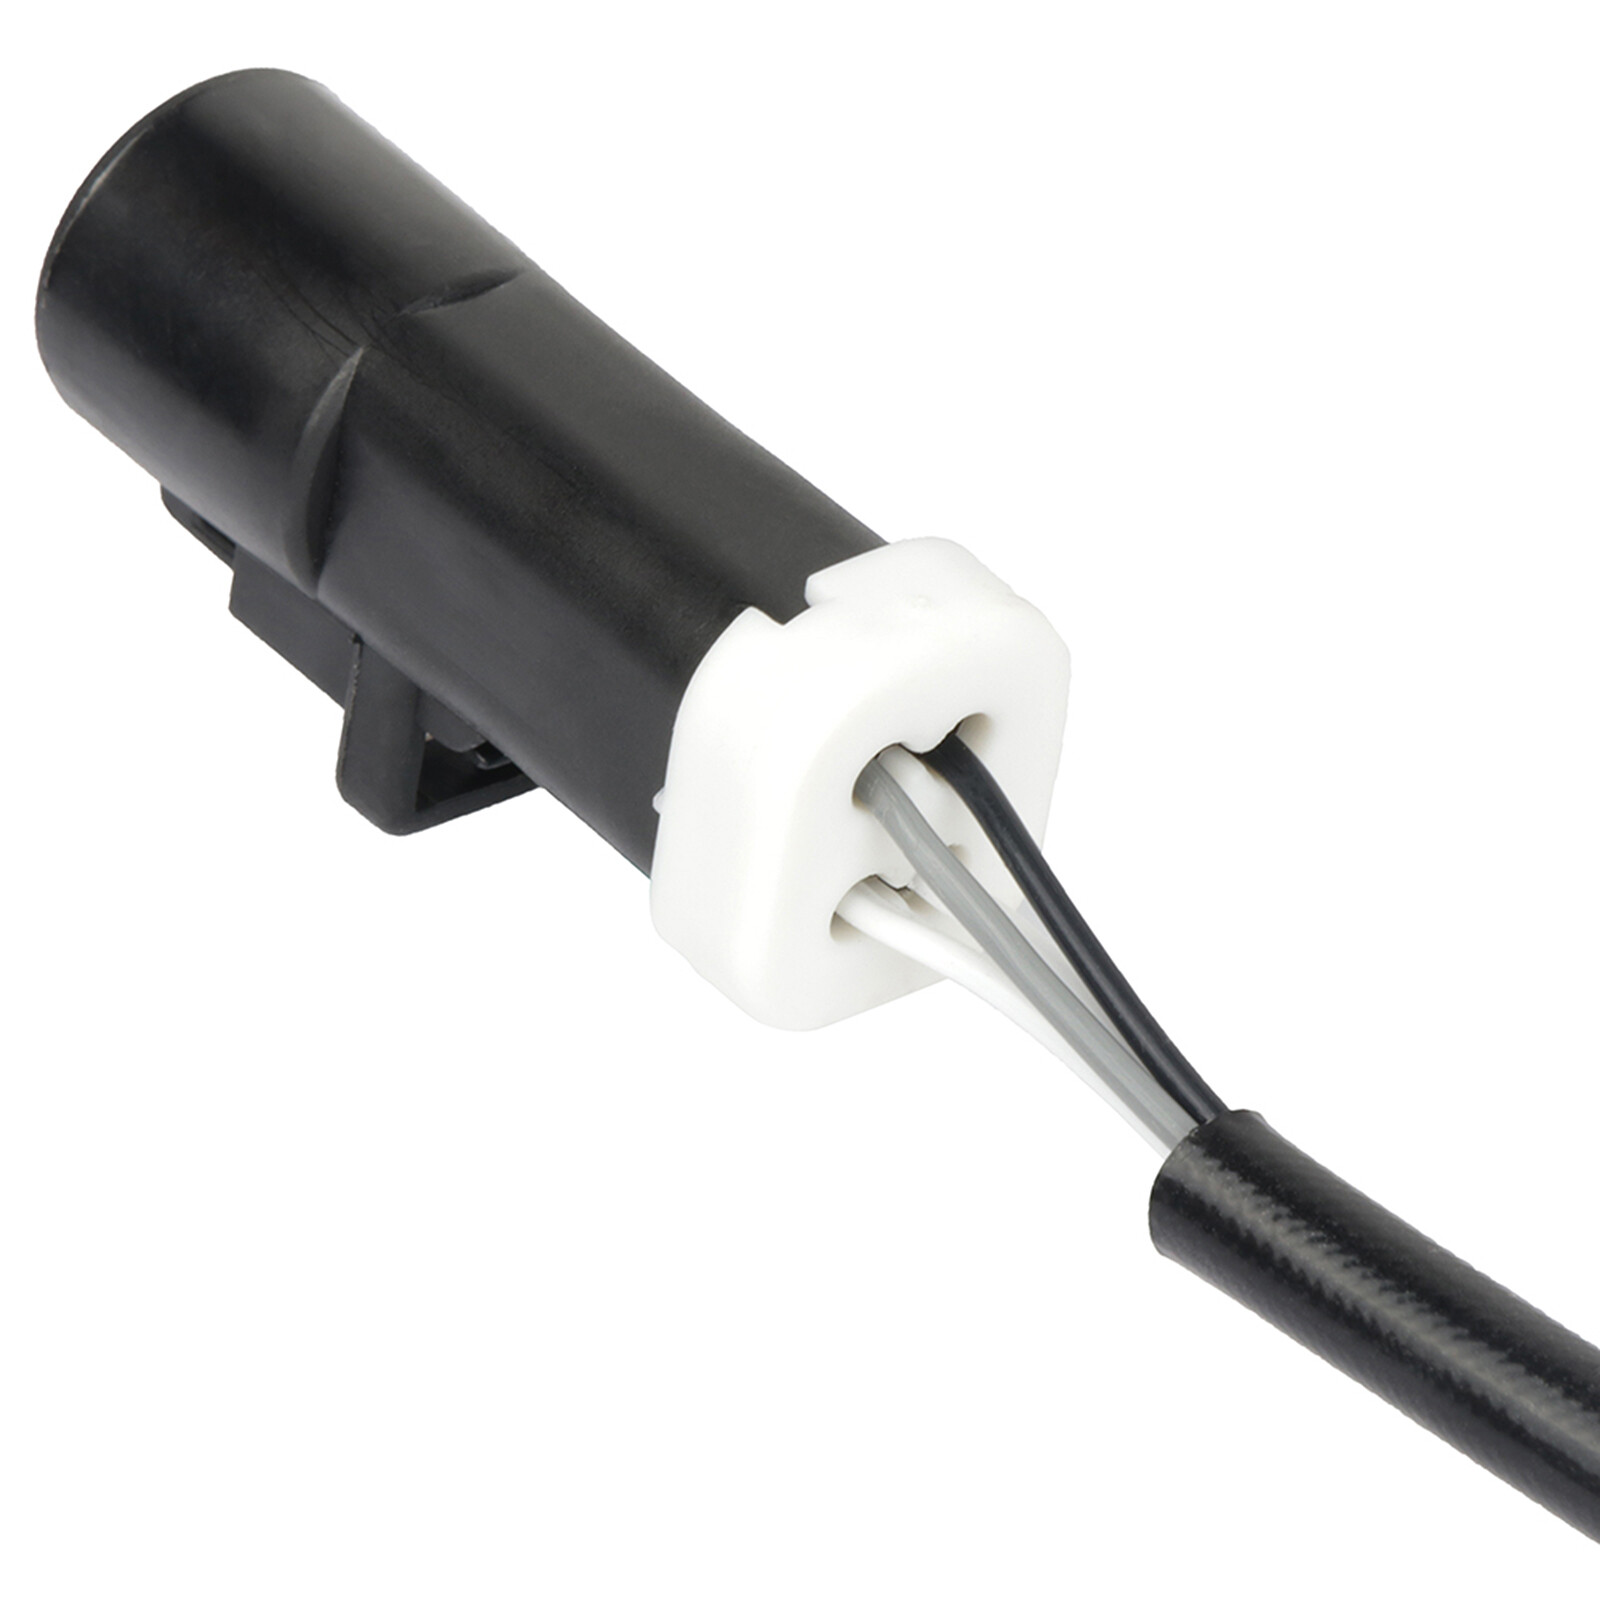
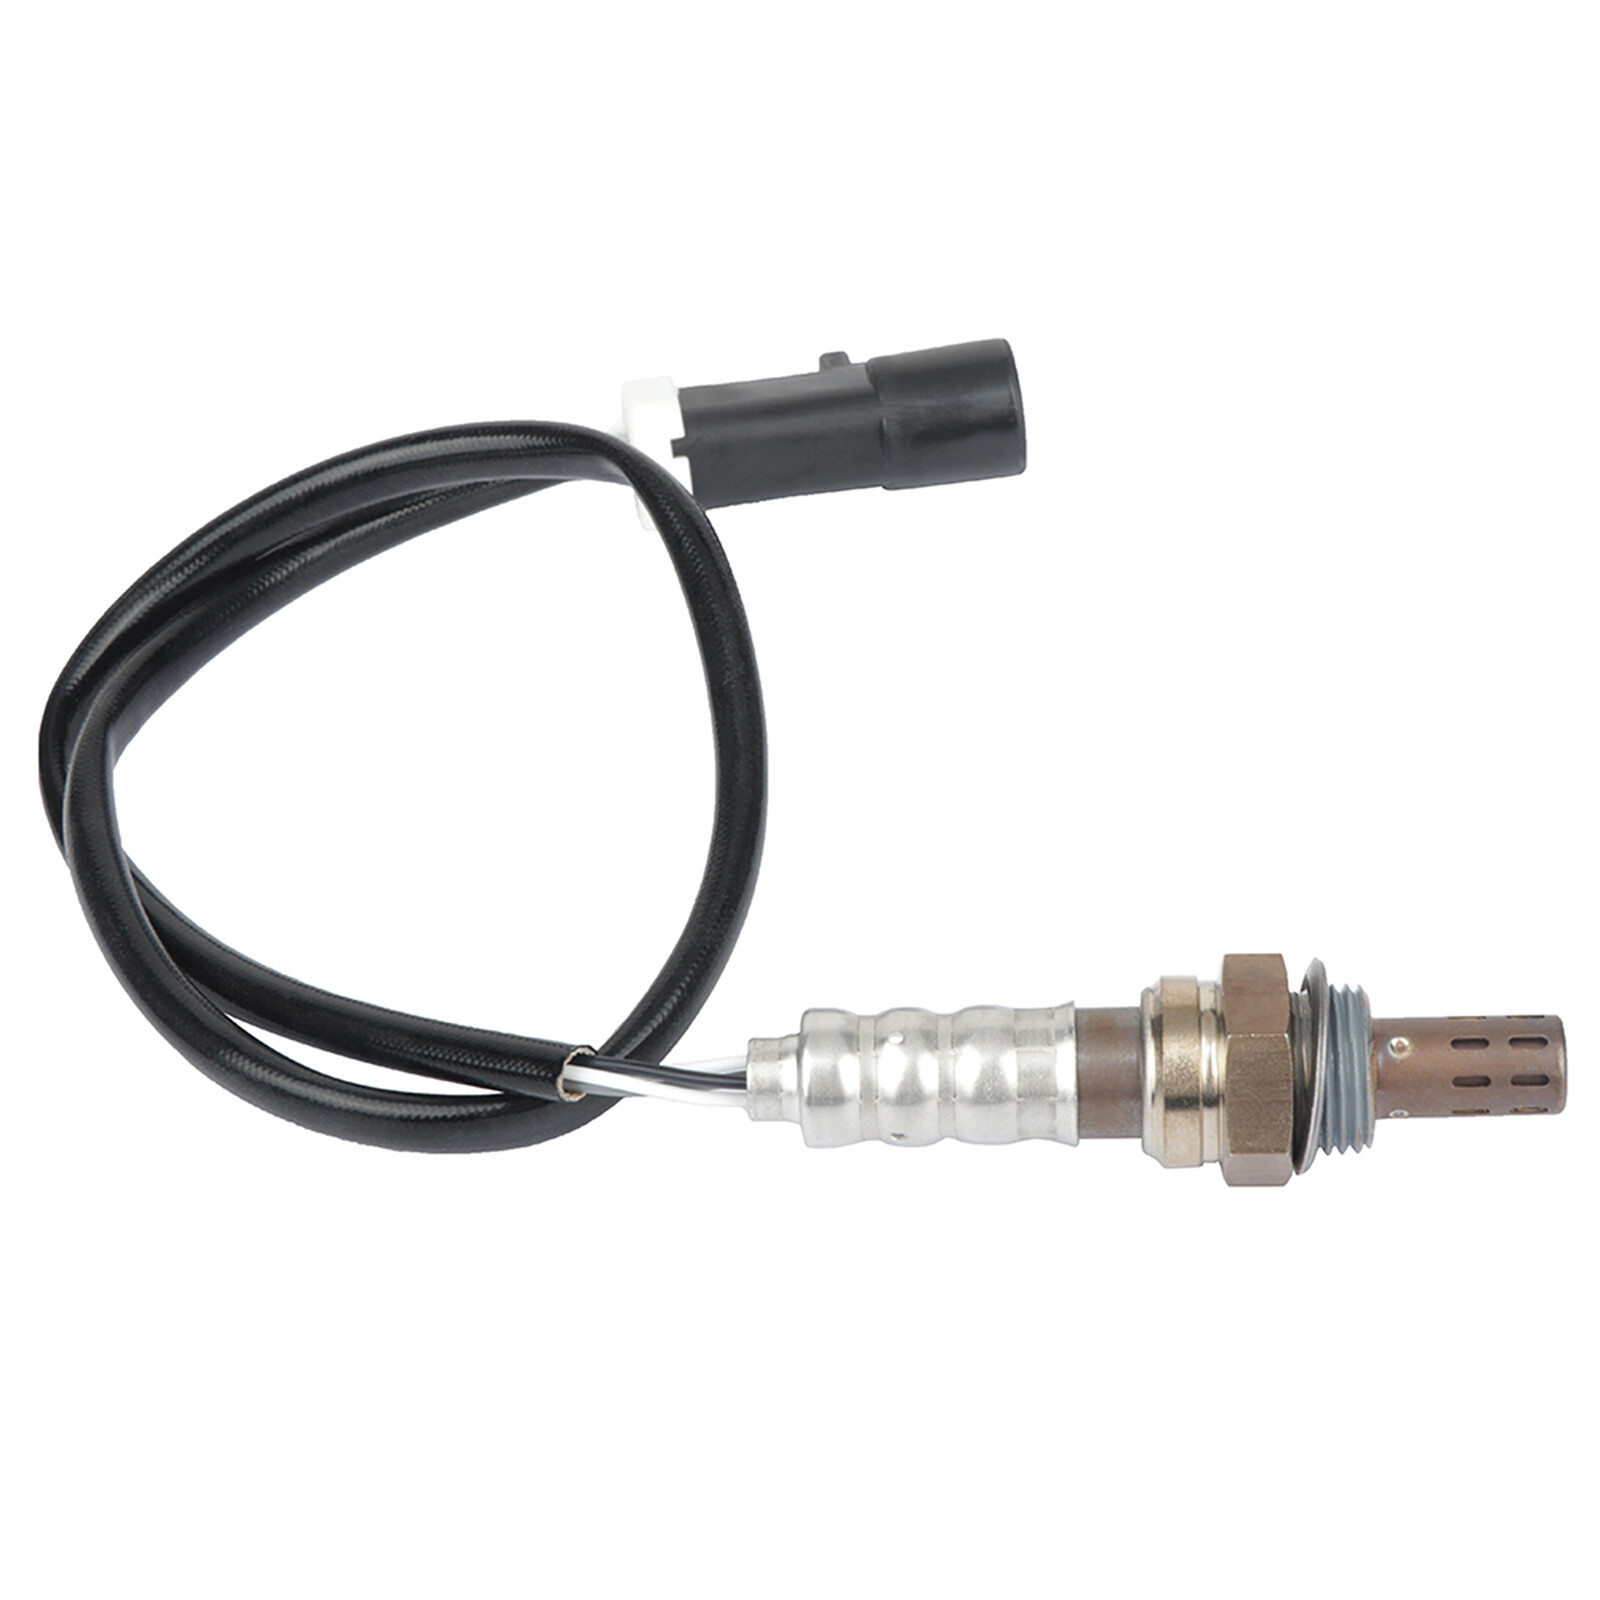
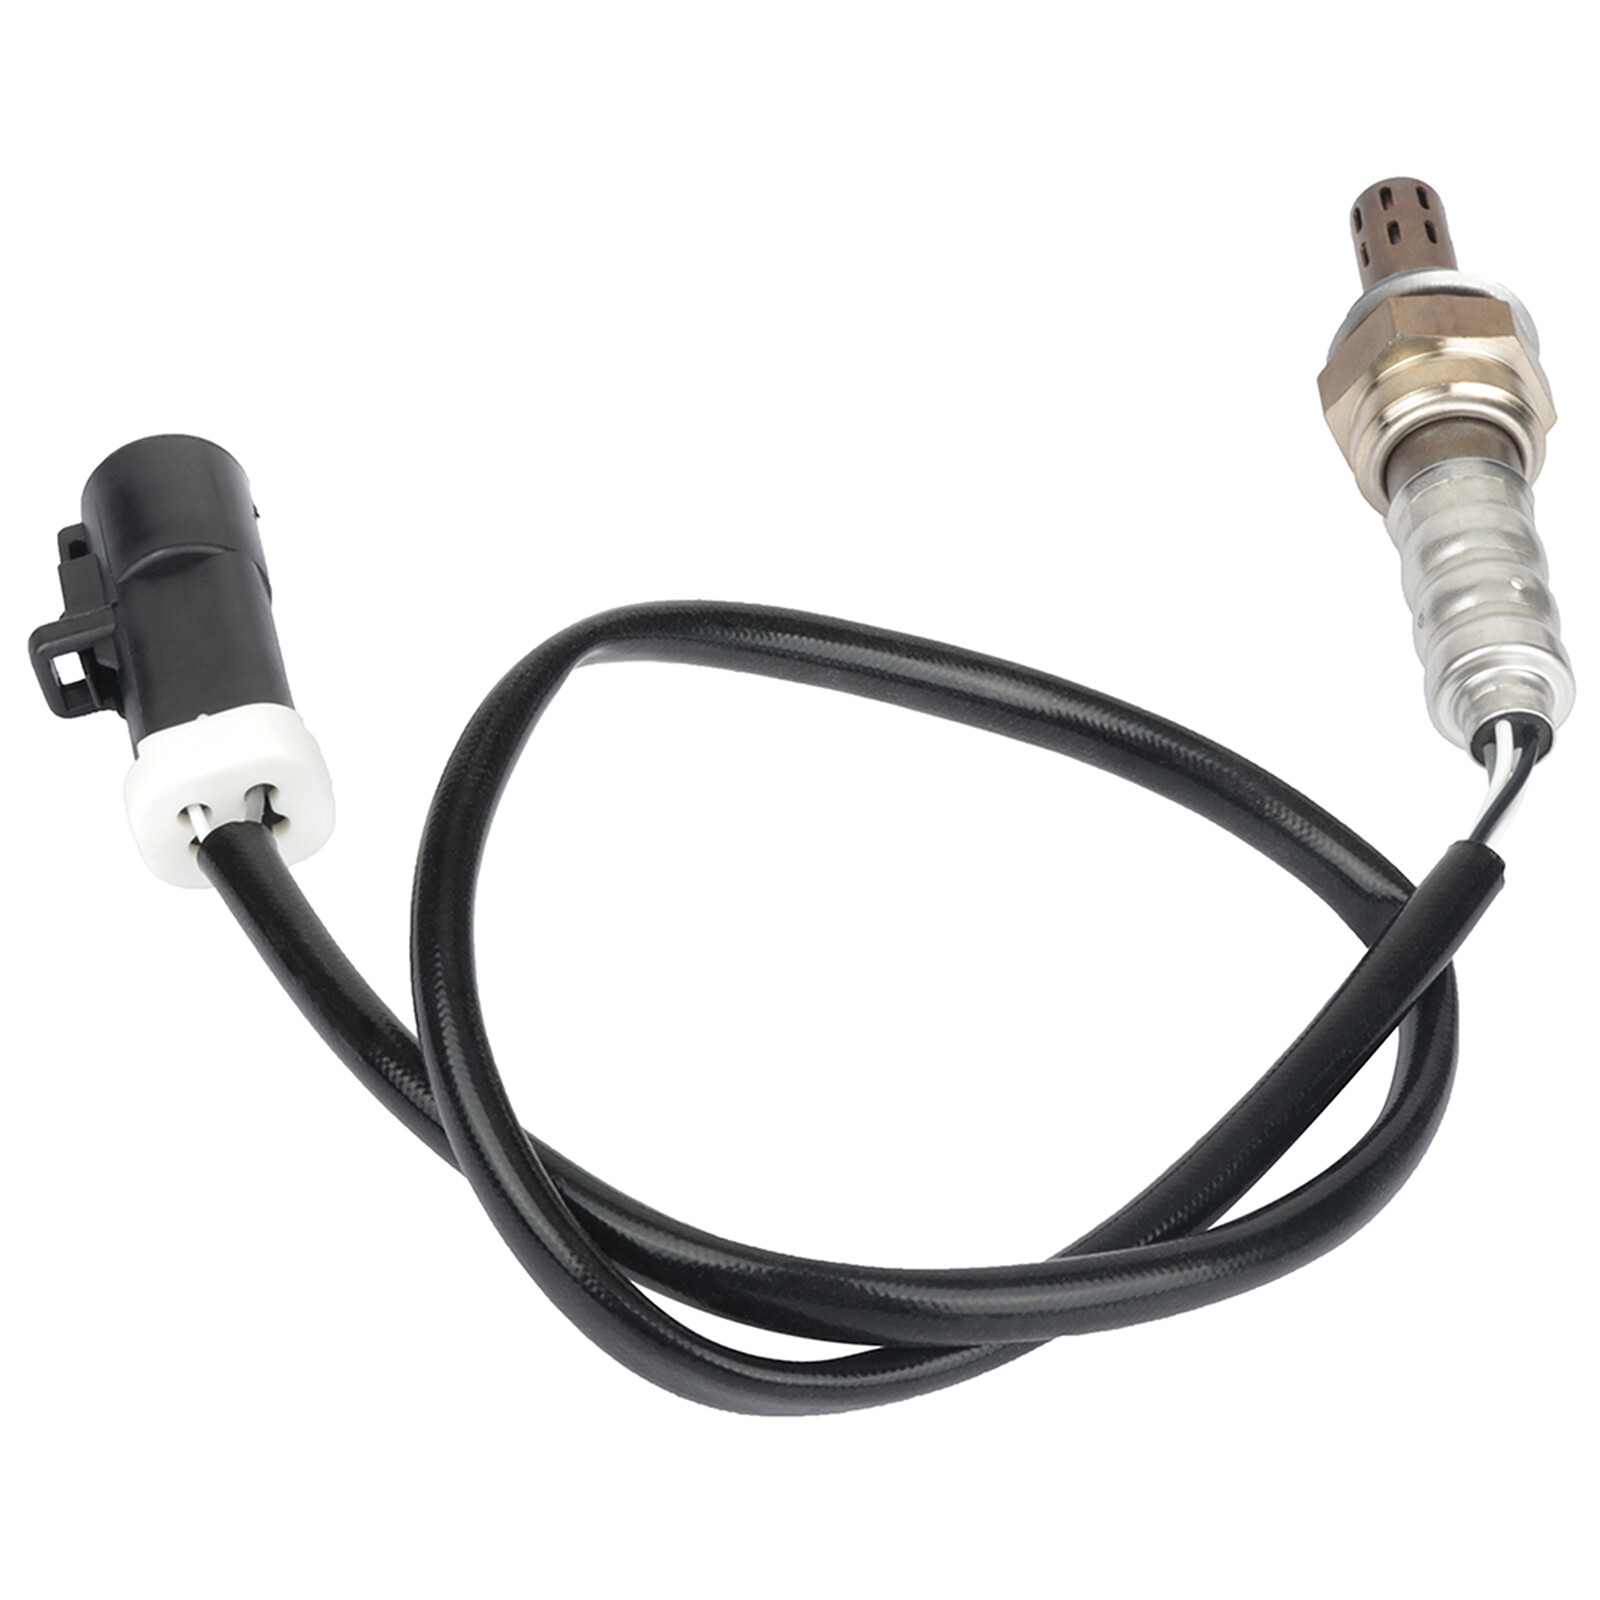
AutoDealsParts For 96-06 Ford Ranger 4.0L w/ 24" O2 02 Oxygen Sensor Heated 4pcs Upsteam Lower
AutoDealsParts For 96-06 Ford Ranger 4.0L w/ 24" O2 02 Oxygen Sensor Heated 4pcs Upsteam Lower


AutoDealsParts For 96-06 Ford Ranger 4.0L w/ 24" O2 02 Oxygen Sensor Heated 4pcs Upsteam Lower
Autodealsparts
|
|
|
|
|
|
|
|
|
|
|
|
|
|
|
|
|
|
|
|
|
|
|
|
|
|
|
|
|
|
|
|
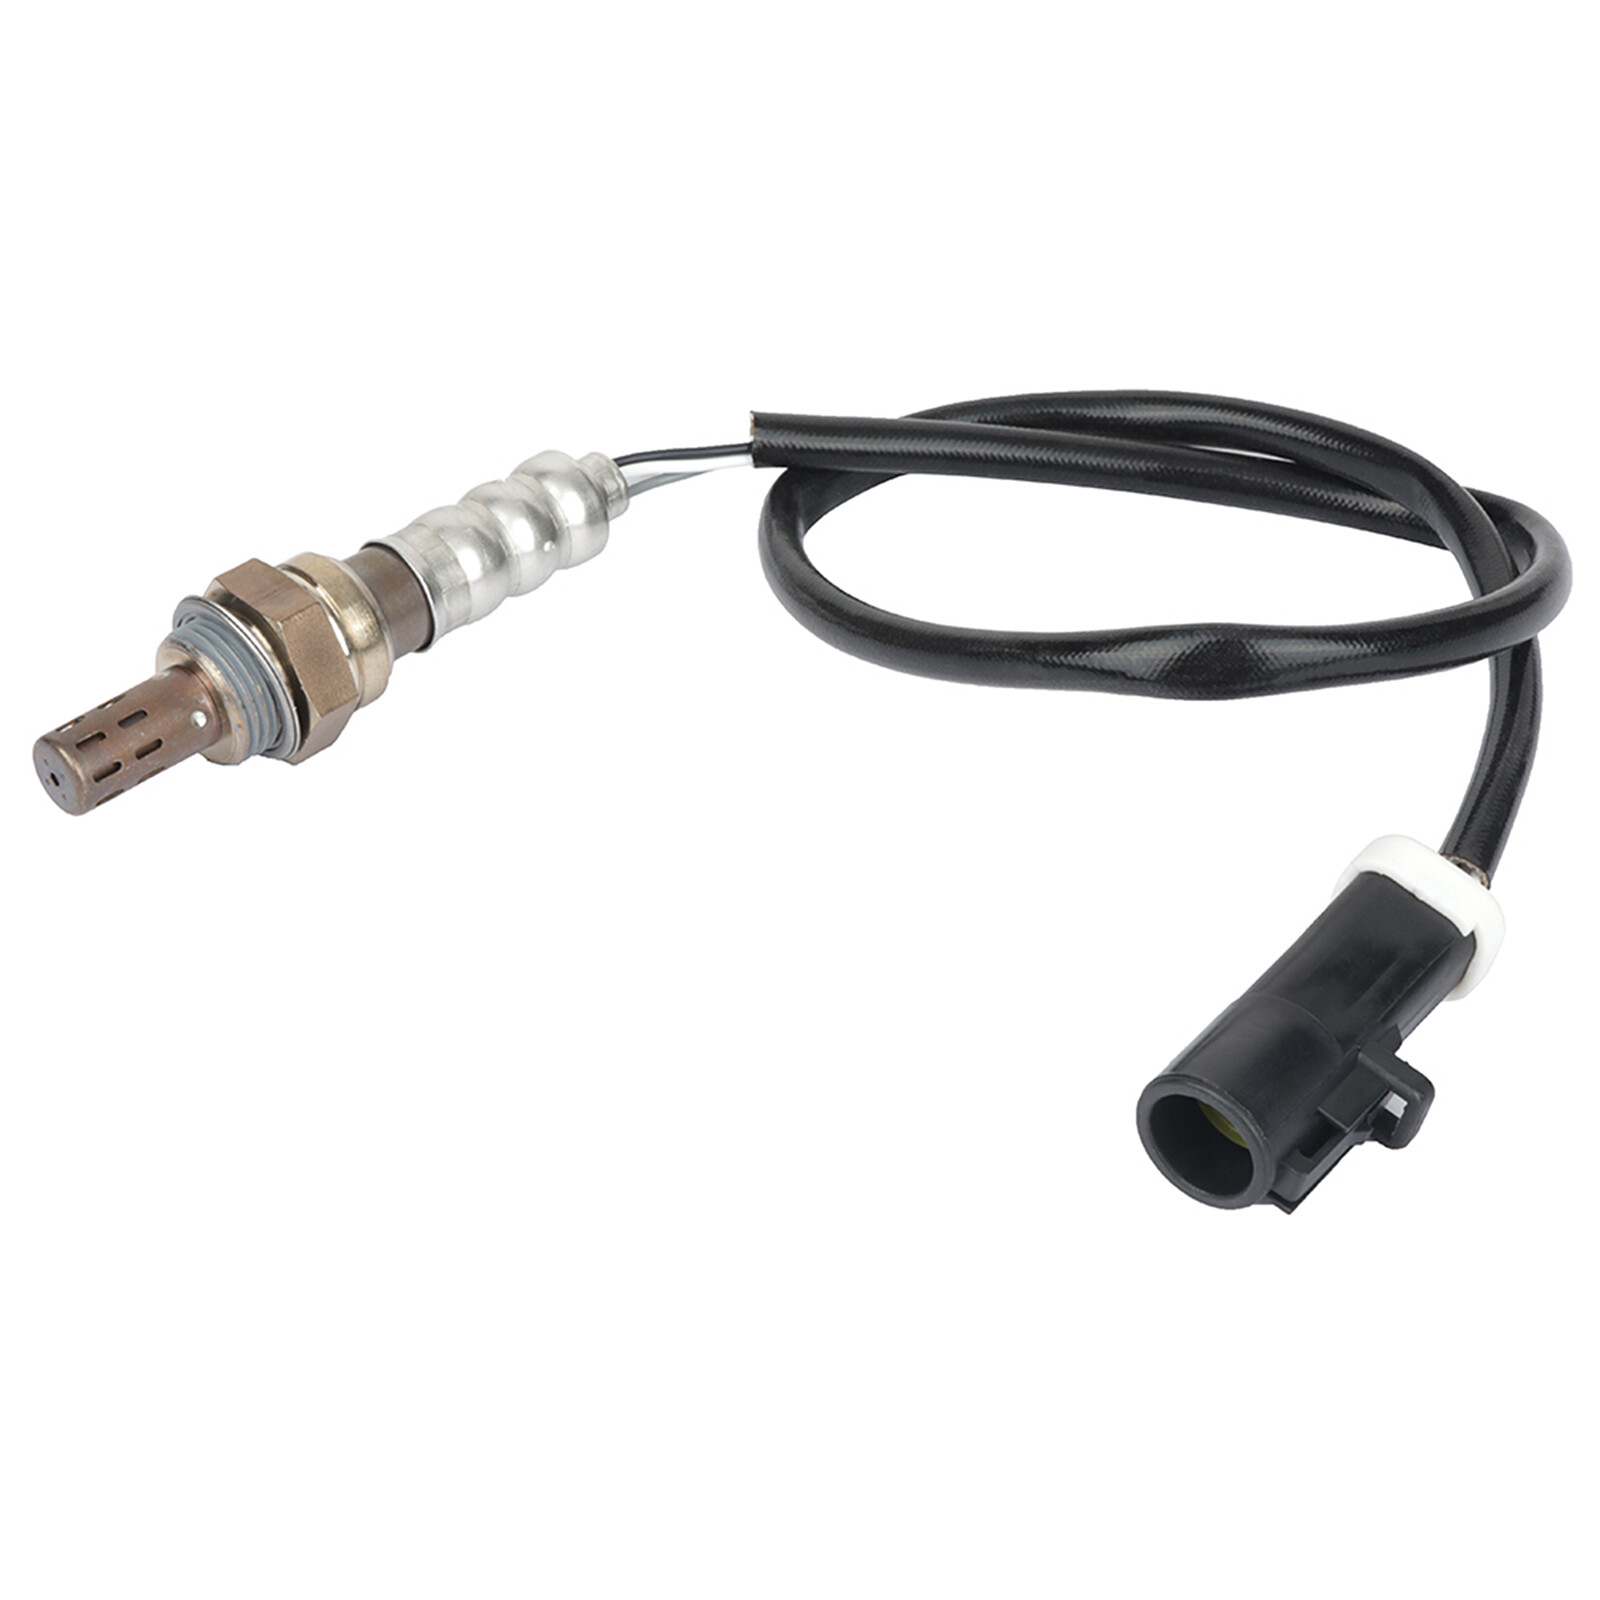
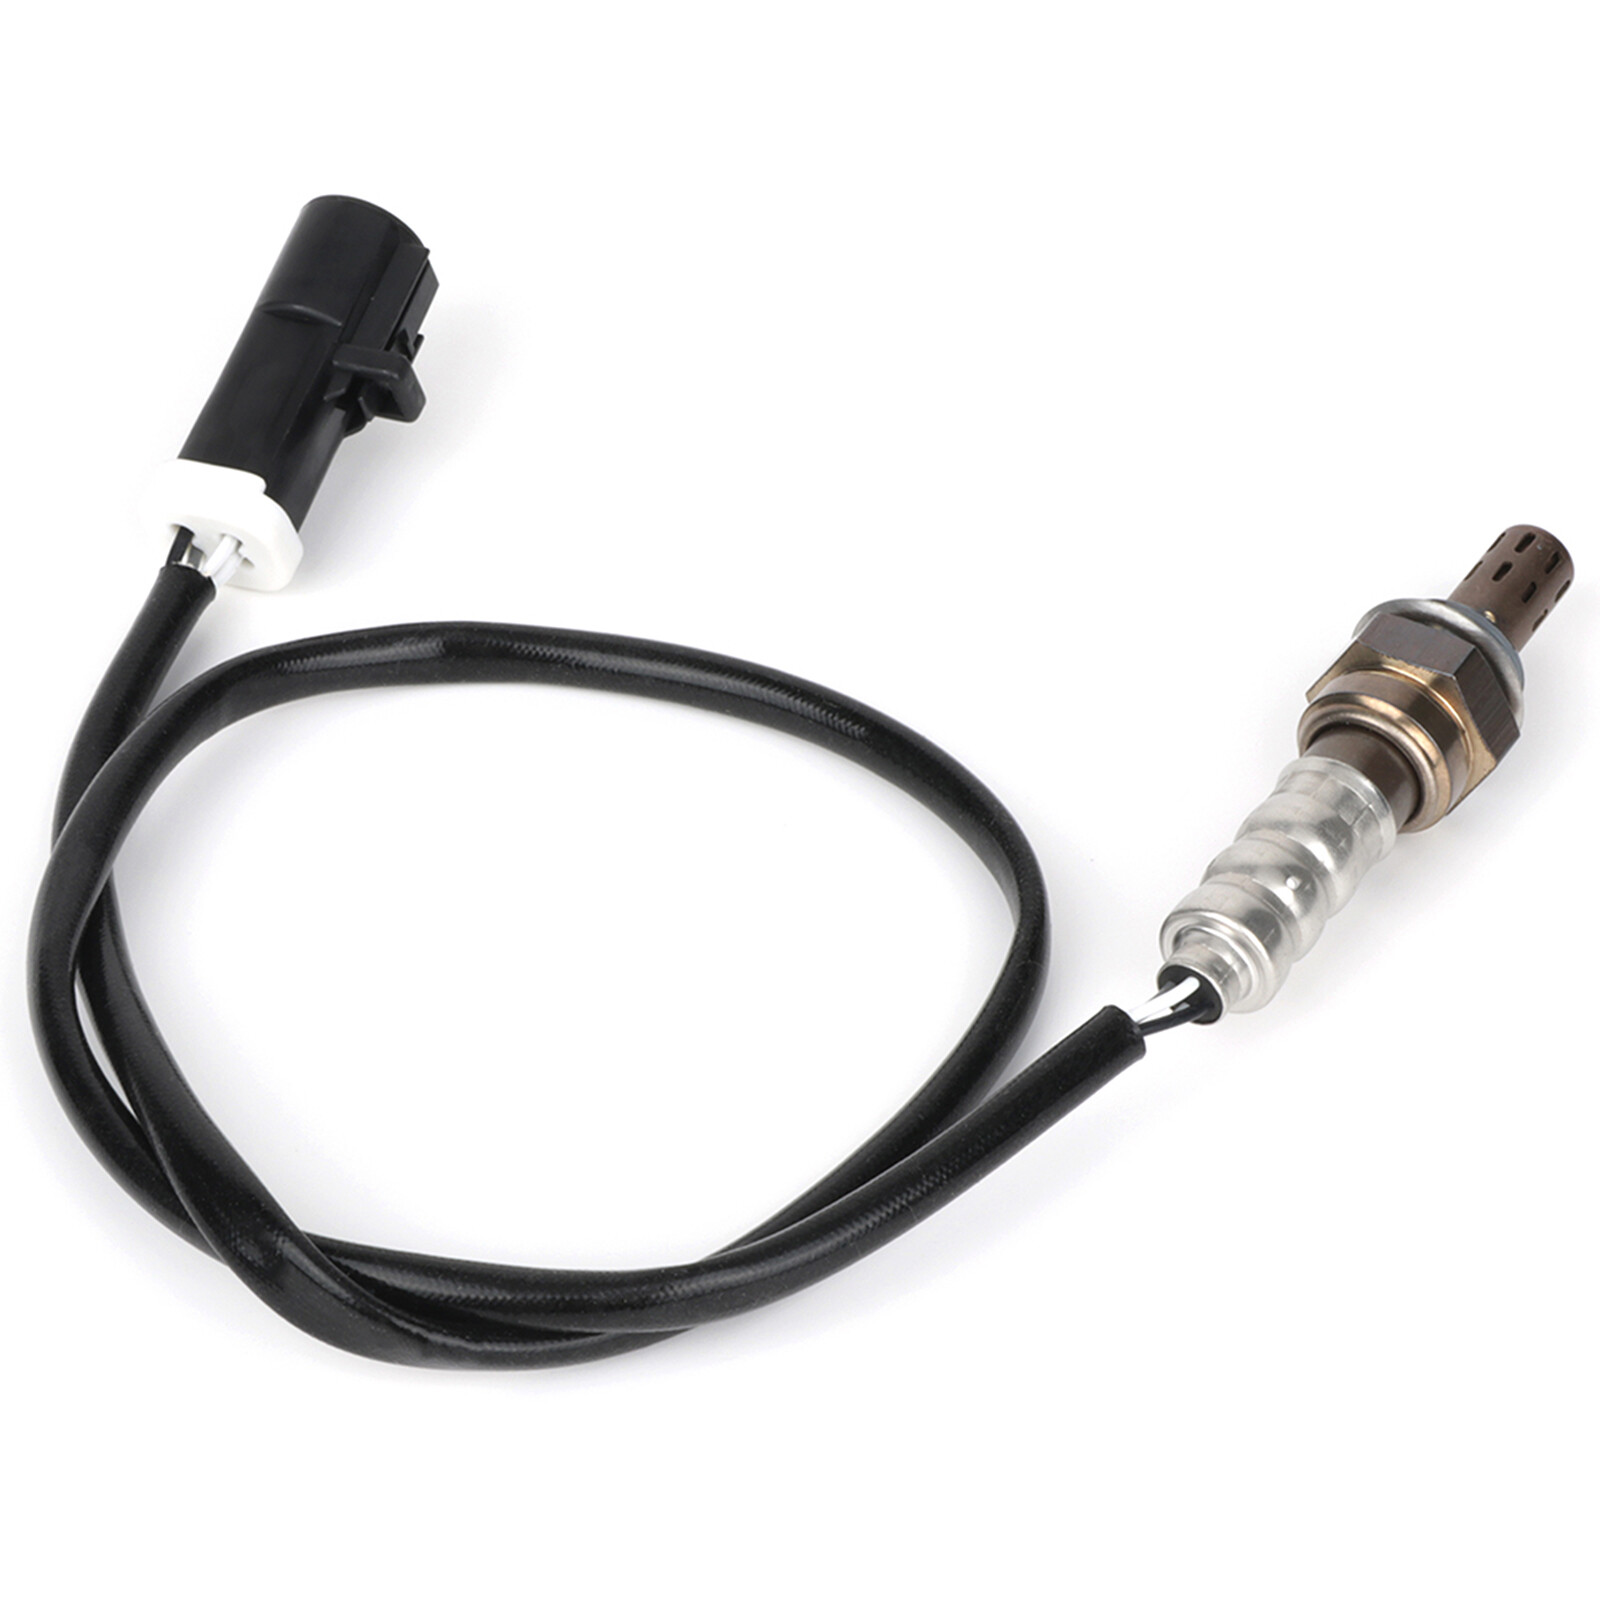
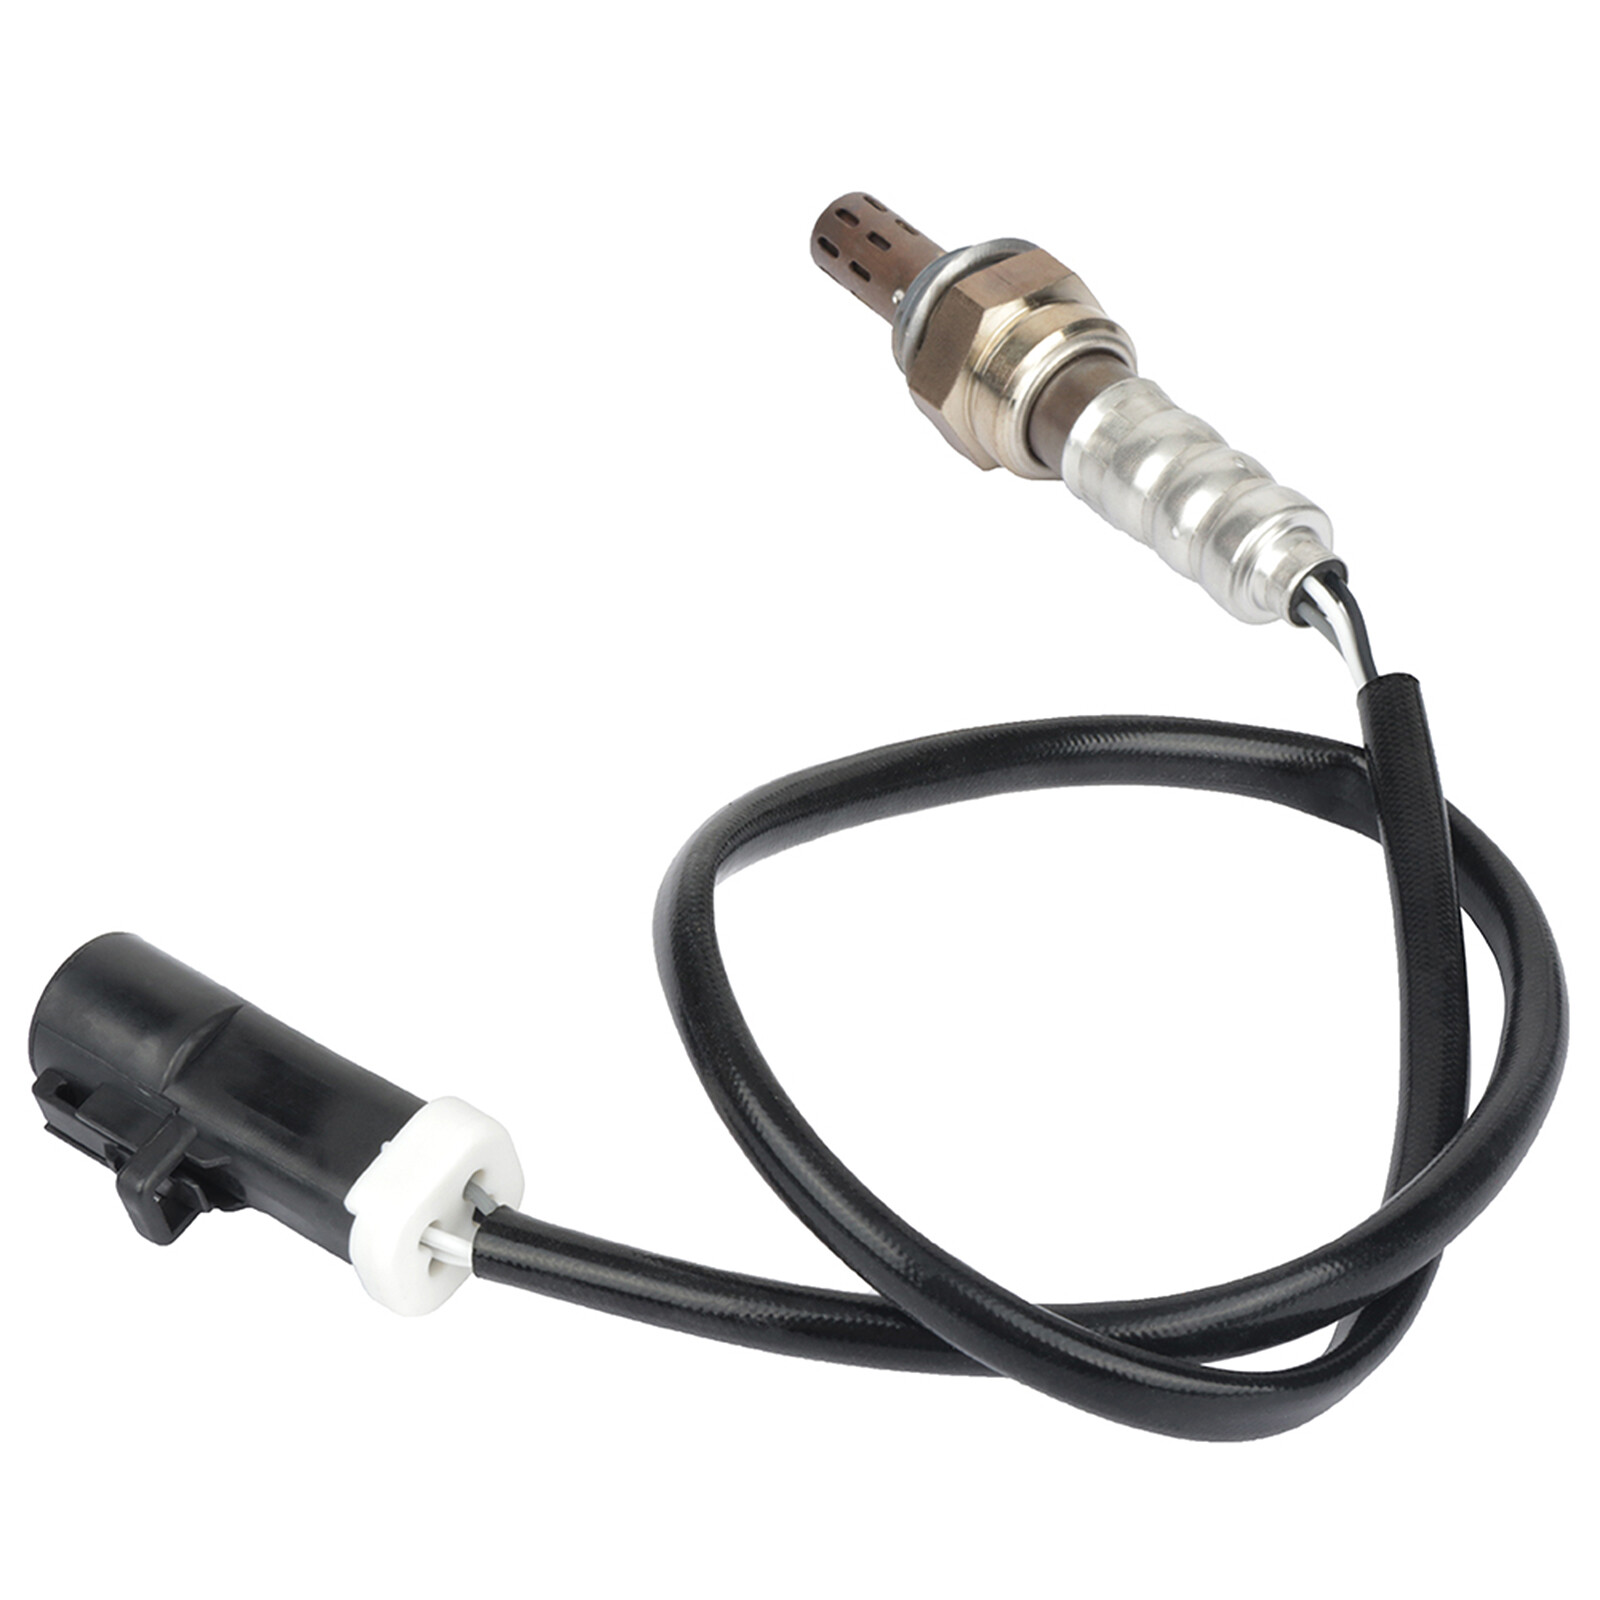
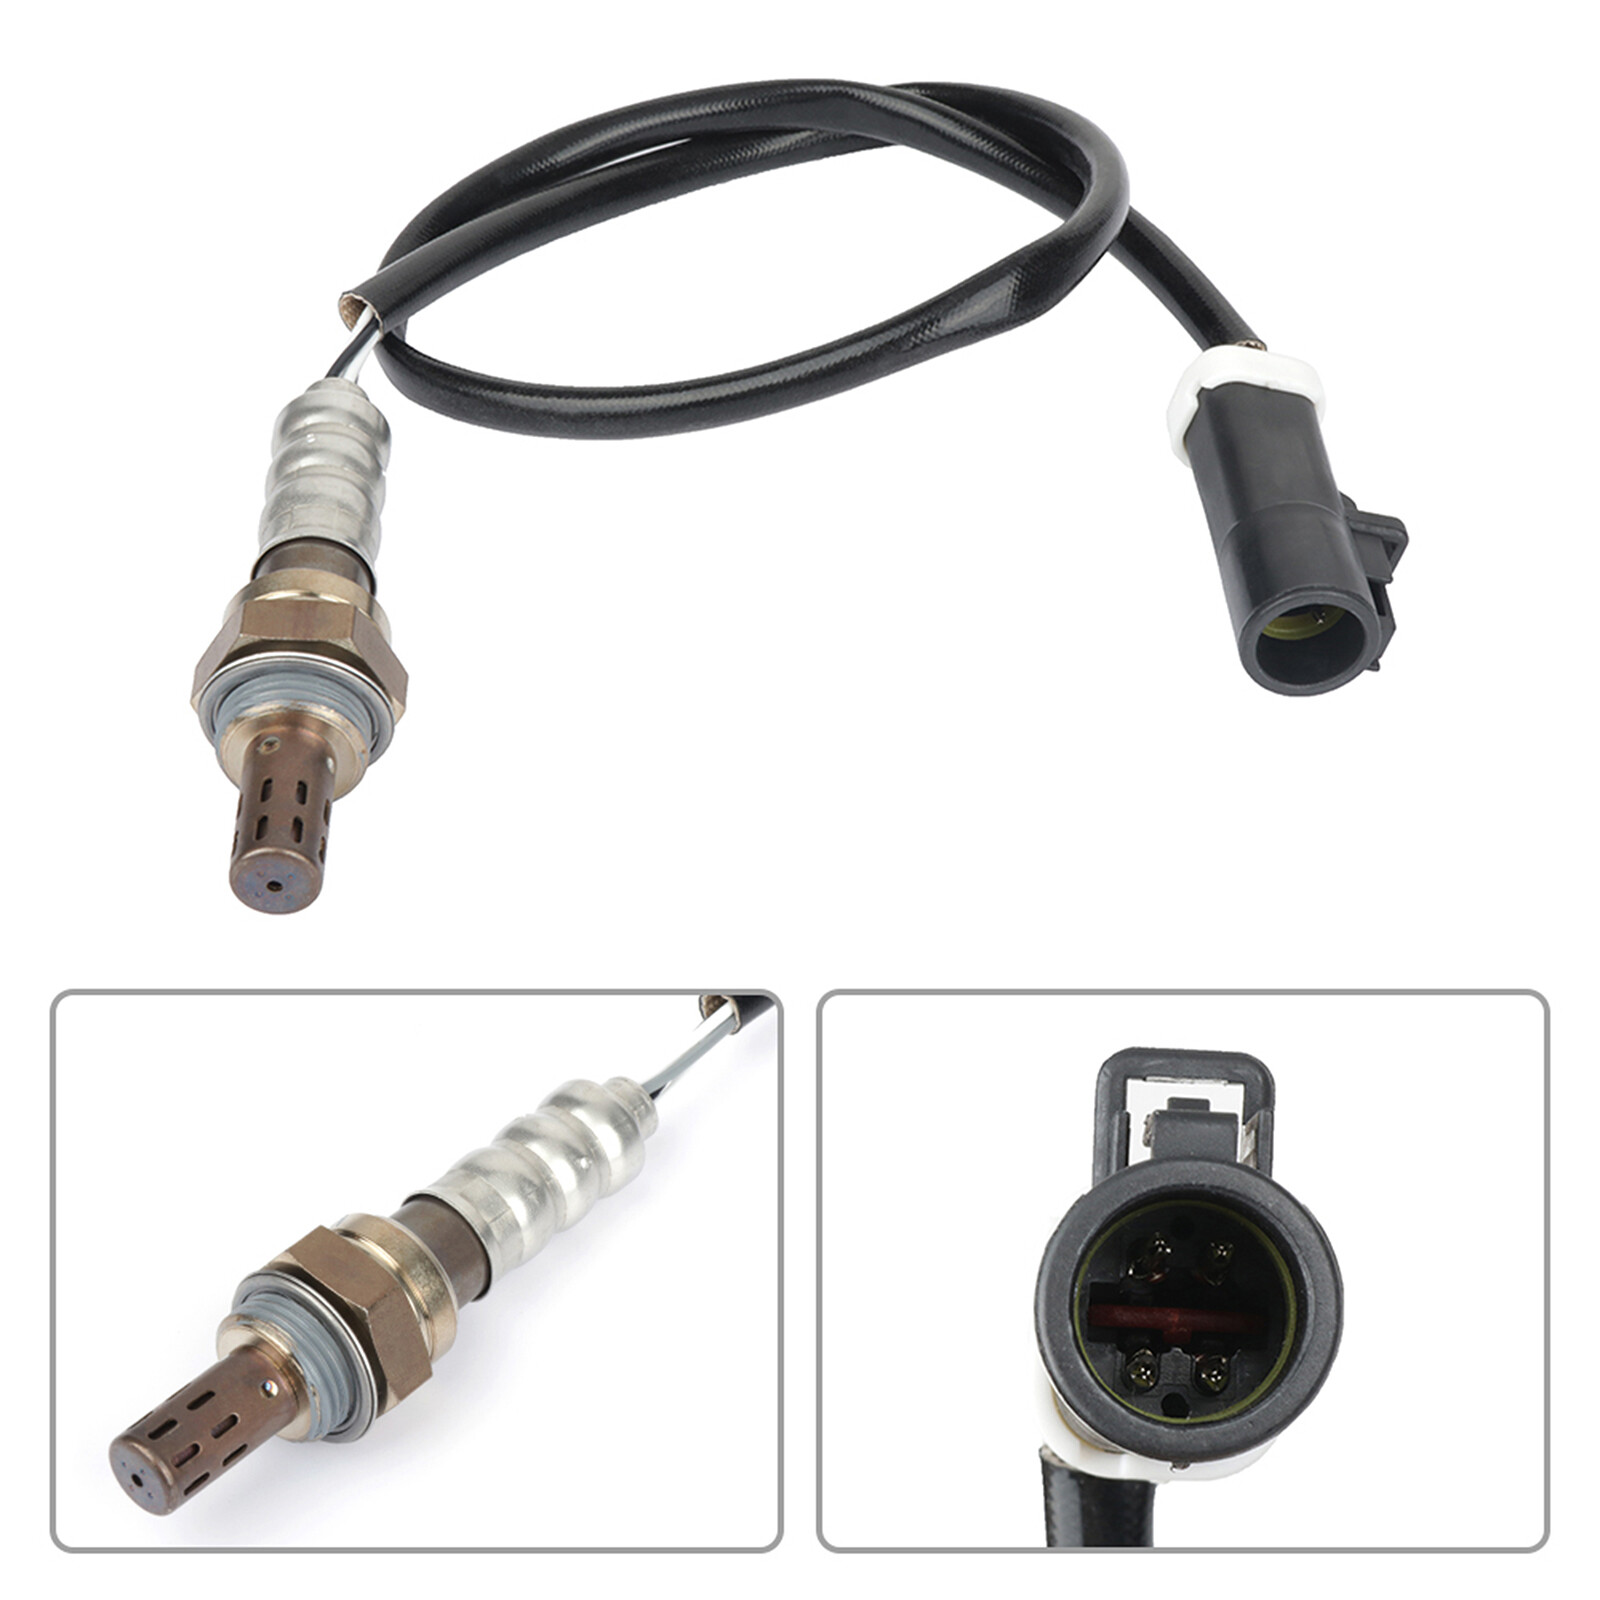
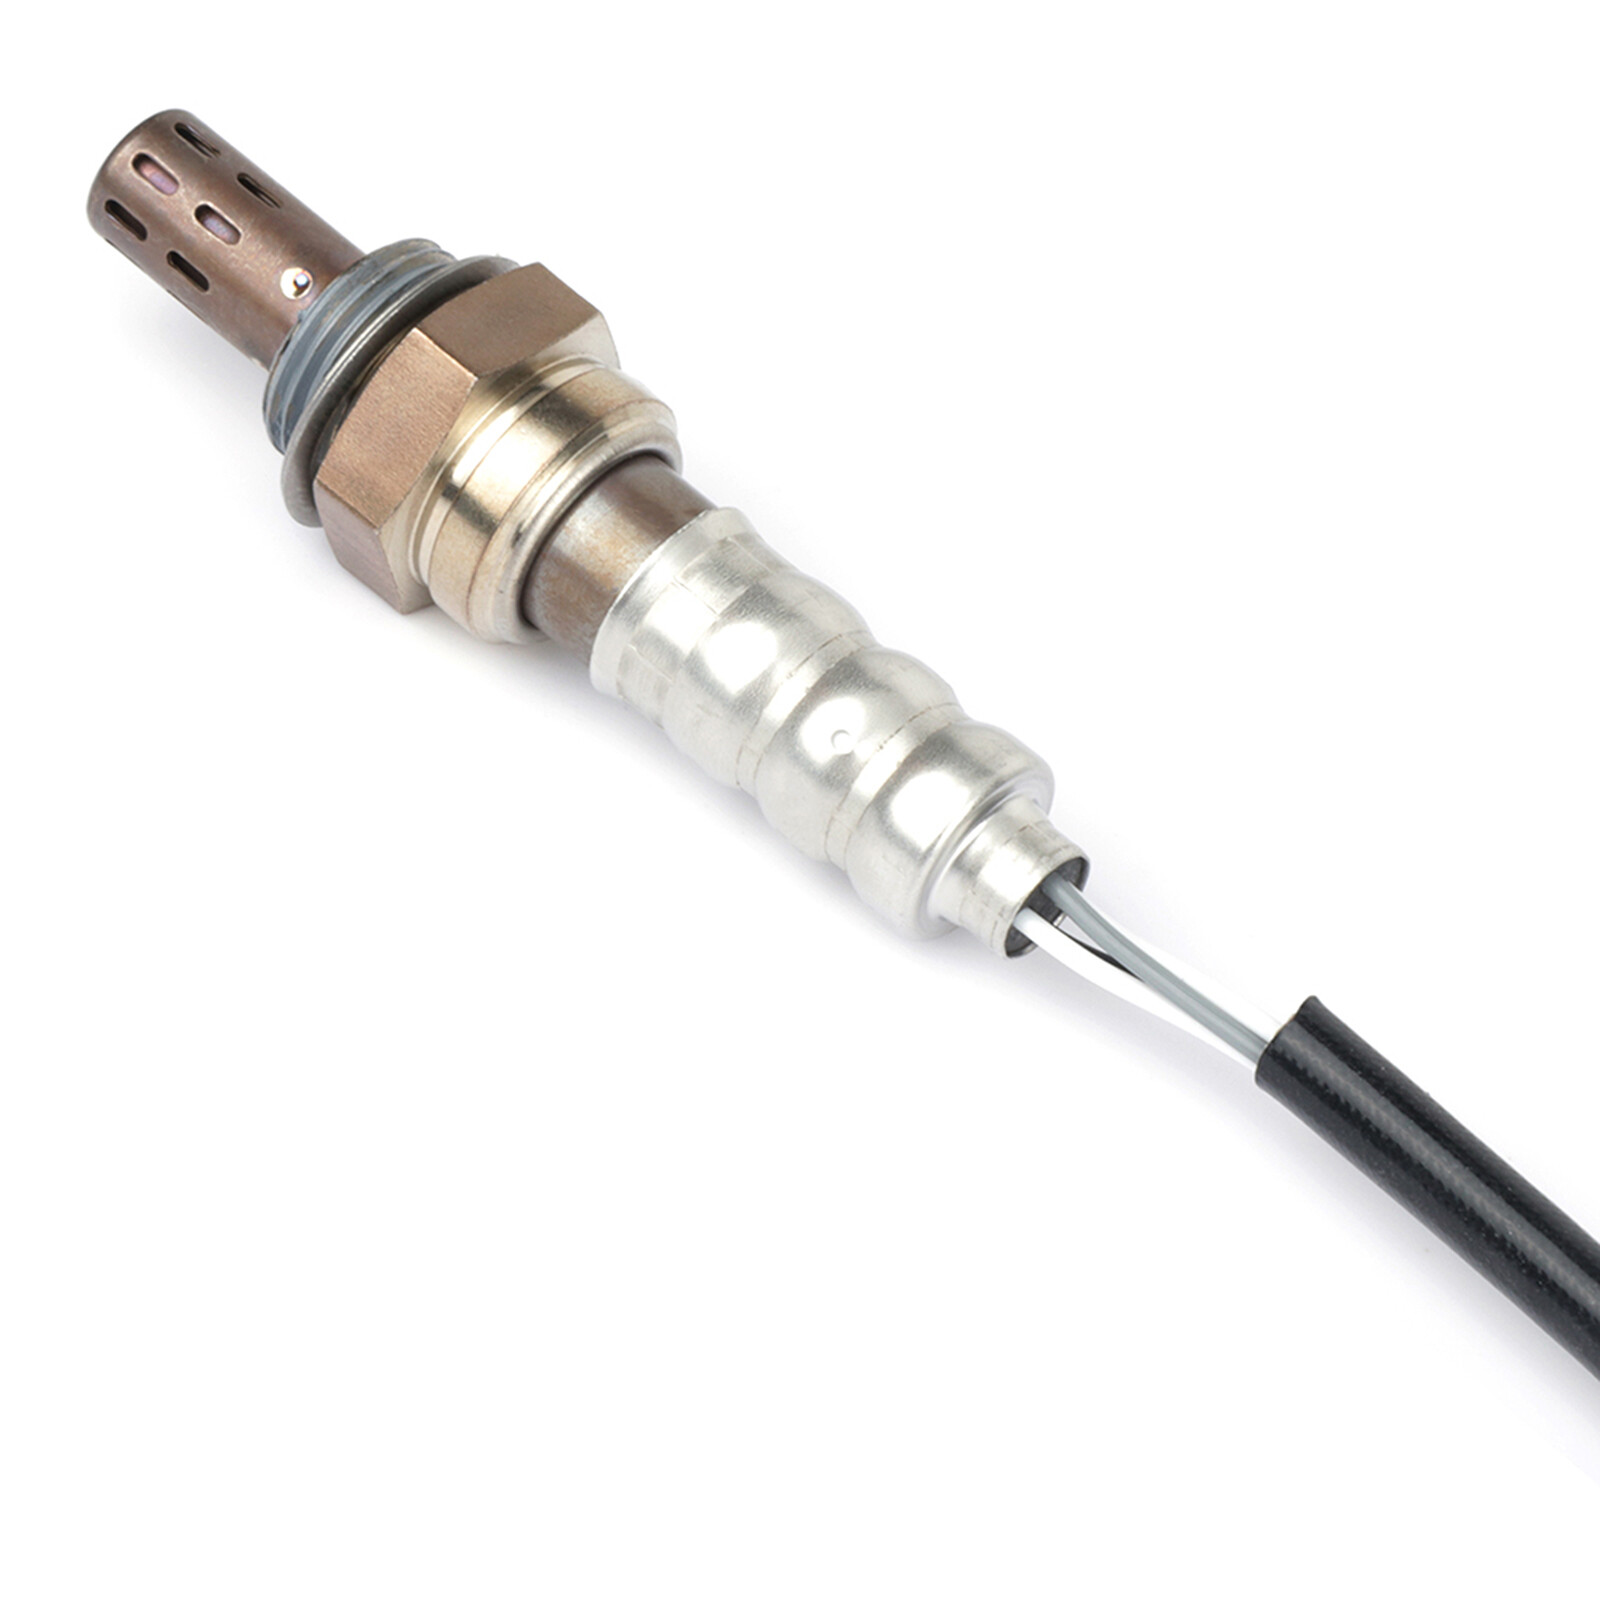
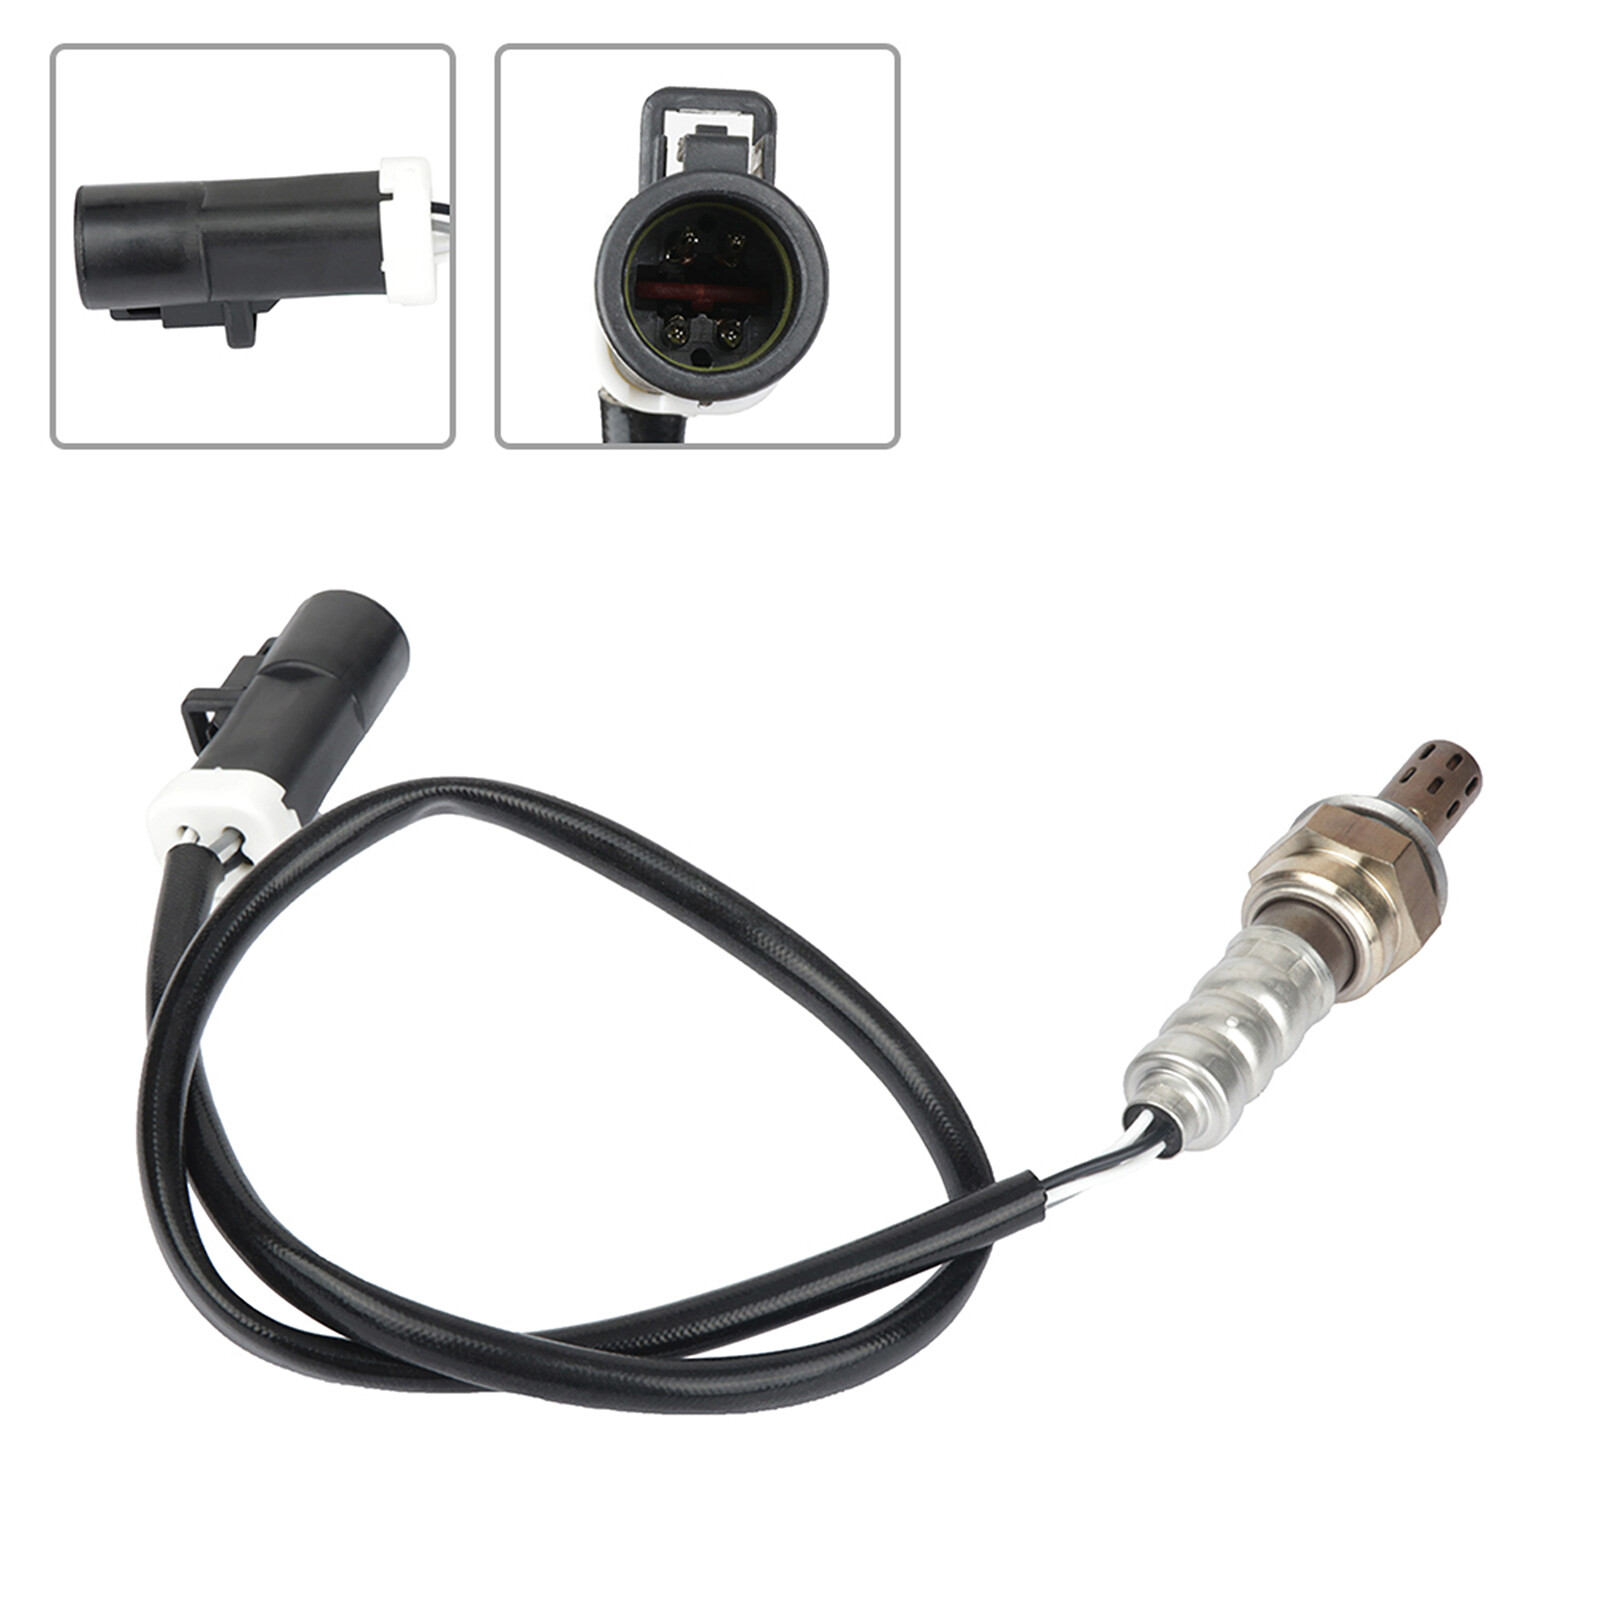
For 96-06 Ford Ranger 4.0L w/ 24" O2 02 Oxygen Sensor Heated 4pcs Upsteam Lower
Compatibility:
1996 Ford Ranger 4.0L
2001-2003 Ford Ranger 4.0L w/ 22"
1996-2006 Ford Ranger 4.0L w/ 24"
2001-2006 Mazda B4000 4.0L
Benefits:
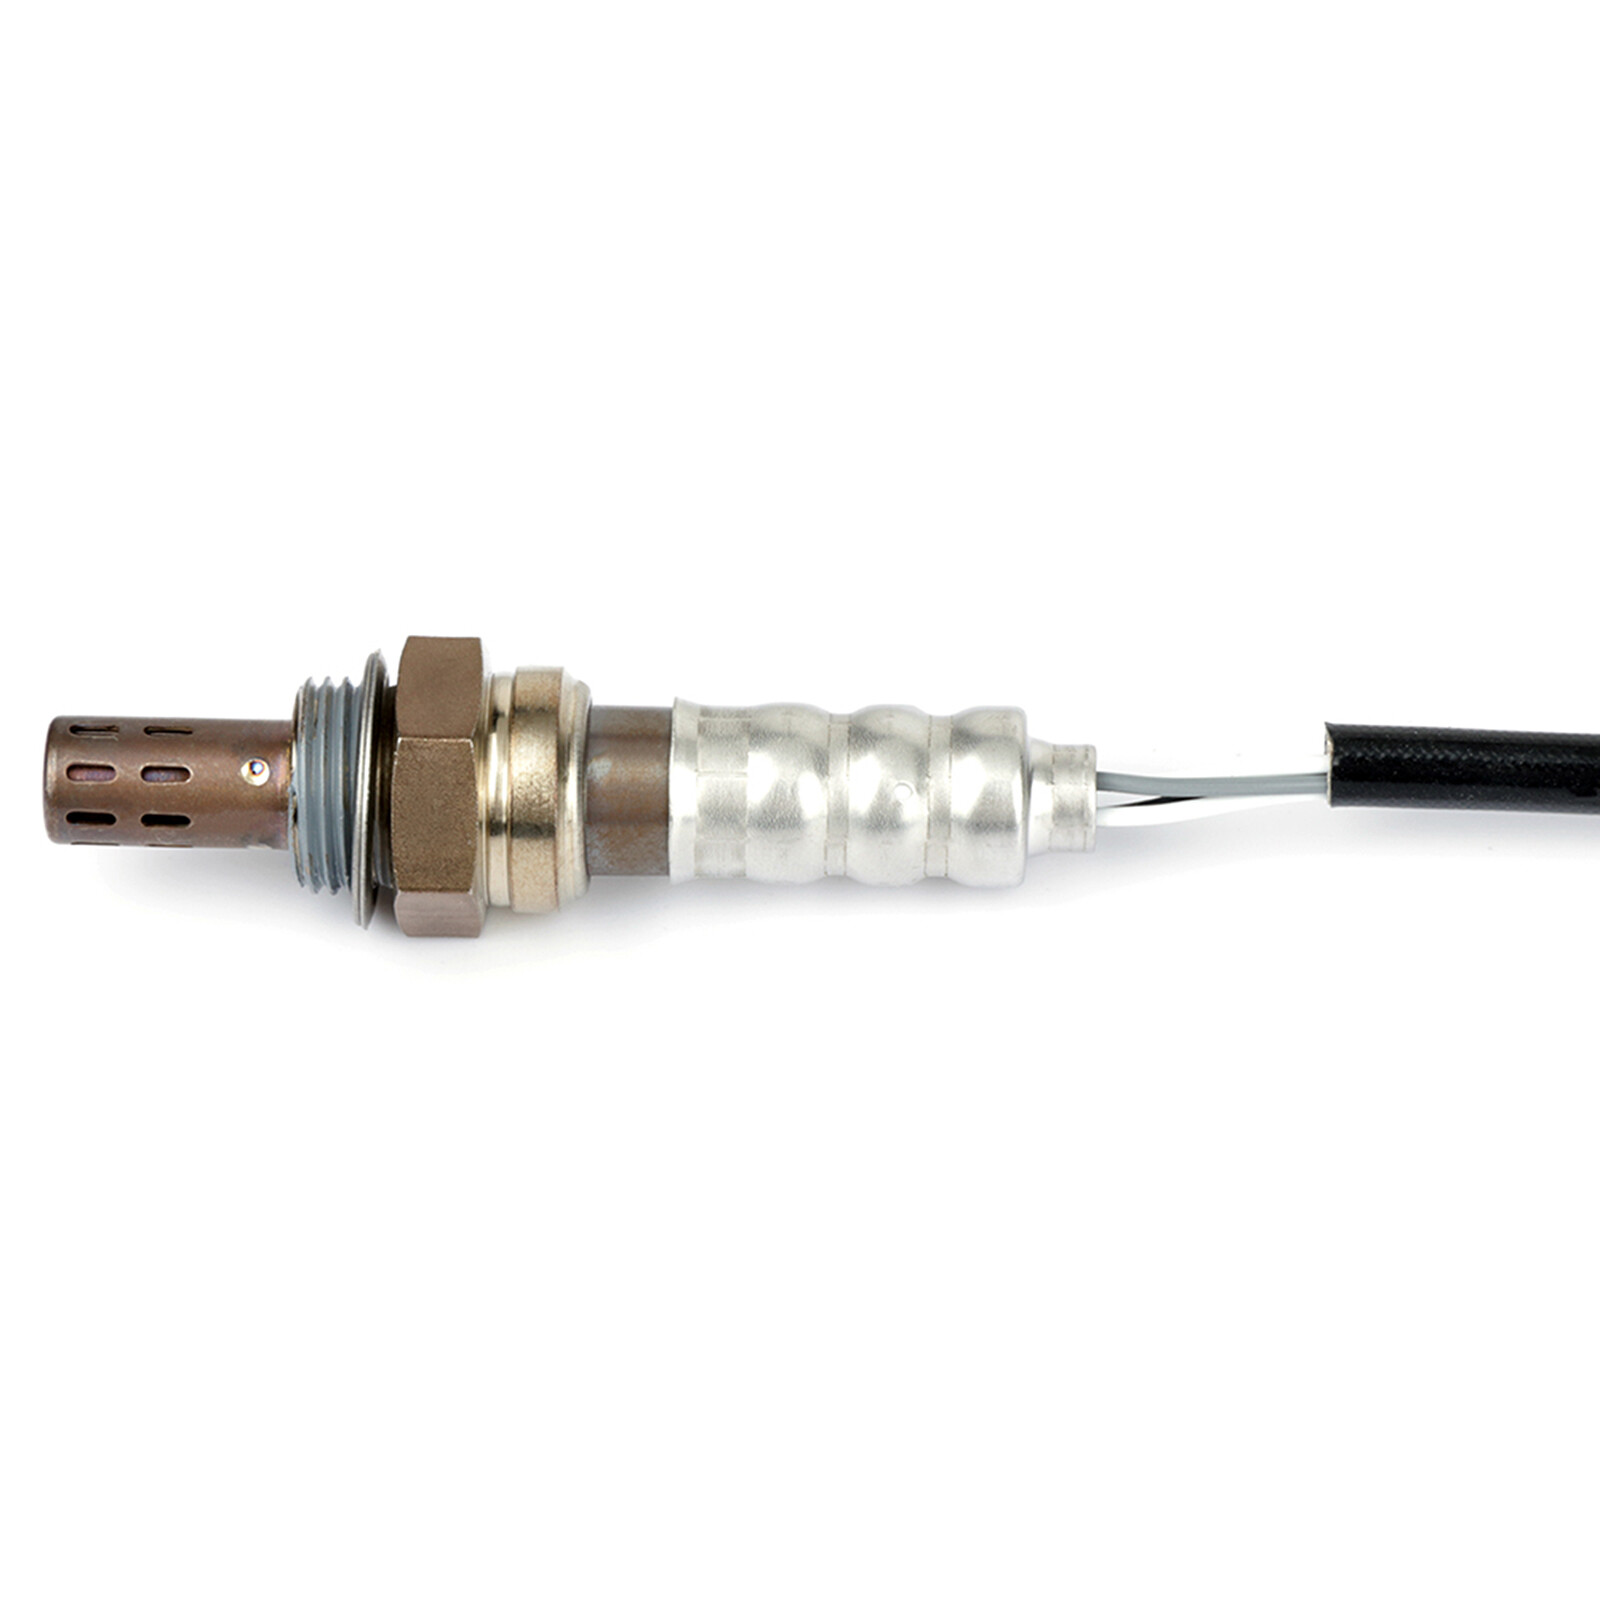
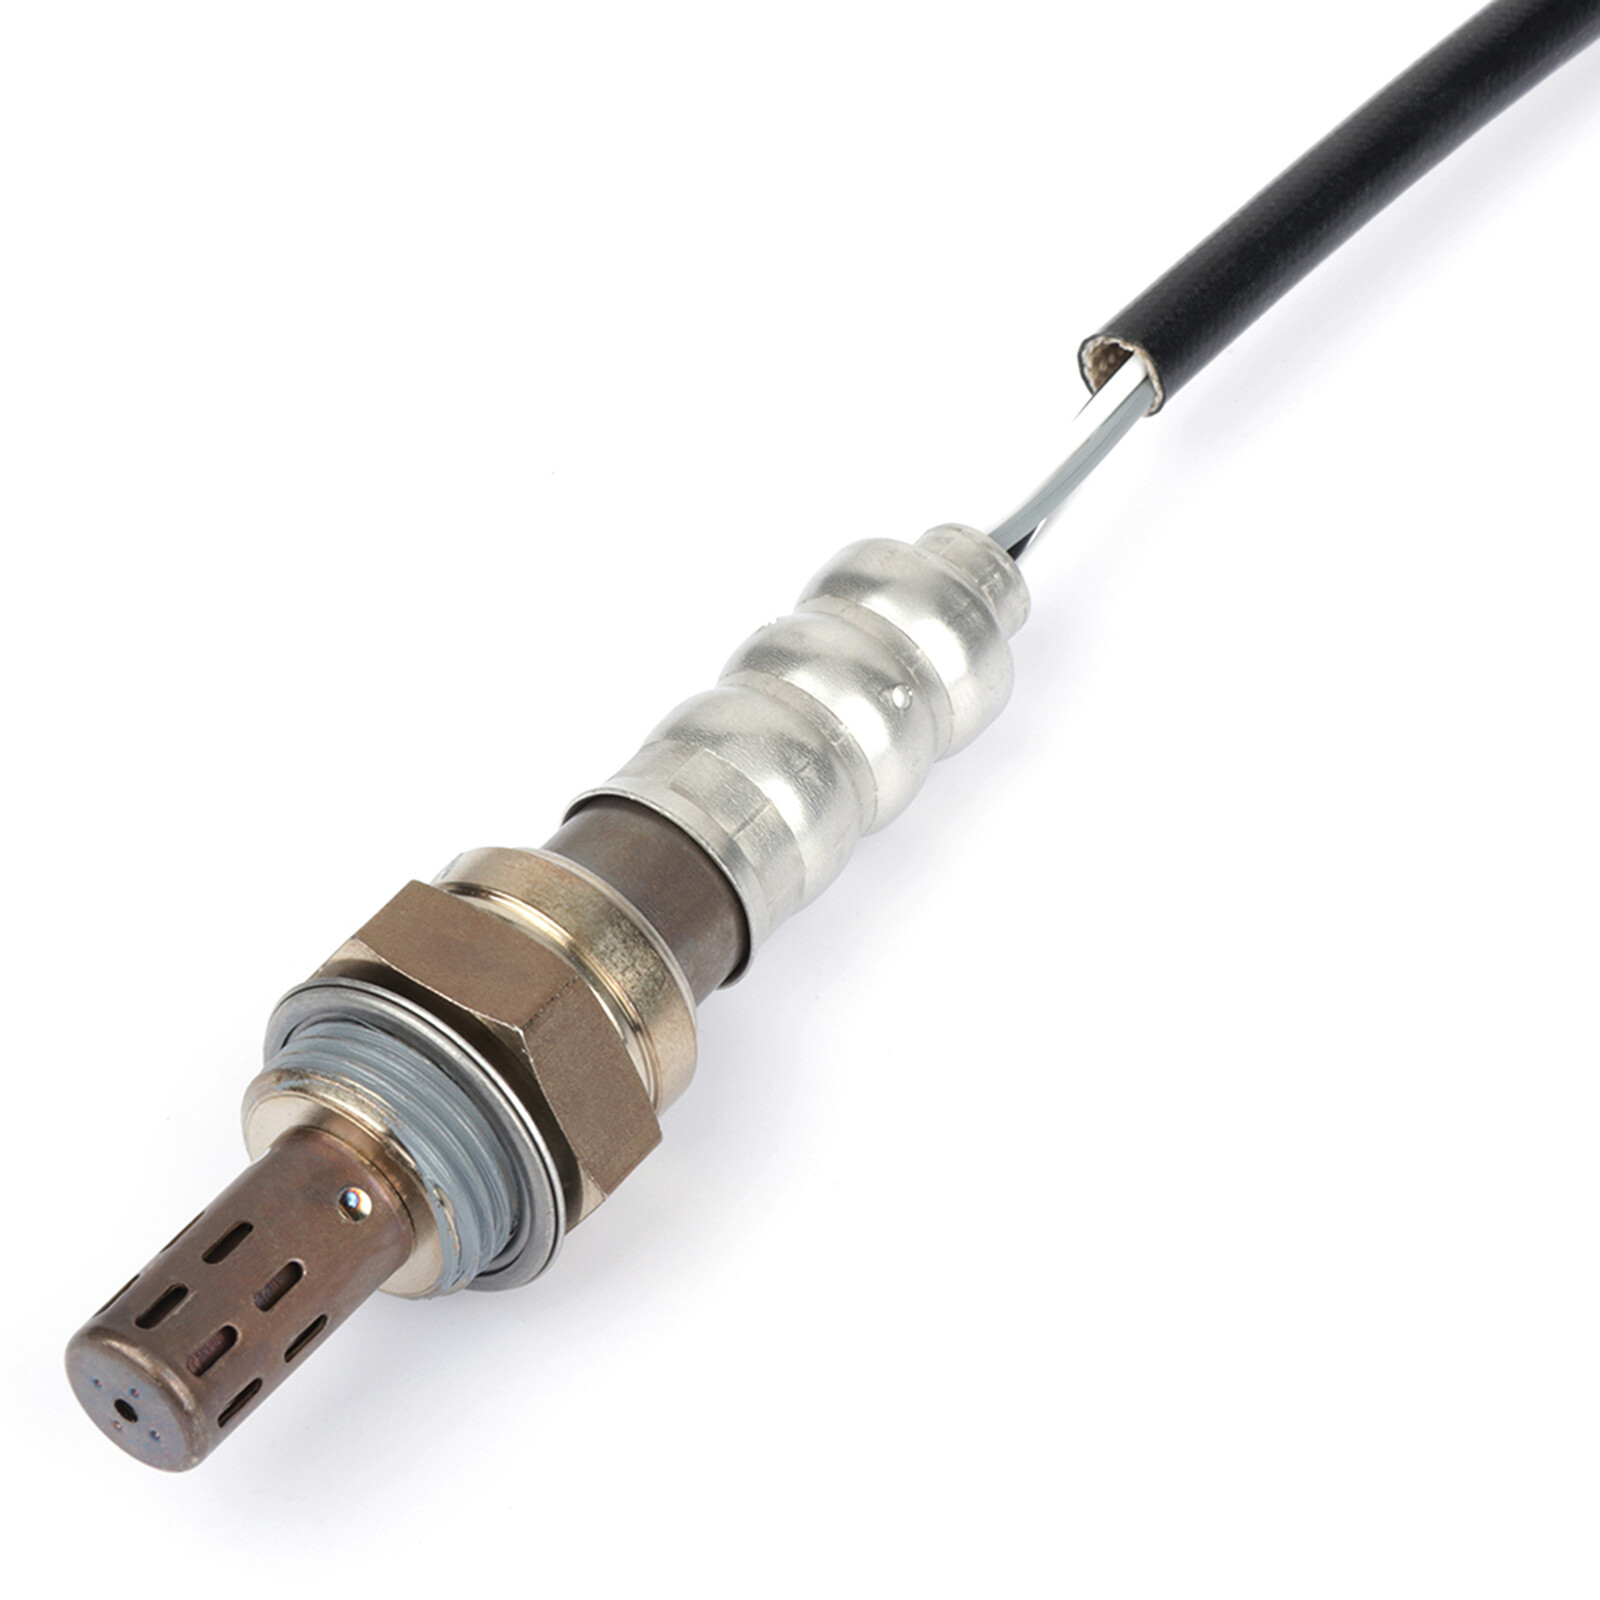
1.Dual Insulated Protective Cover Prevents premature zirconium sensor wear
2.Laser welded sensor body to keep out contaminants
3.Internal Ceramic Insulation for optimal sensor performance.
4.Sealed wire leads prevent moisture interference with electronic signal
Q&A:
Q1:Why the oxygen sensor important for your vhiche?
The oxygen sensor in your car resides in your exhaust manifold and is used to detect components of your exhaust (including oxygen!) that helps your car monitor its performance. Your oxygen sensor’s readings are transmitted to your engine, in real time, and helps your car determine its fuel-to-air ratio in order to maximize its performance.
Failing oxygen sensors were the most common repair performed by North American automotive mechanics for the 5th year in a row, with cars older than 10 years constituting most repairs. Understanding when you should repair your oxygen sensor is important if you drive an older car. Most automotive manufacturers recommend replacing the oxygen sensor in your car every 100,000 km to 150,000 km.
Q2:how to check the oxygen sensor is bad?
1. Check Engine Light Is On
Normally, if your oxygen sensor is malfunctioning, your check engine light will turn on. Instead of ignoring your check engine light, get an inspection from a licensed mechanic as soon as possible. If you drive an older car (10+ years, or above 150,000 km) it is very likely that your check engine light is signalling a faulty oxygen sensor.
2. Increased exhaust emissions
Your oxygen sensor determines the optimal air-to-fuel ratio for your engine by monitoring your emissions in real-time. If your oxygen sensor begins to malfunction, then your engine may be operating at sub-optimal air-to-fuel ratios, which can cause an increase in your exhaust emissions.
3. Bad performance
Your car may misfire or experience hesitation and stalling. Most cars default to the factory air-to-fuel ratio if the oxygen sensor fails, which can cause problems because of non-standard temperature, moisture, or air composition. If your oxygen sensor is failing, then its readings will be inaccurate, again, resulting in a sub-optimal fuel-to-air composition.
Q3:how to install the oxygen sensor?
1. Tools and Materials
Clean rags
A large adjustable wrench or set of crescent wrenches
2 good-sized blocks of wood
A flashlight
A car jack
Jack stands to support the car
A new oxygen sensor
Latex or nitrile gloves (optional)
It might also be useful to have a guide on hand for your specific vehicle, or check out the process in an online forum specific to your make and model.
2.Prepare Your Work Area
First, park the vehicle on a level surface and set the brake. Put the wood blocks behind and in front of one of the rear tires. This is to ensure that the vehicle doesn't move. If you've recently driven the car there's a good chance that the exhaust system will be extremely hot. Let it cool for awhile before touching it. Raise each side of the car using the jack until the tire is no longer touching the ground. Lower the car onto the stand, being careful to use one of the frame contact points identified in your owner's manual. Other places on the vehicle are not designed to support weight and will be damaged if you use them to lift or support the car. Once the car is situated on the stand make sure that it is being supported in a stable manner.
3.Locate and Remove the Sensor(s)
While some vehicles are equipped with only one oxygen sensor, other cars use two. On engines using only one sensor, it is typically located on or very near the exhaust manifold (the part of the exhaust that attaches to your car's motor). On vehicles with two sensors, the second sensor will be located downstream from the car's catalytic converter. Simply follow the car's exhaust system from the manifold back towards the muffler to locate the sensor. Remove and replace the sensors one at a time, taking care to make sure you're installing the correct sensor in each location. Take a look and the new oxygen sensor so that you have a good idea of exactly what it looks like. The sensor wire should unplug using a simple clip. Once the wire is removed, use a crescent wrench to loosen the bolt attaching the sensor to the exhaust system and remove it. Replace the sensor and reconnect it, taking care to make sure the wire's clip clicks into place. Take care to route the wire in its original location so that the wire is away from the hot exhaust pipe.
4.Finish Up
Once the sensors are replaced, reverse the process of step one to complete the job.
| Item Specifics | |
|---|---|
| Manufacturer Part Number | AUT8362030US |
| Type | Oxygen Sensor |
| Brand | AutoDealsParts |
| Manufacturer Warranty | 1 Year |
| Number of Pieces | 4 |
| Fitment Type | Direct Replacement |
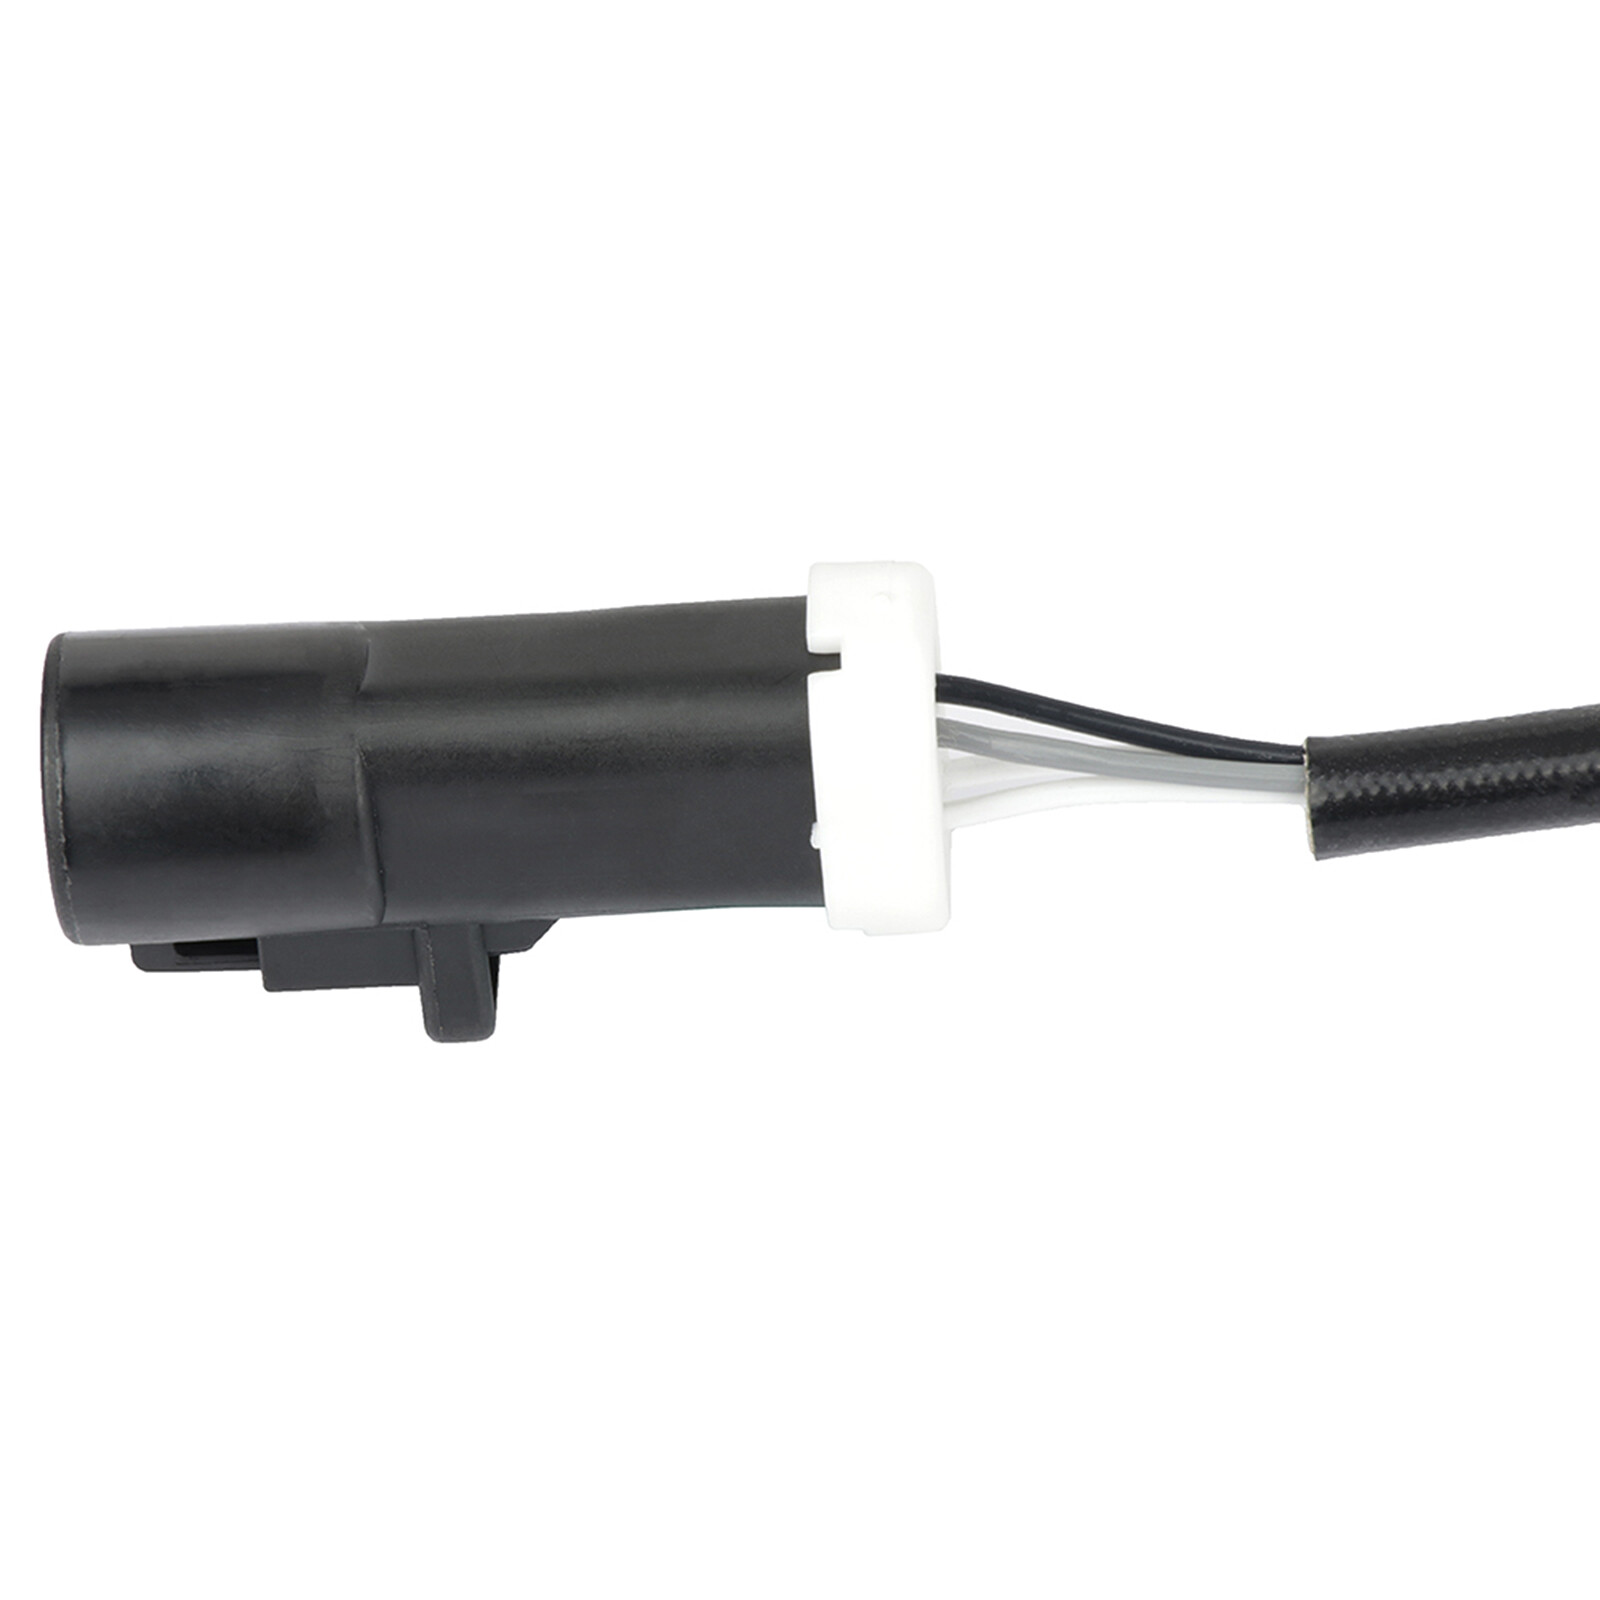
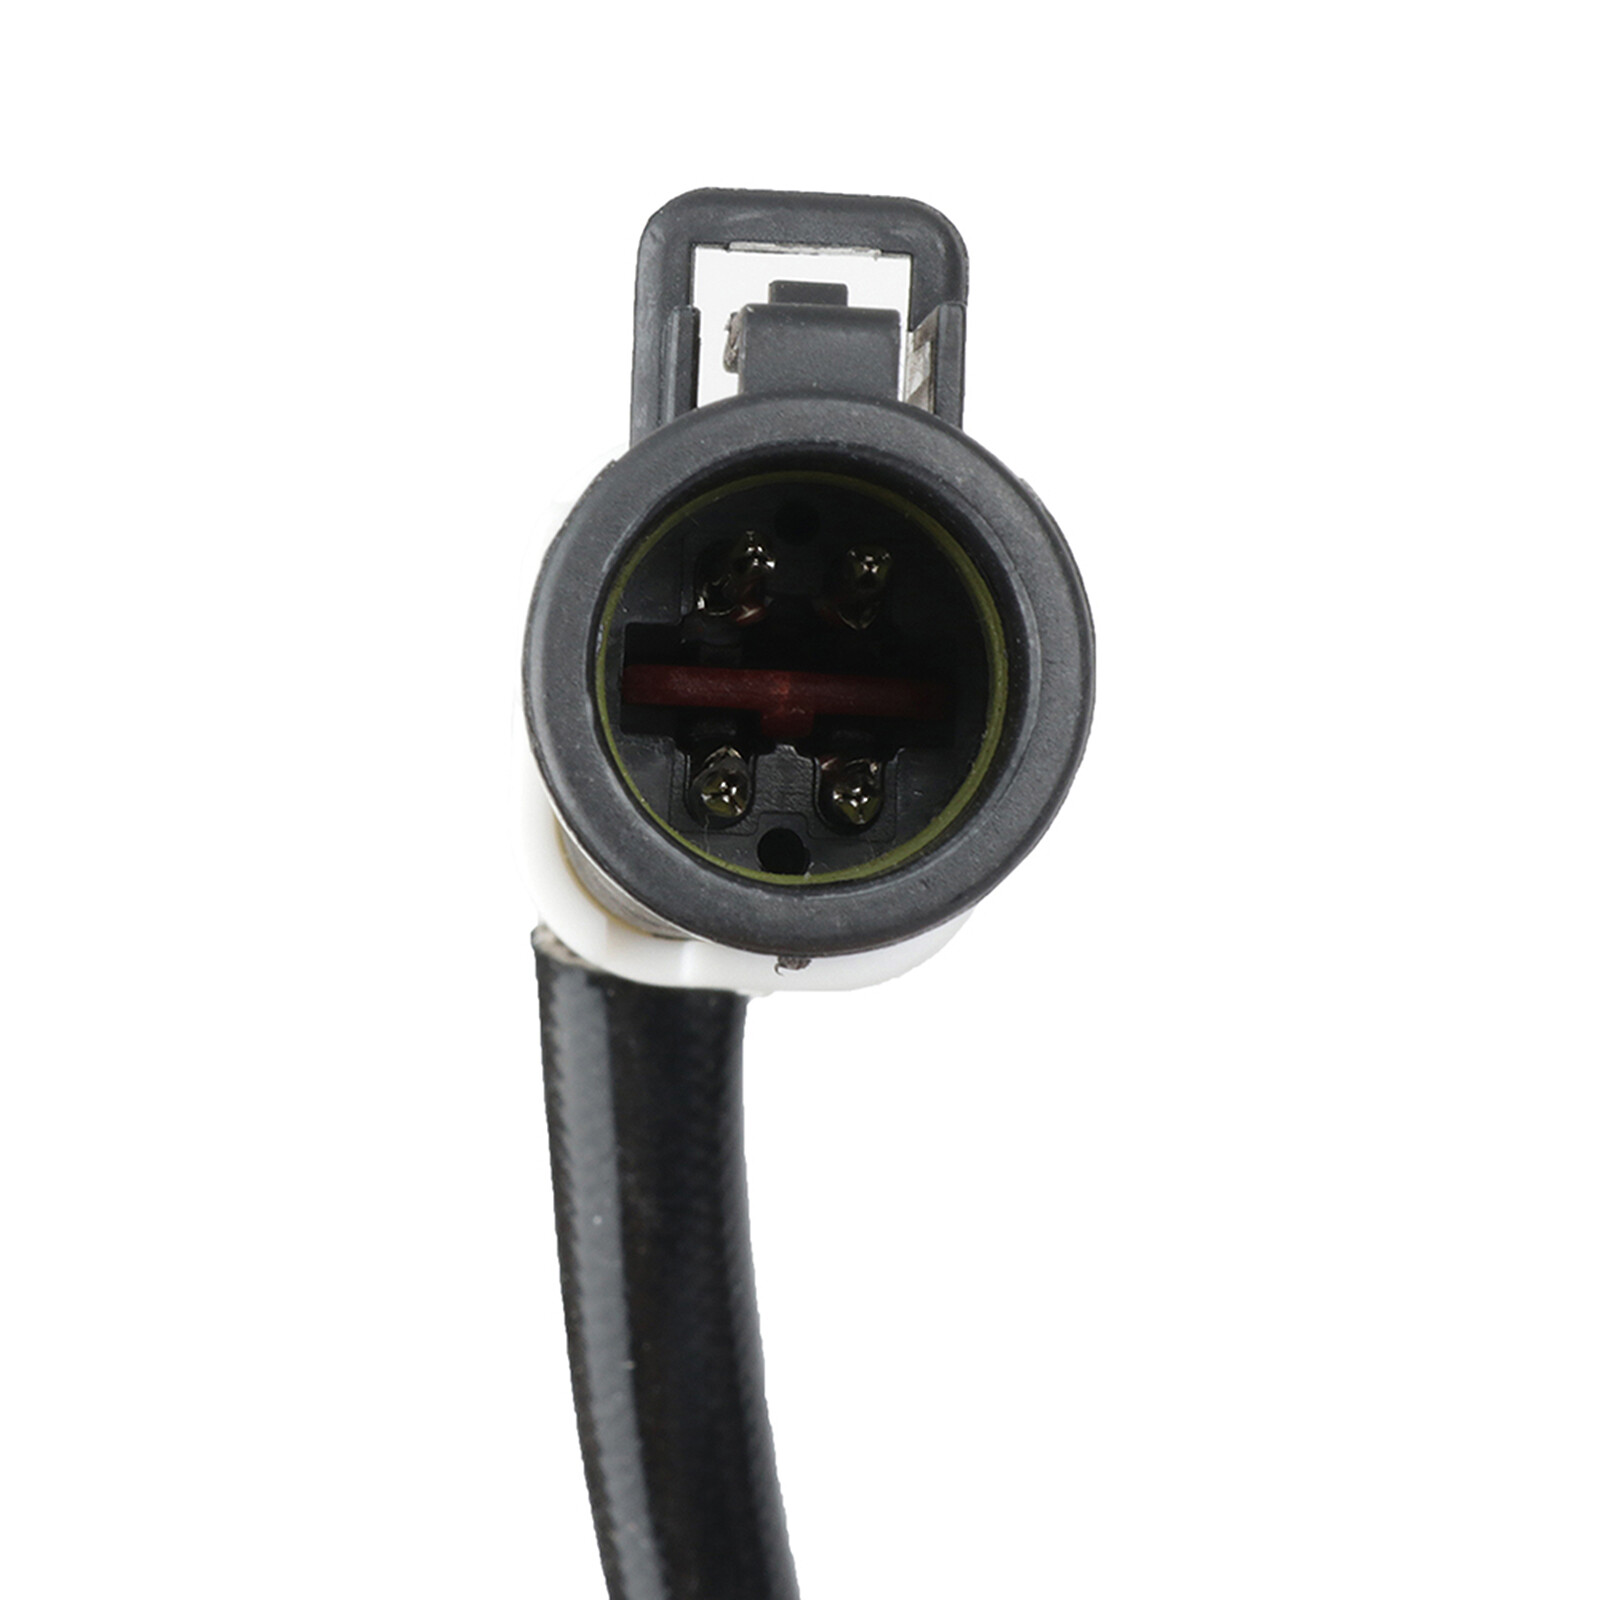
| Pin | 4 |
| Wire | 4 |
| Location | Upstream Downstream |
| Placement on Vehicle | Upstream Downstream |
| Sensor Type | Heated |
| Technology | Narrow-band |
| Attachment Method | Screw-On |
| Universal Or Specific Fit | Specific |
Payment
We accept multiple payment methods
Shipping
1. We only ship to confirmed paypal addresses, your paypal address must match your shipping address.
2. All domestic orders will be shipped via USPS, UPS or Fedex from our US warehouse and usually arrives to your door in about 2-7 business days.
3. If you have not received your shipment within 15 days from payment , please contact us. We will track the shipment and get back to you as soon as possible with a reply.
4. Local pick up is not available.
Returns
All of our brand new items come with a 30-days money-back guarantee.
Contact Us
If you have any question, please contact us.
Warning
Please check carefully for the fitment before order, thank you.
Autodealsparts
DESCRIPTION PAYMENT SHIPPING RETURN POLICY CONTACT US |
Shop Category Picture Picture Picture |
For 96-06 Ford Ranger 4.0L w/ 24" O2 02 Oxygen Sensor Heated 4pcs Upsteam Lower
Compatibility: 1996 Ford Ranger 4.0L 2001-2003 Ford Ranger 4.0L w/ 22" 1996-2006 Ford Ranger 4.0L w/ 24" 2001-2006 Mazda B4000 4.0L
Benefits:
1.Dual Insulated Protective Cover Prevents premature zirconium sensor wear 2.Laser welded sensor body to keep out contaminants 3.Internal Ceramic Insulation for optimal sensor performance. 4.Sealed wire leads prevent moisture interference with electronic signal
Q&A:
Q1:Why the oxygen sensor important for your vhiche?
The oxygen sensor in your car resides in your exhaust manifold and is used to detect components of your exhaust (including oxygen!) that helps your car monitor its performance. Your oxygen sensor’s readings are transmitted to your engine, in real time, and helps your car determine its fuel-to-air ratio in order to maximize its performance. Failing oxygen sensors were the most common repair performed by North American automotive mechanics for the 5th year in a row, with cars older than 10 years constituting most repairs. Understanding when you should repair your oxygen sensor is important if you drive an older car. Most automotive manufacturers recommend replacing the oxygen sensor in your car every 100,000 km to 150,000 km.
Q2:how to check the oxygen sensor is bad?
1. Check Engine Light Is On Normally, if your oxygen sensor is malfunctioning, your check engine light will turn on. Instead of ignoring your check engine light, get an inspection from a licensed mechanic as soon as possible. If you drive an older car (10+ years, or above 150,000 km) it is very likely that your check engine light is signalling a faulty oxygen sensor.
2. Increased exhaust emissions Your oxygen sensor determines the optimal air-to-fuel ratio for your engine by monitoring your emissions in real-time. If your oxygen sensor begins to malfunction, then your engine may be operating at sub-optimal air-to-fuel ratios, which can cause an increase in your exhaust emissions.
3. Bad performance Your car may misfire or experience hesitation and stalling. Most cars default to the factory air-to-fuel ratio if the oxygen sensor fails, which can cause problems because of non-standard temperature, moisture, or air composition. If your oxygen sensor is failing, then its readings will be inaccurate, again, resulting in a sub-optimal fuel-to-air composition.
Q3:how to install the oxygen sensor?
1. Tools and Materials Clean rags A large adjustable wrench or set of crescent wrenches 2 good-sized blocks of wood A flashlight A car jack Jack stands to support the car A new oxygen sensor Latex or nitrile gloves (optional) It might also be useful to have a guide on hand for your specific vehicle, or check out the process in an online forum specific to your make and model.
2.Prepare Your Work Area First, park the vehicle on a level surface and set the brake. Put the wood blocks behind and in front of one of the rear tires. This is to ensure that the vehicle doesn't move. If you've recently driven the car there's a good chance that the exhaust system will be extremely hot. Let it cool for awhile before touching it. Raise each side of the car using the jack until the tire is no longer touching the ground. Lower the car onto the stand, being careful to use one of the frame contact points identified in your owner's manual. Other places on the vehicle are not designed to support weight and will be damaged if you use them to lift or support the car. Once the car is situated on the stand make sure that it is being supported in a stable manner.
3.Locate and Remove the Sensor(s) While some vehicles are equipped with only one oxygen sensor, other cars use two. On engines using only one sensor, it is typically located on or very near the exhaust manifold (the part of the exhaust that attaches to your car's motor). On vehicles with two sensors, the second sensor will be located downstream from the car's catalytic converter. Simply follow the car's exhaust system from the manifold back towards the muffler to locate the sensor. Remove and replace the sensors one at a time, taking care to make sure you're installing the correct sensor in each location. Take a look and the new oxygen sensor so that you have a good idea of exactly what it looks like. The sensor wire should unplug using a simple clip. Once the wire is removed, use a crescent wrench to loosen the bolt attaching the sensor to the exhaust system and remove it. Replace the sensor and reconnect it, taking care to make sure the wire's clip clicks into place. Take care to route the wire in its original location so that the wire is away from the hot exhaust pipe.
4.Finish Up Once the sensors are replaced, reverse the process of step one to complete the job.
Payment
We accept multiple payment methods Shipping
1. We only ship to confirmed paypal addresses, your paypal address must match your shipping address.
Returns
All of our brand new items come with a 30-days money-back guarantee. Contact Us
If you have any question, please contact us. Warning
Please check carefully for the fitment before order, thank you. All rights reserved. |
| Brand: | AutoDealsParts |
|---|---|
| Isin: | IB8RZ9MWM9FB |
Out of Stock
In Stock
Backordered
Out of Stock


IBspot Buyer Protection
Shop confidently on IBspot, receive your item as described or your money back for eligible orders. Learn Program Terms
GUARANTEED SAFE CHECKOUT
-

MONEY BACK GUARANTEE
30 days money back guarantee, no additional fee charged.
-

EXCELLENT SUPPORT
We provide 24/7 online customer support via email.
-

Fast Shipping
One week domestic shipping. Global delivery to the US in 2 weeks.
Autodealsparts

|
|
|
|
|

|
|
|
|
|
|
|

|
|
|
|
|
|
|
|
|
|
|
|
|
|
For 96-06 Ford Ranger 4.0L w/ 24" O2 02 Oxygen Sensor Heated 4pcs Upsteam Lower
Compatibility:
1996 Ford Ranger 4.0L
2001-2003 Ford Ranger 4.0L w/ 22"
1996-2006 Ford Ranger 4.0L w/ 24"
2001-2006 Mazda B4000 4.0L
Benefits:
1.Dual Insulated Protective Cover Prevents premature zirconium sensor wear
2.Laser welded sensor body to keep out contaminants
3.Internal Ceramic Insulation for optimal sensor performance.
4.Sealed wire leads prevent moisture interference with electronic signal
Q&A:
Q1:Why the oxygen sensor important for your vhiche?
The oxygen sensor in your car resides in your exhaust manifold and is used to detect components of your exhaust (including oxygen!) that helps your car monitor its performance. Your oxygen sensor’s readings are transmitted to your engine, in real time, and helps your car determine its fuel-to-air ratio in order to maximize its performance.
Failing oxygen sensors were the most common repair performed by North American automotive mechanics for the 5th year in a row, with cars older than 10 years constituting most repairs. Understanding when you should repair your oxygen sensor is important if you drive an older car. Most automotive manufacturers recommend replacing the oxygen sensor in your car every 100,000 km to 150,000 km.
Q2:how to check the oxygen sensor is bad?
1. Check Engine Light Is On
Normally, if your oxygen sensor is malfunctioning, your check engine light will turn on. Instead of ignoring your check engine light, get an inspection from a licensed mechanic as soon as possible. If you drive an older car (10+ years, or above 150,000 km) it is very likely that your check engine light is signalling a faulty oxygen sensor.
2. Increased exhaust emissions
Your oxygen sensor determines the optimal air-to-fuel ratio for your engine by monitoring your emissions in real-time. If your oxygen sensor begins to malfunction, then your engine may be operating at sub-optimal air-to-fuel ratios, which can cause an increase in your exhaust emissions.
3. Bad performance
Your car may misfire or experience hesitation and stalling. Most cars default to the factory air-to-fuel ratio if the oxygen sensor fails, which can cause problems because of non-standard temperature, moisture, or air composition. If your oxygen sensor is failing, then its readings will be inaccurate, again, resulting in a sub-optimal fuel-to-air composition.
Q3:how to install the oxygen sensor?
1. Tools and Materials
Clean rags
A large adjustable wrench or set of crescent wrenches
2 good-sized blocks of wood
A flashlight
A car jack
Jack stands to support the car
A new oxygen sensor
Latex or nitrile gloves (optional)
It might also be useful to have a guide on hand for your specific vehicle, or check out the process in an online forum specific to your make and model.
2.Prepare Your Work Area
First, park the vehicle on a level surface and set the brake. Put the wood blocks behind and in front of one of the rear tires. This is to ensure that the vehicle doesn't move. If you've recently driven the car there's a good chance that the exhaust system will be extremely hot. Let it cool for awhile before touching it. Raise each side of the car using the jack until the tire is no longer touching the ground. Lower the car onto the stand, being careful to use one of the frame contact points identified in your owner's manual. Other places on the vehicle are not designed to support weight and will be damaged if you use them to lift or support the car. Once the car is situated on the stand make sure that it is being supported in a stable manner.
3.Locate and Remove the Sensor(s)
While some vehicles are equipped with only one oxygen sensor, other cars use two. On engines using only one sensor, it is typically located on or very near the exhaust manifold (the part of the exhaust that attaches to your car's motor). On vehicles with two sensors, the second sensor will be located downstream from the car's catalytic converter. Simply follow the car's exhaust system from the manifold back towards the muffler to locate the sensor. Remove and replace the sensors one at a time, taking care to make sure you're installing the correct sensor in each location. Take a look and the new oxygen sensor so that you have a good idea of exactly what it looks like. The sensor wire should unplug using a simple clip. Once the wire is removed, use a crescent wrench to loosen the bolt attaching the sensor to the exhaust system and remove it. Replace the sensor and reconnect it, taking care to make sure the wire's clip clicks into place. Take care to route the wire in its original location so that the wire is away from the hot exhaust pipe.
4.Finish Up
Once the sensors are replaced, reverse the process of step one to complete the job.
| Item Specifics | |
|---|---|
| Manufacturer Part Number | AUT8362030US |
| Type | Oxygen Sensor |
| Brand | AutoDealsParts |
| Manufacturer Warranty | 1 Year |
| Number of Pieces | 4 |
| Fitment Type | Direct Replacement |
| Pin | 4 |
| Wire | 4 |
| Location | Upstream Downstream |
| Placement on Vehicle | Upstream Downstream |
| Sensor Type | Heated |
| Technology | Narrow-band |
| Attachment Method | Screw-On |
| Universal Or Specific Fit | Specific |
Payment
We accept multiple payment methods
Shipping
1. We only ship to confirmed paypal addresses, your paypal address must match your shipping address.
2. All domestic orders will be shipped via USPS, UPS or Fedex from our US warehouse and usually arrives to your door in about 2-7 business days.
3. If you have not received your shipment within 15 days from payment , please contact us. We will track the shipment and get back to you as soon as possible with a reply.
4. Local pick up is not available.
Returns
All of our brand new items come with a 30-days money-back guarantee.
Contact Us
If you have any question, please contact us.
Warning
Please check carefully for the fitment before order, thank you.
Autodealsparts
DESCRIPTION PAYMENT SHIPPING RETURN POLICY CONTACT US |
Shop Category Hot Item
New List Item
Picture
Picture
Picture
|
For 96-06 Ford Ranger 4.0L w/ 24" O2 02 Oxygen Sensor Heated 4pcs Upsteam Lower
Compatibility: 1996 Ford Ranger 4.0L 2001-2003 Ford Ranger 4.0L w/ 22" 1996-2006 Ford Ranger 4.0L w/ 24" 2001-2006 Mazda B4000 4.0L
Benefits:
1.Dual Insulated Protective Cover Prevents premature zirconium sensor wear 2.Laser welded sensor body to keep out contaminants 3.Internal Ceramic Insulation for optimal sensor performance. 4.Sealed wire leads prevent moisture interference with electronic signal
Q&A:
Q1:Why the oxygen sensor important for your vhiche?
The oxygen sensor in your car resides in your exhaust manifold and is used to detect components of your exhaust (including oxygen!) that helps your car monitor its performance. Your oxygen sensor’s readings are transmitted to your engine, in real time, and helps your car determine its fuel-to-air ratio in order to maximize its performance. Failing oxygen sensors were the most common repair performed by North American automotive mechanics for the 5th year in a row, with cars older than 10 years constituting most repairs. Understanding when you should repair your oxygen sensor is important if you drive an older car. Most automotive manufacturers recommend replacing the oxygen sensor in your car every 100,000 km to 150,000 km.
Q2:how to check the oxygen sensor is bad?
1. Check Engine Light Is On Normally, if your oxygen sensor is malfunctioning, your check engine light will turn on. Instead of ignoring your check engine light, get an inspection from a licensed mechanic as soon as possible. If you drive an older car (10+ years, or above 150,000 km) it is very likely that your check engine light is signalling a faulty oxygen sensor.
2. Increased exhaust emissions Your oxygen sensor determines the optimal air-to-fuel ratio for your engine by monitoring your emissions in real-time. If your oxygen sensor begins to malfunction, then your engine may be operating at sub-optimal air-to-fuel ratios, which can cause an increase in your exhaust emissions.
3. Bad performance Your car may misfire or experience hesitation and stalling. Most cars default to the factory air-to-fuel ratio if the oxygen sensor fails, which can cause problems because of non-standard temperature, moisture, or air composition. If your oxygen sensor is failing, then its readings will be inaccurate, again, resulting in a sub-optimal fuel-to-air composition.
Q3:how to install the oxygen sensor?
1. Tools and Materials Clean rags A large adjustable wrench or set of crescent wrenches 2 good-sized blocks of wood A flashlight A car jack Jack stands to support the car A new oxygen sensor Latex or nitrile gloves (optional) It might also be useful to have a guide on hand for your specific vehicle, or check out the process in an online forum specific to your make and model.
2.Prepare Your Work Area First, park the vehicle on a level surface and set the brake. Put the wood blocks behind and in front of one of the rear tires. This is to ensure that the vehicle doesn't move. If you've recently driven the car there's a good chance that the exhaust system will be extremely hot. Let it cool for awhile before touching it. Raise each side of the car using the jack until the tire is no longer touching the ground. Lower the car onto the stand, being careful to use one of the frame contact points identified in your owner's manual. Other places on the vehicle are not designed to support weight and will be damaged if you use them to lift or support the car. Once the car is situated on the stand make sure that it is being supported in a stable manner.
3.Locate and Remove the Sensor(s) While some vehicles are equipped with only one oxygen sensor, other cars use two. On engines using only one sensor, it is typically located on or very near the exhaust manifold (the part of the exhaust that attaches to your car's motor). On vehicles with two sensors, the second sensor will be located downstream from the car's catalytic converter. Simply follow the car's exhaust system from the manifold back towards the muffler to locate the sensor. Remove and replace the sensors one at a time, taking care to make sure you're installing the correct sensor in each location. Take a look and the new oxygen sensor so that you have a good idea of exactly what it looks like. The sensor wire should unplug using a simple clip. Once the wire is removed, use a crescent wrench to loosen the bolt attaching the sensor to the exhaust system and remove it. Replace the sensor and reconnect it, taking care to make sure the wire's clip clicks into place. Take care to route the wire in its original location so that the wire is away from the hot exhaust pipe.
4.Finish Up Once the sensors are replaced, reverse the process of step one to complete the job.
Payment
We accept multiple payment methods Shipping
1. We only ship to confirmed paypal addresses, your paypal address must match your shipping address.
Returns
All of our brand new items come with a 30-days money-back guarantee. Contact Us
If you have any question, please contact us. Warning
Please check carefully for the fitment before order, thank you. All rights reserved. |


- Manufacturer Part Number: AUT8362030US
- Type: Oxygen Sensor
- Brand: AutoDealsParts
- Manufacturer Warranty: 1 Year
- UPC: Does not apply
- Number of Pieces: 4
- Fitment Type: Direct Replacement
- Pin: 4
- Wire: 4
- Location: Upstream Downstream
- Placement on Vehicle: Upstream Downstream
- Sensor Type: Heated
- Technology: Narrow-band
- Attachment Method: Screw-On
- Universal Or Specific Fit: Specific
Processing Time
- We process and ship orders Monday through Friday, excluding holidays.
- Most orders are processed within 1–3 business days, depending on product availability.
- Processing time does not include delivery time, which varies based on your location and the product’s shipping origin.
Shipping Coverage
We currently ship to addresses within the United States only.
Products may ship from:
- Our U.S. warehouses, or
- Our international fulfillment centers (including Korea, Japan, China, Australia, Mexico, Canada, the United Kingdom, and the EU).
Each product page clearly displays the “Ships From” location before checkout.
Shipping Methods & Estimated Delivery
| Shipping Method | Estimated Delivery | Cost |
|---|---|---|
| Free Shipping (US) | 5–10 business days | Free, available on eligible items |
| Standard Shipping (US to US by Item) | 5–10 business days | $6.50 for the first item, $3.00 each additional |
| Standard Shipping (From US Warehouse by Weight) | 3–7 business days | Starts at $6.50, increasing by $2 for every additional 4 oz (0.25 lb) up to 1 lb, then by $4 for each additional pound beyond 1 lb. |
| Extended Delivery (Ships from Overseas Warehouse) | 10–15 business days | $14.50 for the first item, $4.00 each additional |
Shipping costs vary by product weight, quantity and origin. Exact rates and delivery estimates are displayed on each product page and confirmed during checkout.
Free Shipping
We offer free standard shipping on select products or during promotional periods. Availability of free shipping will be displayed on the product page and at checkout.
Carriers
We primarily use USPS and UPS for U.S. deliveries. Items shipped from international warehouses may be handled by partner carriers depending on the country of origin.
Import Duties & Taxes
All import duties and taxes for goods imported into the United States are included in the product price. There are no hidden fees or additional charges at checkout.
Tracking & Notifications
Every order is fully trackable. You will receive a tracking number via email once your order ships. If your order ships in multiple packages, each package will have its own tracking number. If you don’t receive a shipping confirmation immediately, your order is still being processed and will arrive within the estimated timeframe shown at checkout.
You can track your shipment anytime using the Track Your Order page on our website.
Order Changes & Cancellations
If you need to modify or cancel an order, please contact our customer support team as soon as possible. Orders can only be canceled before they ship. Once shipped, cancellations are not possible, but you may request a return after the item is delivered.
Contact: support@ibspot.com
Item Not Received
If your tracking number shows “Delivered” but you haven’t received your package:
- Check with your local USPS or UPS office.
- Confirm that the shipping address provided was correct.
- If the issue remains unresolved, contact support@ibspot.com for assistance.
Damaged or Lost Parcels
If your package arrives damaged or fails to arrive, please contact us immediately. For deliveries to P.O. boxes, ibspot is not responsible for damage caused by weather, temperature, or theft.
Customer Support
For any questions about shipping, tracking, or delivery, our customer support team is here to help.
Email: support@ibspot.com
We’re always happy to help.
Please read our policy carefully before making a purchase.
We aim to ensure every customer has a smooth and transparent experience with ibspot.com.
Order Cancellation Policy
Customers may request to cancel an order before it has been shipped.
Once the package has been shipped, cancellations are no longer possible; however, you may still request a return after receiving your order.
How to Request a Cancellation
You can contact us through:
-
Email: support@ibspot.com
-
Contact Form: Submit a request through our Contact Us page
Please submit your cancellation request as soon as possible after placing the order to allow us to process it before shipment.
Return Policy
We accept returns for most items within 30 days of delivery for a full refund.
To be eligible for a return:
-
The item must be unused, in the same condition as received, and in its original packaging.
-
A tracking number must be provided to confirm the return shipment.
Non-Returnable Items
Certain products cannot be returned, including:
-
Perishable goods (for example, food, flowers, newspapers, magazines)
-
Intimate or sanitary goods
-
Hazardous materials or flammable liquids/gases
-
Gift cards
-
Downloadable software
-
Some health and personal care items
Partial Refunds (If Applicable)
Partial refunds may be granted in specific situations, such as:
-
Books with obvious signs of use
-
Opened CDs, DVDs, software, or vinyl records
-
Items not in their original condition, damaged, or missing parts not due to our error
-
Items returned more than 30 days after delivery
How to Return an Item
To initiate a return, please contact us at support@ibspot.com with your order number and details about the product you wish to return.
Our team will provide you with return instructions and a prepaid return label.
Shipping Cost for Returns
Please contact us before returning any item.
We will provide a free return shipping label.
If a return is sent back without prior contact or without our provided label, we cannot be held responsible for return shipping costs.
For items valued over $75, we recommend using a trackable shipping service or purchasing shipping insurance.
We cannot guarantee that we will receive your returned item if shipped independently.
Refund Processing
Once your return is received and inspected:
-
In-store returns are refunded to the original form of payment or issued as a gift card.
-
Mail-in returns using our prepaid label are refunded to the original payment method within 3–5 business days after we receive your return.
Please allow:
-
5–7 business days for the return to reach our Returns Center.
-
An additional 3–10 business days for your bank to post the refund to your account.
Damages, Issues & Claims
Please inspect your order immediately upon receipt.
If you receive a defective, damaged, or incorrect item, contact us right away at support@ibspot.com.
We’ll evaluate the issue promptly and make it right.
Product Claims
Before purchasing, please review product details carefully.
If there is a problem with your order upon arrival, visit our Support Center or contact us directly to arrange return shipping or replacement.
Exchanges
We do not process direct exchanges.
The fastest way to get what you need is to return the original item and place a new order once your return is accepted.
Return Address
IBSPOT Return Center
15 Sawmill Ln
Dover Plains, NY 12522
United States
Customer Support
Our support team is available 24/7 to assist with cancellations, returns, or general inquiries.
Email: support@ibspot.com
Contact Form: Contact Us page
Oops!
Sorry, it looks like some products are not available in selected quantity.