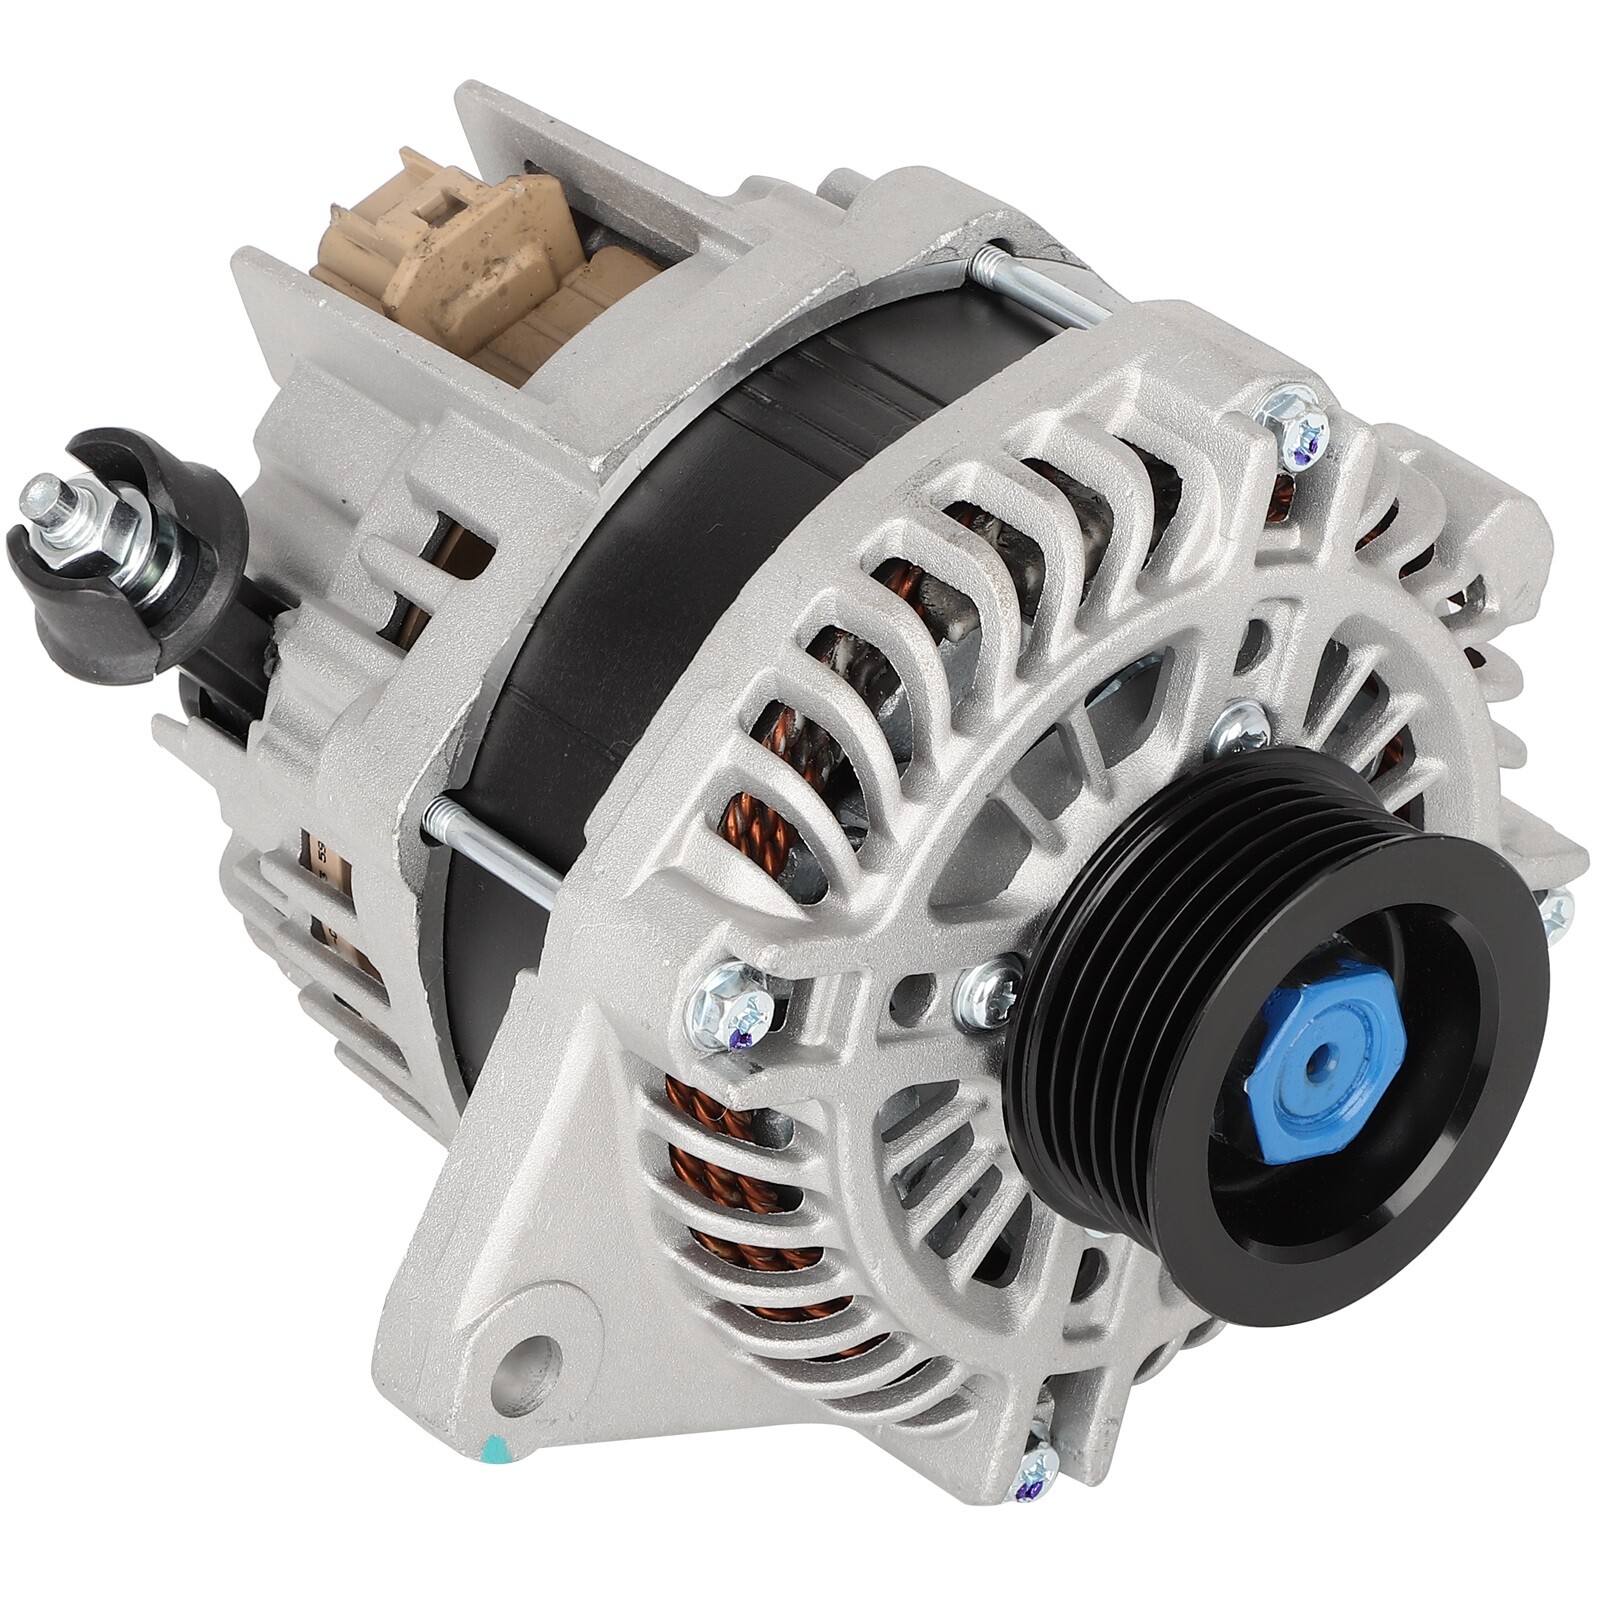
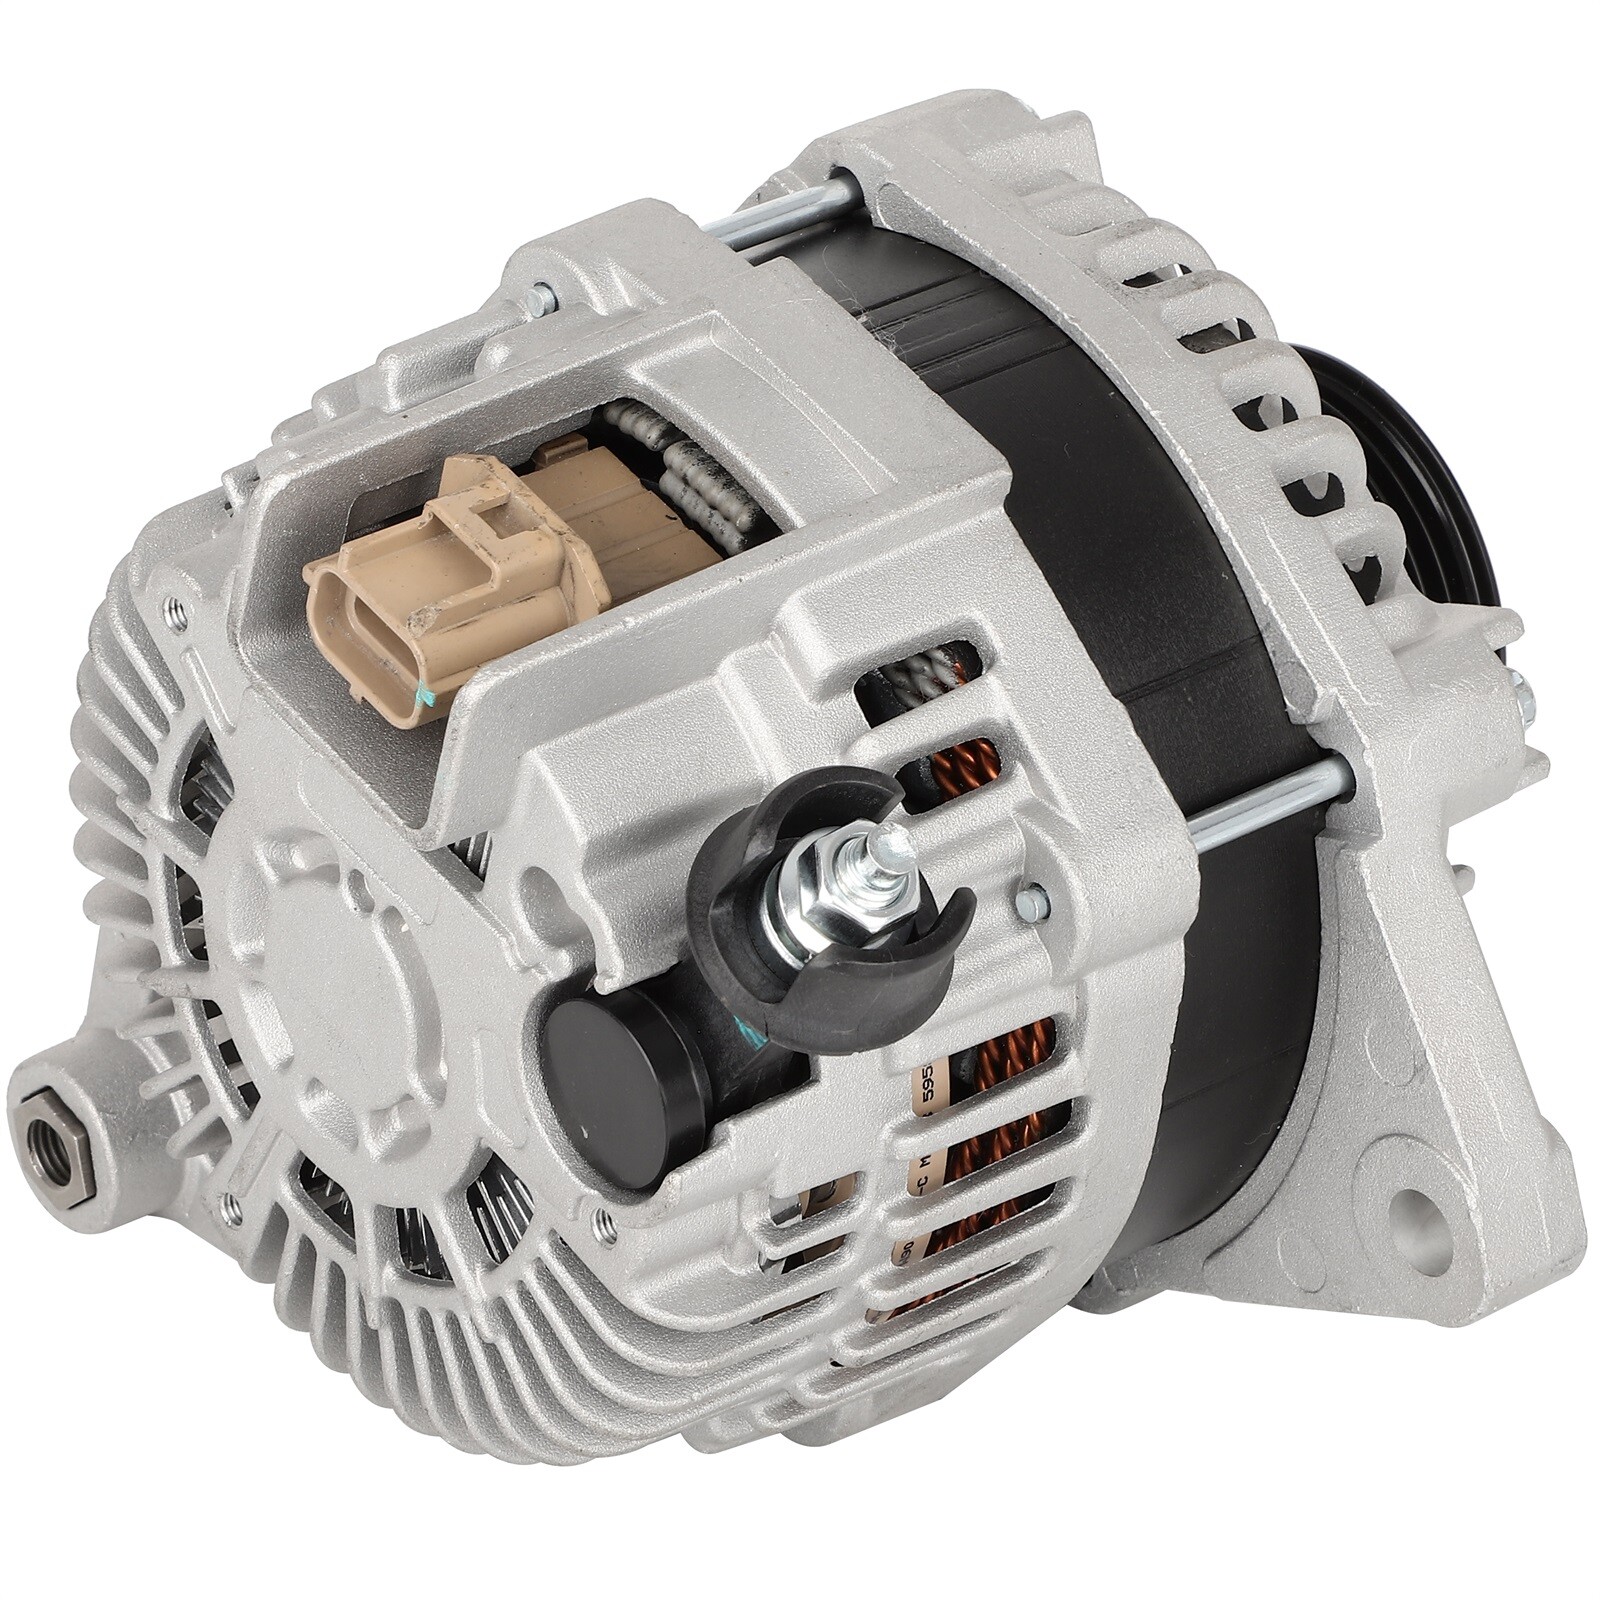
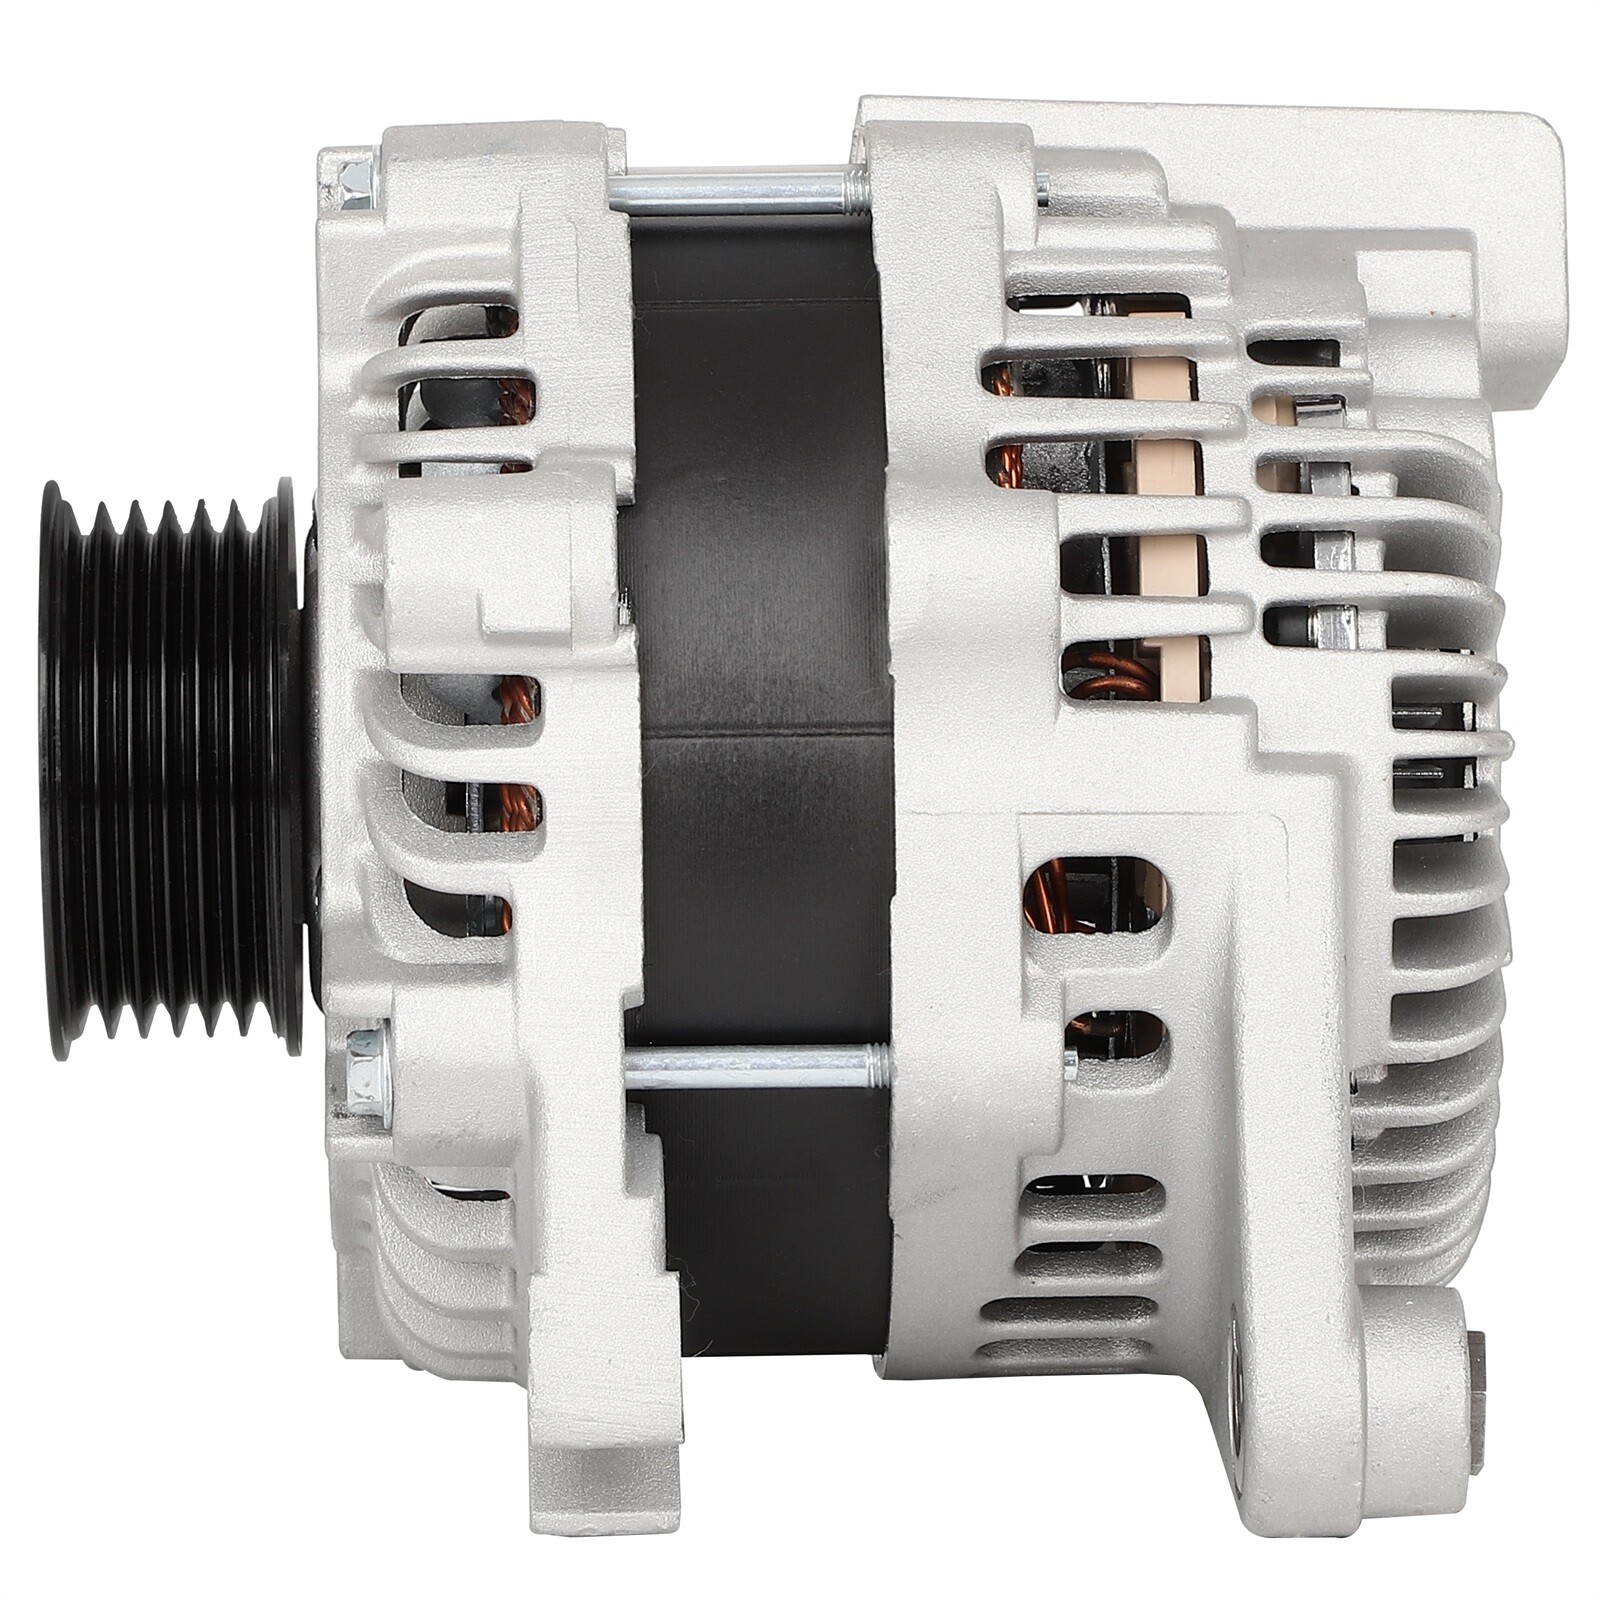
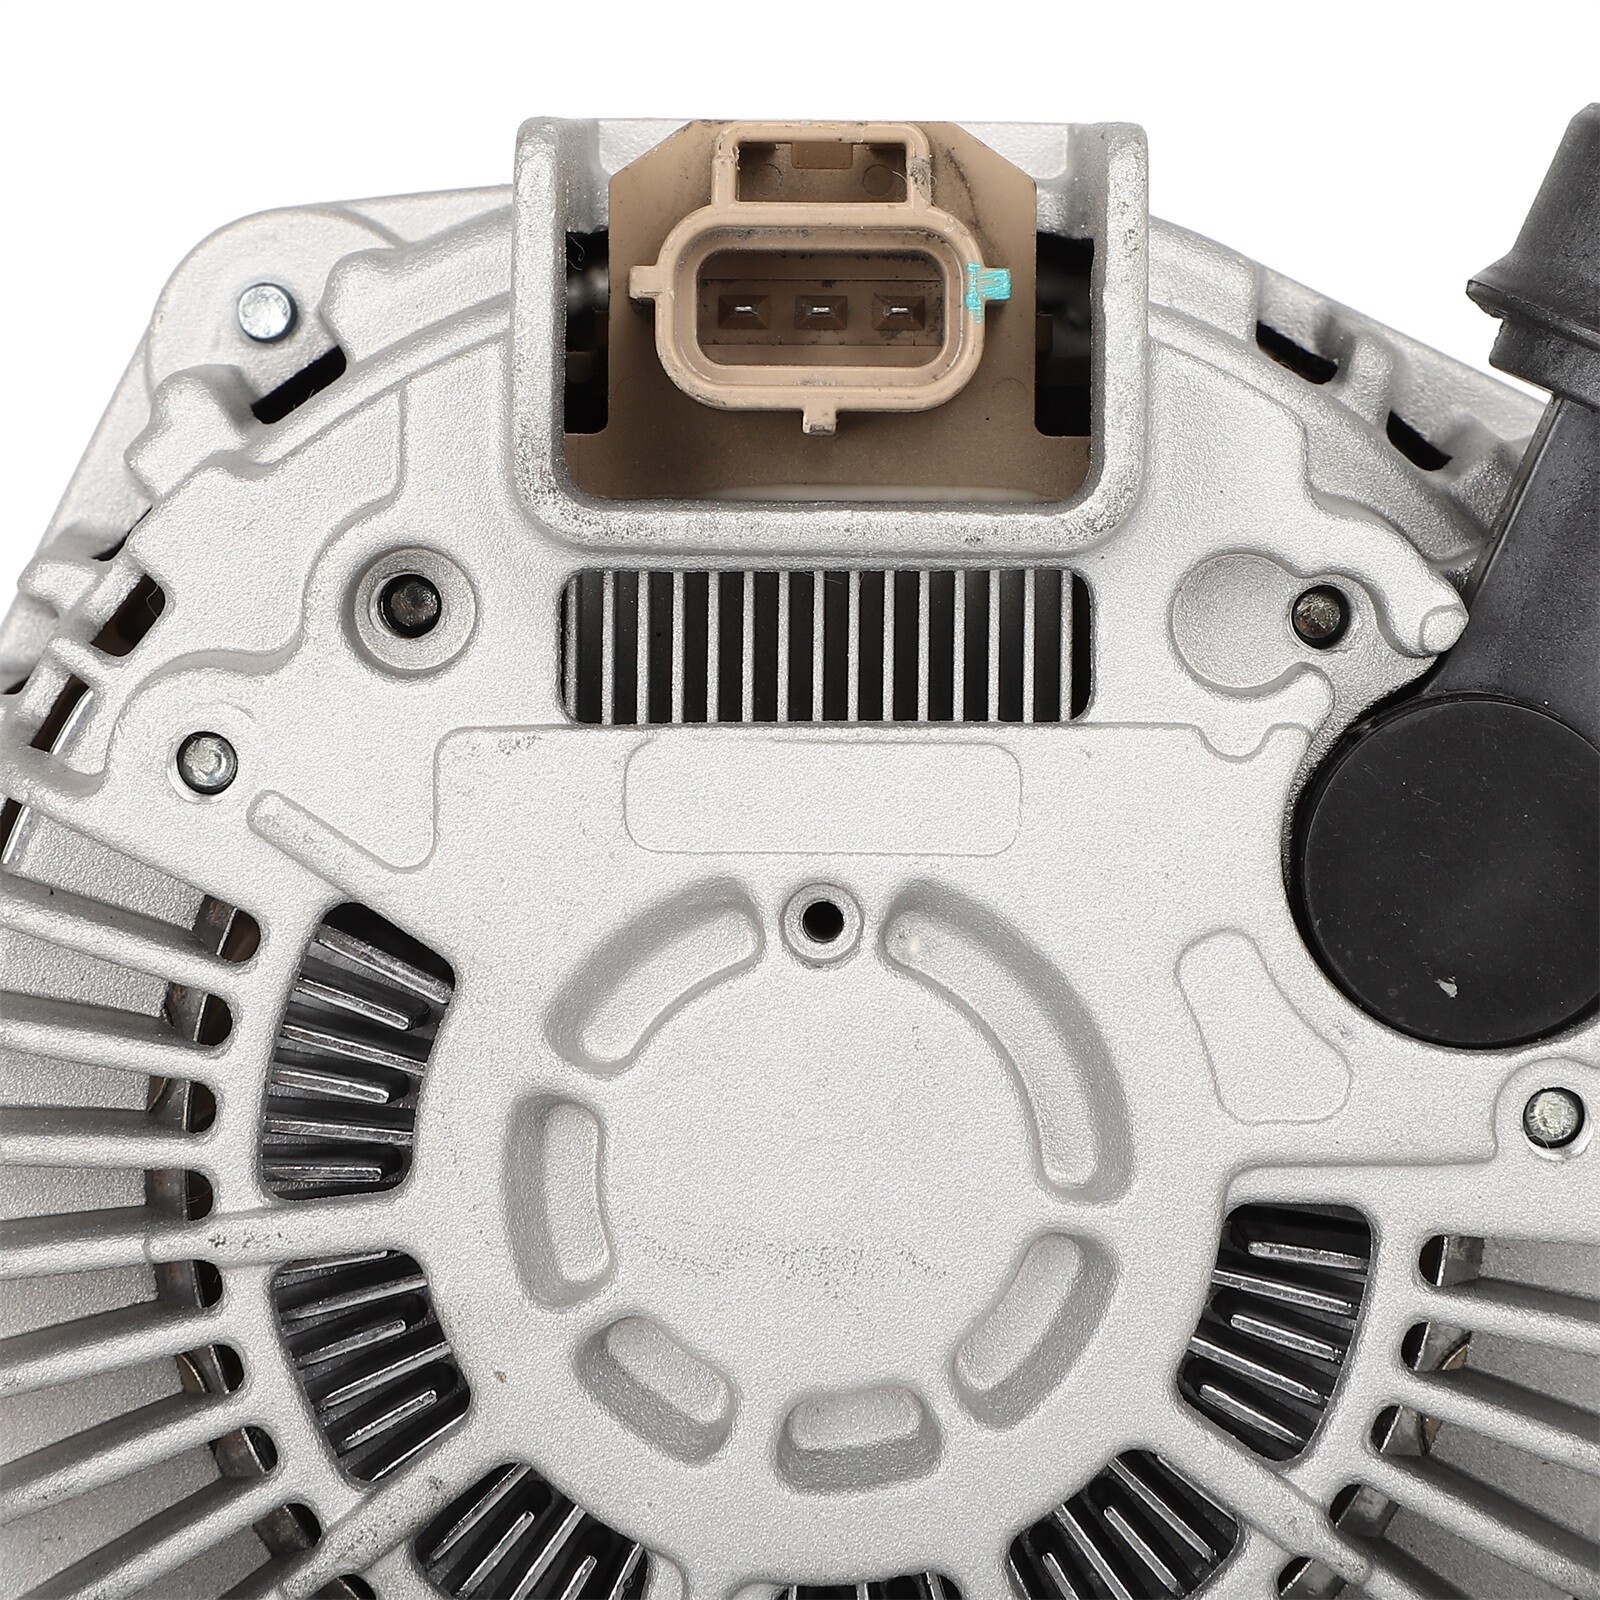
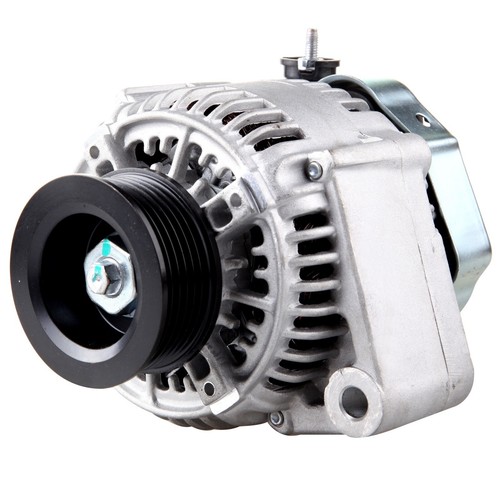
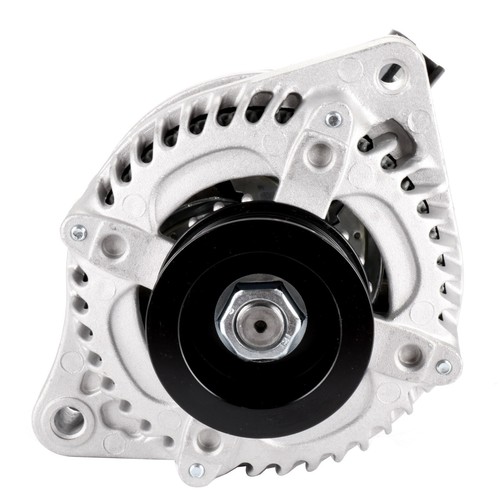
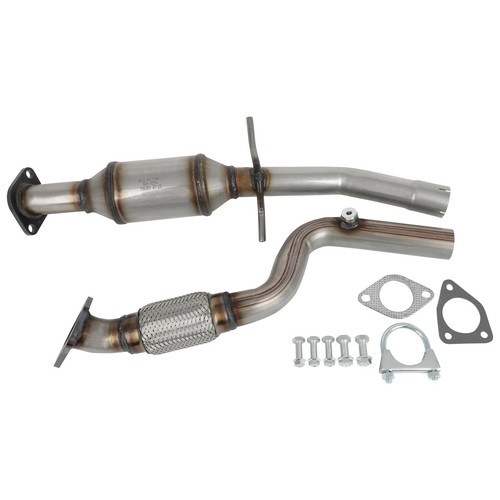
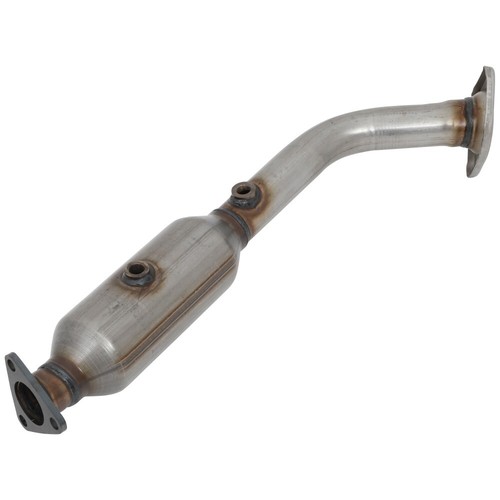
AP1A Alternator For Ford Van Transit-150 V6 3.5L A80749 90273465 CK4Z10346A GL8699
AP1A Alternator For Ford Van Transit-150 V6 3.5L A80749 90273465 CK4Z10346A GL8699


AP1A Alternator For Ford Van Transit-150 V6 3.5L A80749 90273465 CK4Z10346A GL8699
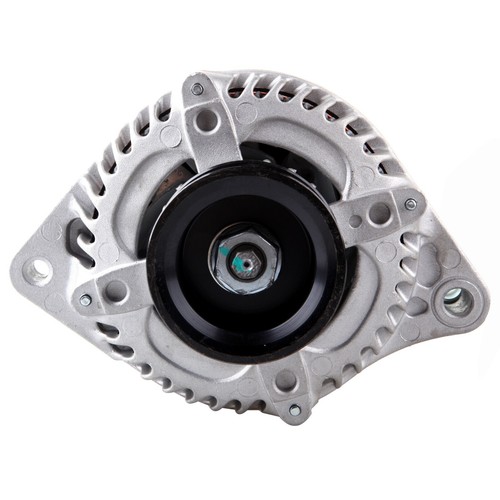
- Elaborately designed to provide just enough power
- Identical in specifications to the factory alternator
- Made to comply with strict OE quality requirements
- Enables precise fit and offers dependable operation
|
|
|
|
|
|
|
|
|
|
|
|
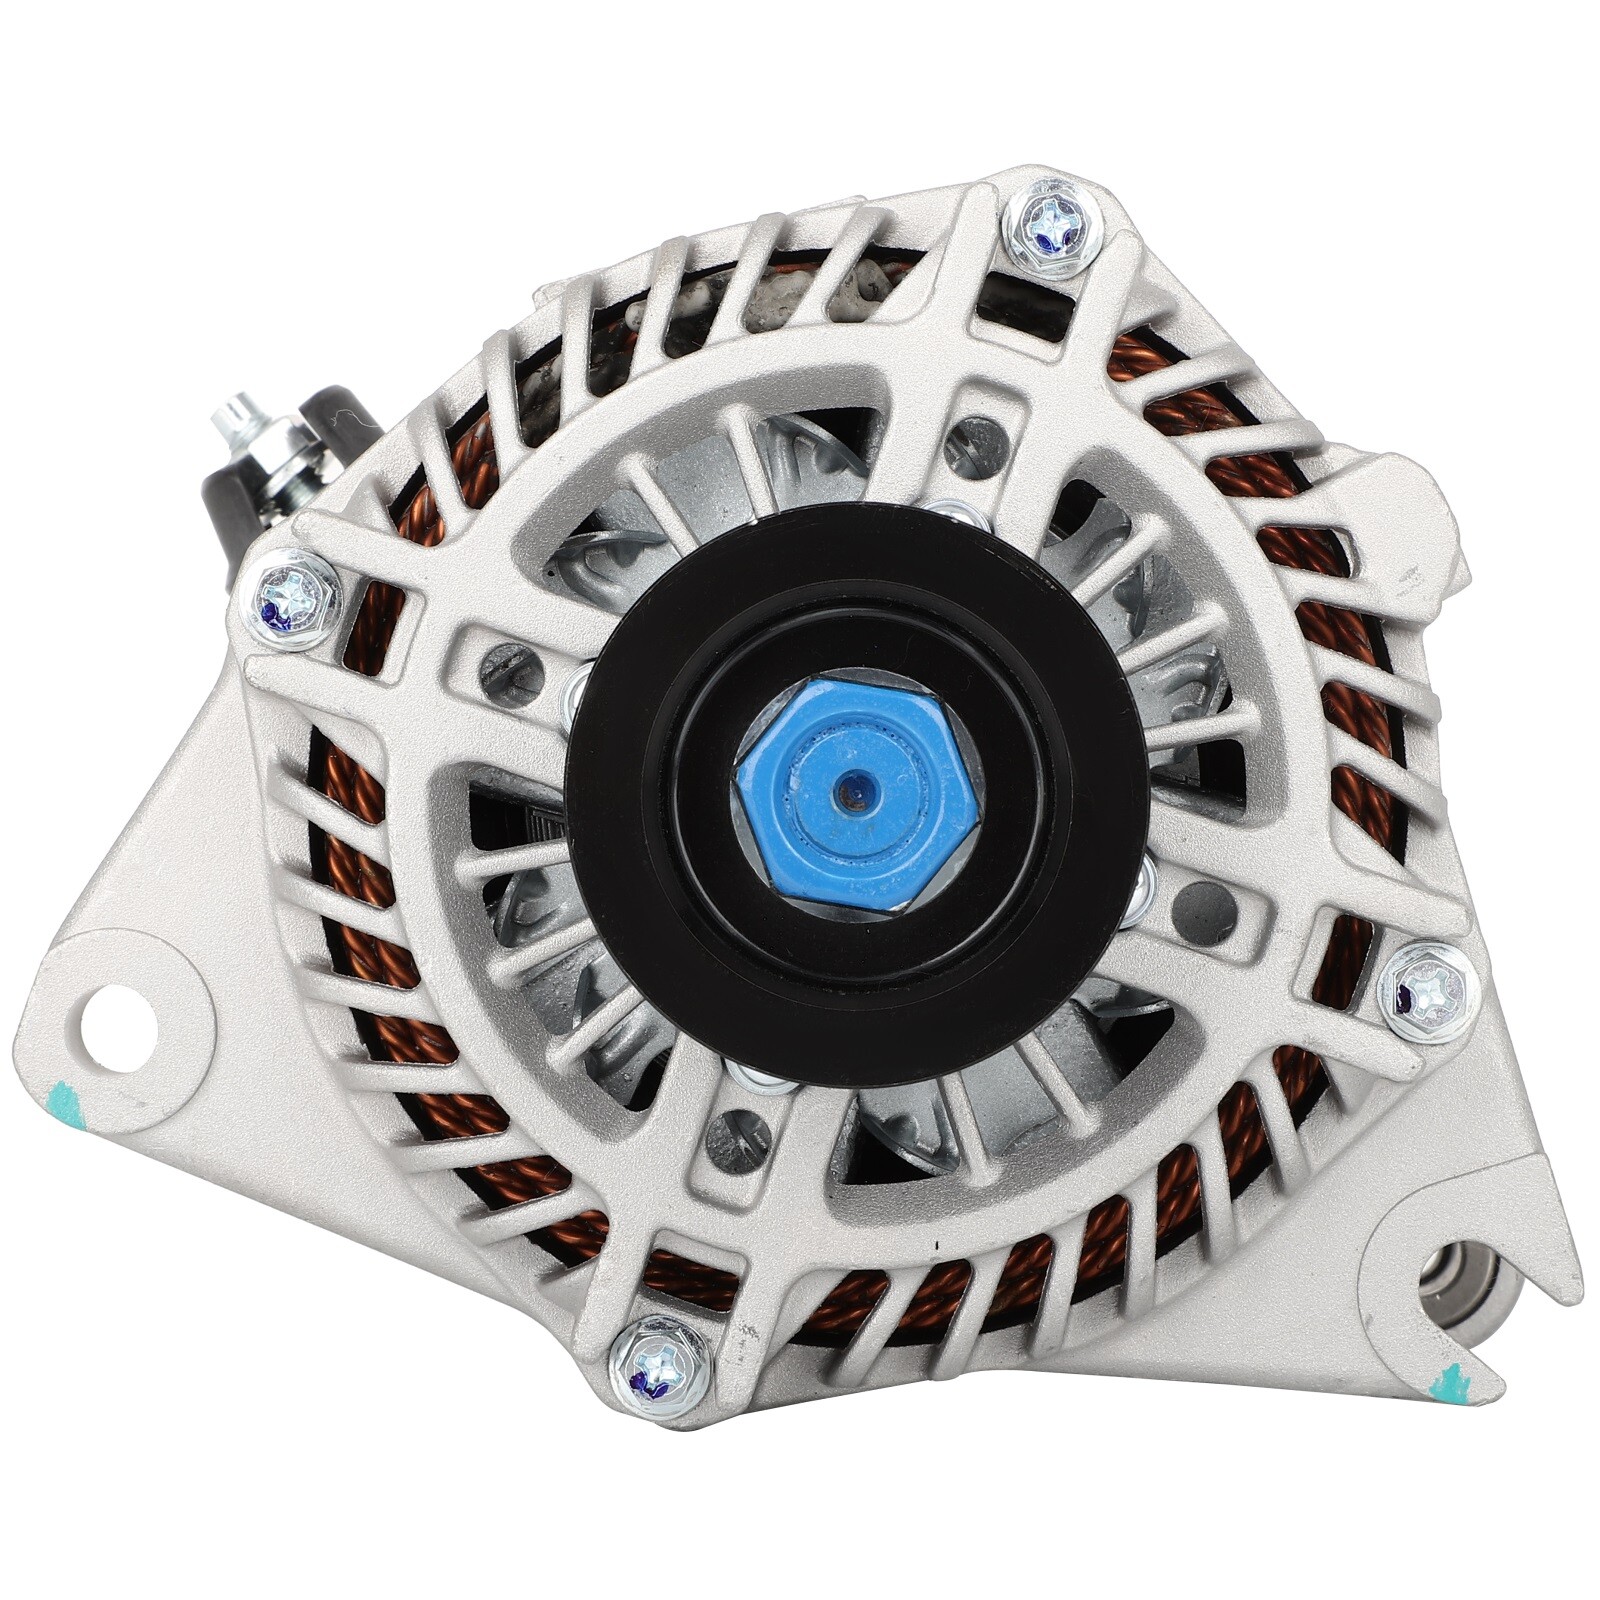
Alternator For Ford Van Transit-150 V6 3.5L A80749 90273465 CK4Z10346A GL8699
Features:
- Elaborately designed to provide just enough power
- Identical in specifications to the factory alternator
- Made to comply with strict OE quality requirements
- Enables precise fit and offers dependable operation
Reference Numbers:
Reference Part Number 3567 A2TX2991 A2TX2991ZC CK4T-10300-AB CK4Z-10346-A GL-8699 A-80749 90-27-3465 A002TX2991 A002TX2991ZC CK4T10300AB CK4Z10346A GL8699 A80749 90273465
Applications:
Ford Van Transit-150 V6 3.5L 3496cc 213cid 2015-2019
Transit-150 V6 3.7L 3726cc 227cid 2015-2019
Transit-250 V6 3.5L 3496cc 213cid 2015-2019
Transit-250 V6 3.7L 3726cc 227cid 2015-2019
Transit-350 V6 3.5L 3496cc 213cid 2015-2019
Transit-350 V6 3.7L 3726cc 227cid 2015-2019
Transit-350 HD V6 3.5L 3496cc 213cid 2015-2019
Transit-350 HD V6 3.7L 3726cc 227cid 2015-2019
Disconnecting the Alternator
1
Park the car on an even, level surface.
Any time you plan to work on your vehicle, safety is paramount. Because you may need to jack the vehicle up, make sure it’s parked on a surface that’s suitable for the work. It should be evenly paved and flat.
Even if you don’t have the jack the car up, it’s easier to work on an even surface.
Ensure the vehicle is park, or has the parking brake engaged (if equipped with a standard transmission).
2
Disconnect the battery.
Find the right socket to loosen the bolt that keeps the cable on the negative terminal tight. It’s the terminal of the battery with a visible (-) sign. Once it’s loose, slide the cable off the terminal to disconnect the battery. Never work in the engine bay of a vehicle without first disconnecting the battery for safety.
Working on the alternator without disconnecting the battery could result in getting shocked or damaging the vehicle.
You can leave the positive cable attached.
3
Jack the vehicle up if necessary.
Follow the serpentine or accessory belts to locate the alternator in your engine bay. Depending on the vehicle, it may be on the top closest to you, or it may be on one of the sides and difficult to access. If you can’t easily access it from the engine bay, you’ll need to jack up the vehicle.
Be sure the parking brake is on and the wheels are blocked before you jack it up.
Insert jack stands beneath the vehicle for safety once it’s jacked up.
4
Remove the main power cable from the alternator.
The main power cable will be the thick cable attached to the alternator that runs from the battery. Depending on how much space you have in your specific vehicle, you may be able to use a ratchet, but in some, you may only be able to fit an open-ended wrench. Unscrew the bolt holding it in place and pull it from where it’s connected.
The bolts will likely require standard sized sockets or wrenches in American made vehicles, and metric in most foreign applications.
The only other cable running to the alternator connects to a harness, so it will be easy to identify.
Set the bolt aside someplace safe until you install the new alternator.
5
Release the safety clip connecting the wiring harness.
The only other wiring heading into the alternator is the control harness. Use your finger or a flat head screwdriver to release the clip holding the harness together, then slide it apart.
Be careful if you use a screwdriver to get to hard to reach clips so you don’t break the plastic.
Tuck the loose wire aside so it doesn’t snag on the alternator when you remove it.
Removing the Old Alternator
1
Relieve tension on the belt with the auto-tensioner (if equipped).
Some vehicles use the alternator itself to apply tension to the serpentine or accessory belt, but others use an auto tensioner pulley. Insert the square drive from a breaker bar into the hole in the auto-tensioner pulley and apply pressure in a clockwise direction to relieve tension on the belt.
You can tell if your vehicle uses an auto-tensioner by looking at the alternator mounting bracket: if the bolts can slide from side to side in the bracket, it does not have an auto-tensioner.
You will need to slide the belt off the alternator pulley before you release the auto-tensioner.
Prior to making any changes, take photos of the belt set up so tha you know exactly how the belt should be routed around the various pulleys.
In some cars, you might need a friend to relieve the tension while you remove the belt.
2
Loosen the bolts on the alternator if there is no auto-tensioner.
In cars without an auto-tensioner pulley, you can relieve the tension on the belt simply by loosening the two bolts that secure the alternator to the engine. These will often require a 14mm or 1⁄2 inch (1.3 cm) socket, though you may need to try others.
As you loosen the bolts, the alternator will slide in the bracket under the tension of the belt.
Only loosen the bolts, but do not remove them!
You may not need to remove the serpentine or accessory belt if it’s not damaged.
3
Inspect the serpentine belt for damage.
Look for signs of glossing or glazing (shinier portions) on the edges and underside of the belt. Inspect both the top and underside for signs of cracking as well.
If you find any of those issues, you’ll need to replace it.
4
Remove the alternator from the engine bay.
With the belt pulled off of the alternator pulley and the wires disconnected, the alternator should come out freely.
You may need to wiggle the alternator around some things in order to remove it.
Keep track of how you worm the alternator out of the engine bay to help squeeze the new one in.
5
Compare the new alternator to the old one.
Before installing the new alternator, set it down on a table next to the old one you just removed. Make sure the mounting holes and wire connectors are in the same place and that the two parts are the same size.
Even if you provided specific information when purchasing the alternator, this step is important to make sure they provided you with the correct part.
If they don’t match, return the new alternator to the auto parts store to get the correct replacement.
Installing the New Alternator
1
Slide the new alternator into place.
You might have to wiggle the alternator around to squeeze it back into place in a crowded engine bay. Be sure to hold loose wires or the serpentine belt out of the way as you get it into place.
Be careful not to trap any wiring behind the alternator as you slide it into place.
Watch out for the serpentine belt as you slide the alternator into place to be sure you don’t damage it.
2
Insert the mounting bolts.
Slide the mounting bolts through the alternator and into the mounting bracket. Tighten them by hand until they’re snug. In cars with an auto-tensioner pulley, you can completely tighten the bolts at this point, otherwise keep the bolts loose.
You’ll need to tighten the belt using the alternator later if you don’t have an auto-tensioner.
Make sure the bolts are snug enough to hold the alternator in place, but loose enough to slide side to side in the bracket.
3
Run the belt over the new alternator pulley.
Either install the new belt or run the old belt back through all of the appropriate pulleys. If you aren’t sure how to properly route the belt, use the photos you have previously taken. You can also look for a diagram on the body of the car inside the engine bay to guide you. The belt will need to go around any accessories it is supposed to power in your specific vehicle.
Keep the tensioner loose with pressure on the ratchet. When the belt is properly seated in the various pulleys, slowly release the ratchet, allowing the tensioner to once again place tension on the belt.
If there is no diagram stuck in the engine bay, you may also be able to find the diagram in your vehicle owner’s manual.
You might also be able to find the diagram on the manufacturer’s website.
4
Apply tension to the alternator with a pry bar if necessary.
If your vehicle does not have an auto-tensioner pulley, apply pressure to the alternator using a large screwdriver or pry bar until the belt is tight. Place the pry bar between the alternator and the engine, and push the alternator out, away from the engine.
Be careful not pinch or cut any wires with the screwdriver or pry bar.
You or a friend will need to continue applying pressure until the bolts are tightened.
5
Tighten the bolts and the belt.
With tension on the belt applied via the alternator and pry bar, use the appropriate socket and a ratchet to tighten the two mounting bolts up the rest of the way. This will allow the alternator to keep the tension n the belt.
Make sure that the serpentine belt has less than an inch of play back and forth once installed.
If the belt is a little loose, loosen the bolts and apply pressure again using the pry bar while you tighten them up.
If you have taken photos of the belt, use them to make sure once again that the belt is positioned correctly.
6
Connect the power cable and monitor harness.
Reconnect the wire harness and insert the bolt that secures the main power cable to the alternator in the same order you removed them. They should install exactly as they were in the old alternator.
Make sure the primary power cable is tightened firmly onto the new alternator.
Be sure you hear an audible “click” from the wiring harness to ensure it’s seated snugly.
7
Reconnect the battery.
With the new alternator in place, all you have left to do is reconnect the negative lead to the battery. Make sure you tighten it firmly so it can’t shake loose while driving.
If the battery is dead, you may need to jump start it.
If the vehicle is jacked up, remove the jack stands and lower it.
FAQ:
What is a serpentine belt tool?
It's usually a long ratchet or "breaker bar" used to loosen the bolt on the belt tensioner so that the serpentine belt becomes loose.
How can I be sure that the alternator is the problem with my car?
If you aren't sure how to diagnose this problem yourself, you can take your car to the shop and have them check your alternator (even if you do the repairs yourself).
Do I have to leave the negative cable connected?
No, it is best to remove battery cables and clean the terminals while it is off.
Do I have to change my battery?
If your alternator is broken, it may have drained your battery, but that doesn't necessarily mean the battery is bad. If it's been completely drained repeatedly, however, it may need to be replaced. Pull the battery from the car and take it to your nearest auto parts store to be tested - they can determine if the battery can still hold a charge.
| Item Specifics | |
|---|---|
| Brand | AP1A |
| Type | Alternator |
| Voltage | 12 V |
| Features | Clockwise Rotation |
| Manufacturer Part Number | AP11944301P |
| OE/OEM Part Number | 20384N 90273465, 90-27-3465 ,CK4Z10346A |
| Amperage | 150A |
| Manufacturer Warranty | 1 Year |
| Performance Part | Yes |
| Country/Region of Manufacture | Unknown |
| Finish | Polished |
| Universal Fitment | No |
| Vintage Car Part | No |
| Interchange Part Number | A002TX2991 A002TX2991ZC CK4T10300AB |
| SPEC GENERAL | DENSO HAIRPIN IR/IF 100A 12V CW S7 |
| SPEC INTERNAL ID | PP11138N-E2 |
| Superseded Part Number | A-80749, A2TX2991ZC A2TX2991 GL8699 A80749 |
| SPEC INCLUDES | Mounting Hardware: No |
| SPEC CORE CHARGE | No Core Required |
| Fitment Type | Direct Replacement |
| Product Type | Starting & Charging |
| For | Ford Van Transit-150 V6 3.5L |
| Year | 2015 2016 2017 2018 2019 |
| Model | Ford Van Transit-150 Transit-250 Transit-350 |
| For 2 | Transit-250 V6 3.7L |
| For 3 | Transit-350 V6 3.5L |
| For 4 | Transit-350 V6 3.7L |
Payment
Payment must be received within 10 days as auction ended or order might be delayed.
Shipping
If you have not received your shipment within 15 days from payment , please contact us. We will track the shipment and get back to you as soon as possible with a reply. Our goal is customer satisfaction!
Returns
Return shipping is to be paid by the Buyer.
Contact Us
Please check the picture and the part number carefully to make sure that you bought the right part for your car.The only way to be 100% sure that the part will fit your vehicle is to check your original part,You can also email us before purchasing, we will check for you and reply soon within 24 hours.
Feedback
Positive Feedback is very important to us. We request that you contact us immediately BEFORE you give us neutral or negative feedback, so that we can satisfactorily address your concerns.
Shop Category Excellent Delivery Help & Info Payment Policy Shipping Policy Return Policy FAQ About Us |
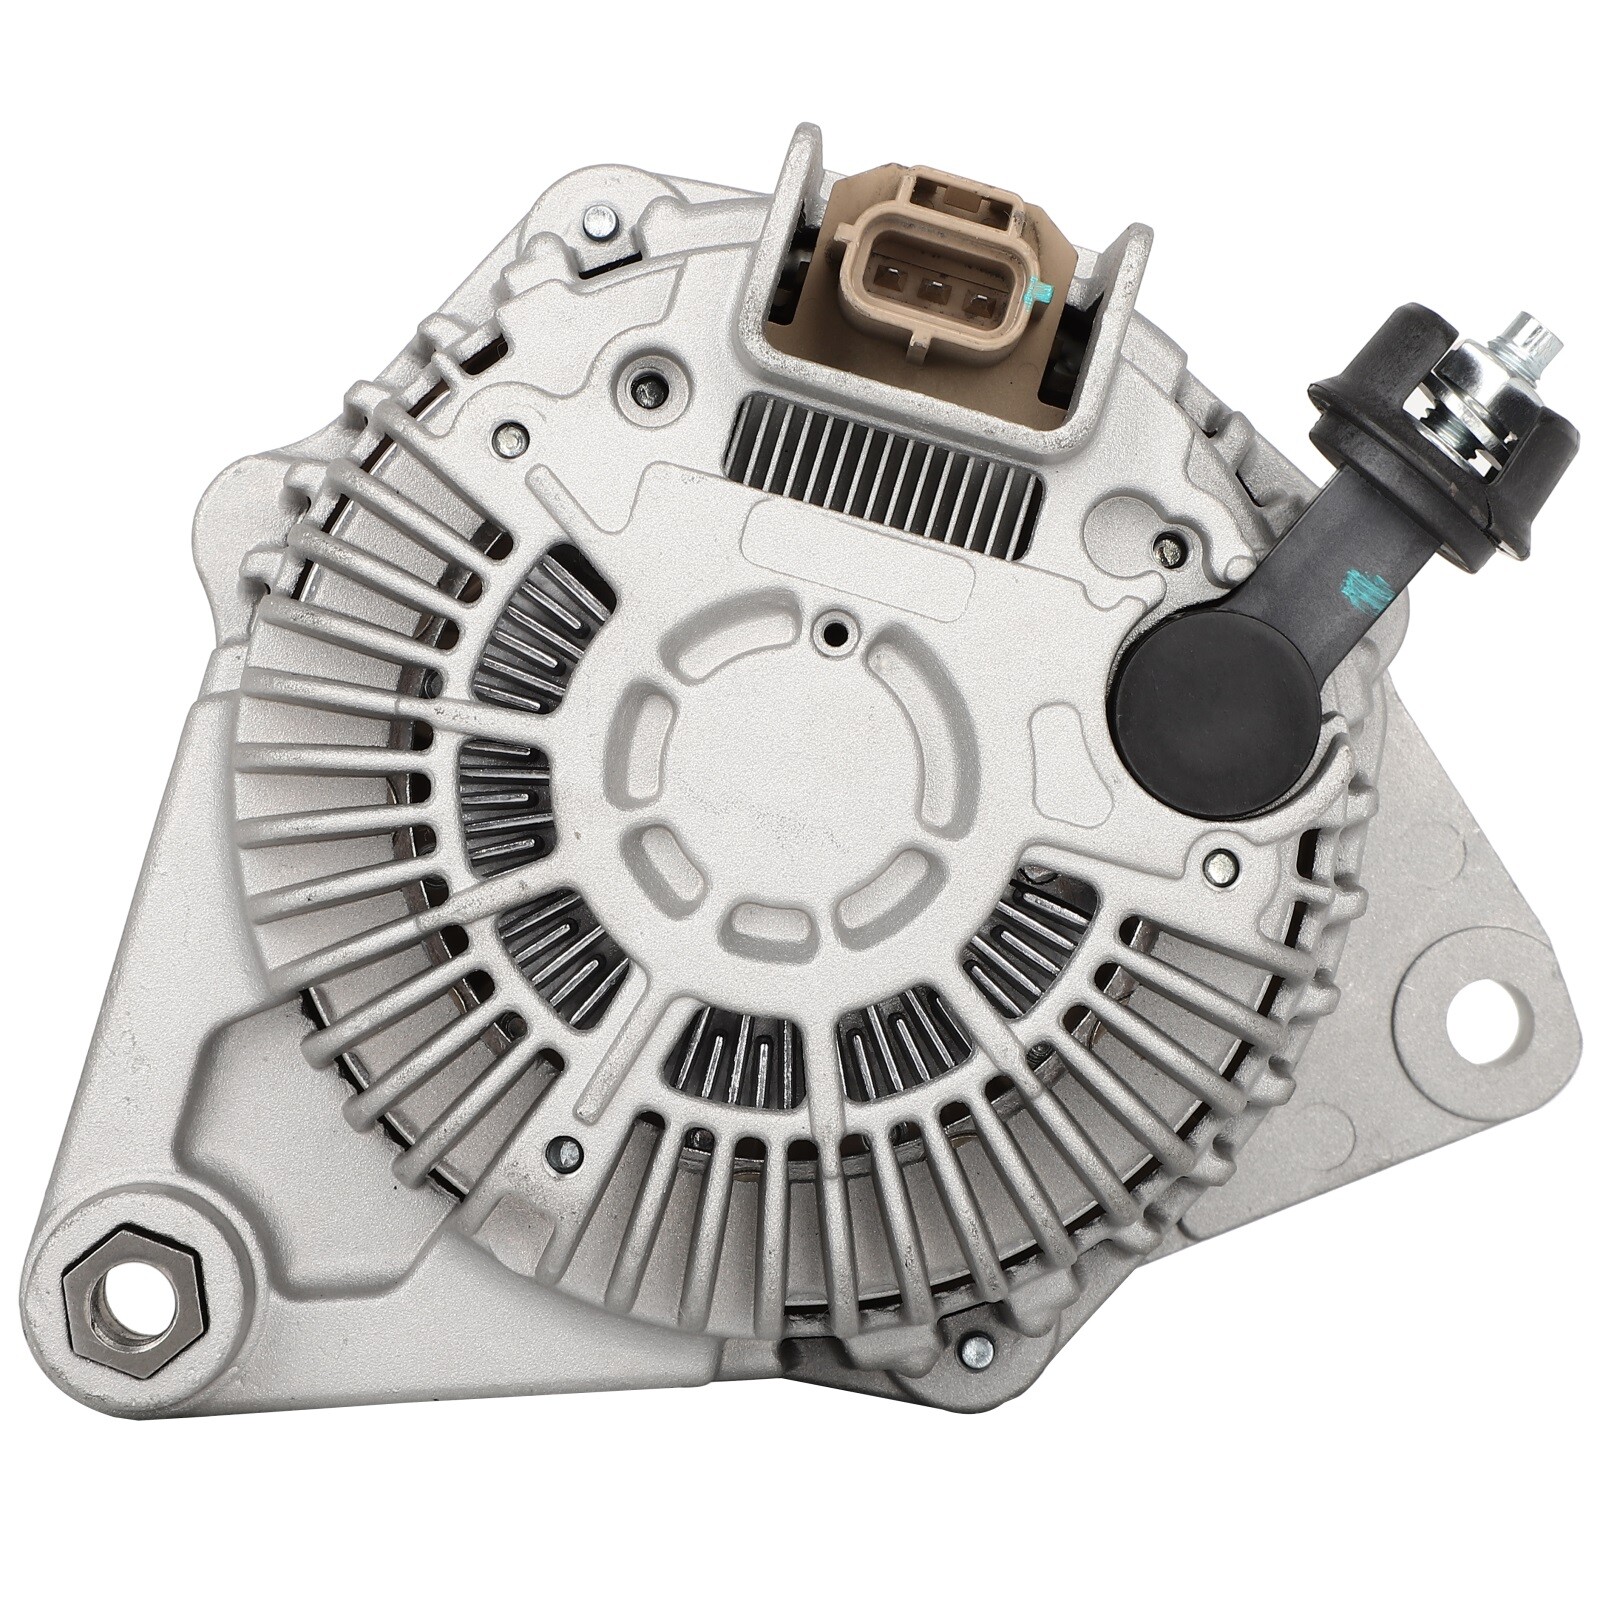
Alternator For Ford Van Transit-150 V6 3.5L A80749 90273465 CK4Z10346A GL8699
Features:
Reference Part Number 3567 A2TX2991 A2TX2991ZC CK4T-10300-AB CK4Z-10346-A GL-8699 A-80749 90-27-3465 A002TX2991 A002TX2991ZC CK4T10300AB CK4Z10346A GL8699 A80749 90273465 Applications:
Ford Van Transit-150 V6 3.5L 3496cc 213cid 2015-2019
Disconnecting the Alternator
Park the car on an even, level surface.
2
Removing the Old Alternator
Some vehicles use the alternator itself to apply tension to the serpentine or accessory belt, but others use an auto tensioner pulley. Insert the square drive from a breaker bar into the hole in the auto-tensioner pulley and apply pressure in a clockwise direction to relieve tension on the belt.
In cars without an auto-tensioner pulley, you can relieve the tension on the belt simply by loosening the two bolts that secure the alternator to the engine. These will often require a 14mm or 1⁄2 inch (1.3 cm) socket, though you may need to try others.
Look for signs of glossing or glazing (shinier portions) on the edges and underside of the belt. Inspect both the top and underside for signs of cracking as well.
With the belt pulled off of the alternator pulley and the wires disconnected, the alternator should come out freely.
Before installing the new alternator, set it down on a table next to the old one you just removed. Make sure the mounting holes and wire connectors are in the same place and that the two parts are the same size.
You might have to wiggle the alternator around to squeeze it back into place in a crowded engine bay. Be sure to hold loose wires or the serpentine belt out of the way as you get it into place.
Slide the mounting bolts through the alternator and into the mounting bracket. Tighten them by hand until they’re snug. In cars with an auto-tensioner pulley, you can completely tighten the bolts at this point, otherwise keep the bolts loose.
Either install the new belt or run the old belt back through all of the appropriate pulleys. If you aren’t sure how to properly route the belt, use the photos you have previously taken. You can also look for a diagram on the body of the car inside the engine bay to guide you. The belt will need to go around any accessories it is supposed to power in your specific vehicle. 4 If your vehicle does not have an auto-tensioner pulley, apply pressure to the alternator using a large screwdriver or pry bar until the belt is tight. Place the pry bar between the alternator and the engine, and push the alternator out, away from the engine.
With tension on the belt applied via the alternator and pry bar, use the appropriate socket and a ratchet to tighten the two mounting bolts up the rest of the way. This will allow the alternator to keep the tension n the belt.
Reconnect the wire harness and insert the bolt that secures the main power cable to the alternator in the same order you removed them. They should install exactly as they were in the old alternator. 7 With the new alternator in place, all you have left to do is reconnect the negative lead to the battery. Make sure you tighten it firmly so it can’t shake loose while driving. If the battery is dead, you may need to jump start it.
FAQ:
What is a serpentine belt tool? It's usually a long ratchet or "breaker bar" used to loosen the bolt on the belt tensioner so that the serpentine belt becomes loose.
How can I be sure that the alternator is the problem with my car? If you aren't sure how to diagnose this problem yourself, you can take your car to the shop and have them check your alternator (even if you do the repairs yourself).
Do I have to leave the negative cable connected? No, it is best to remove battery cables and clean the terminals while it is off.
Do I have to change my battery? If your alternator is broken, it may have drained your battery, but that doesn't necessarily mean the battery is bad. If it's been completely drained repeatedly, however, it may need to be replaced. Pull the battery from the car and take it to your nearest auto parts store to be tested - they can determine if the battery can still hold a charge.
Payment must be received within 10 days as auction ended or order might be delayed. If you have not received your shipment within 15 days from payment , please contact us. We will track the shipment and get back to you as soon as possible with a reply. Our goal is customer satisfaction! Return shipping is to be paid by the Buyer. Please check the picture and the part number carefully to make sure that you bought the right part for your car.The only way to be 100% sure that the part will fit your vehicle is to check your original part,You can also email us before purchasing, we will check for you and reply soon within 24 hours. Positive Feedback is very important to us. We request that you contact us immediately BEFORE you give us neutral or negative feedback, so that we can satisfactorily address your concerns. All rights reserved. |
| Brand: | AP1A |
|---|---|
| Isin: | I7MD8FD955NC |
Out of Stock
In Stock
Backordered
Out of Stock


IBspot Buyer Protection
Shop confidently on IBspot, receive your item as described or your money back for eligible orders. Learn Program Terms
GUARANTEED SAFE CHECKOUT
-

MONEY BACK GUARANTEE
30 days money back guarantee, no additional fee charged.
-

EXCELLENT SUPPORT
We provide 24/7 online customer support via email.
-

Fast Shipping
One week domestic shipping. Global delivery to the US in 2 weeks.
- Elaborately designed to provide just enough power
- Identical in specifications to the factory alternator
- Made to comply with strict OE quality requirements
- Enables precise fit and offers dependable operation

|
|
|
|

|
|
|
|
|
|
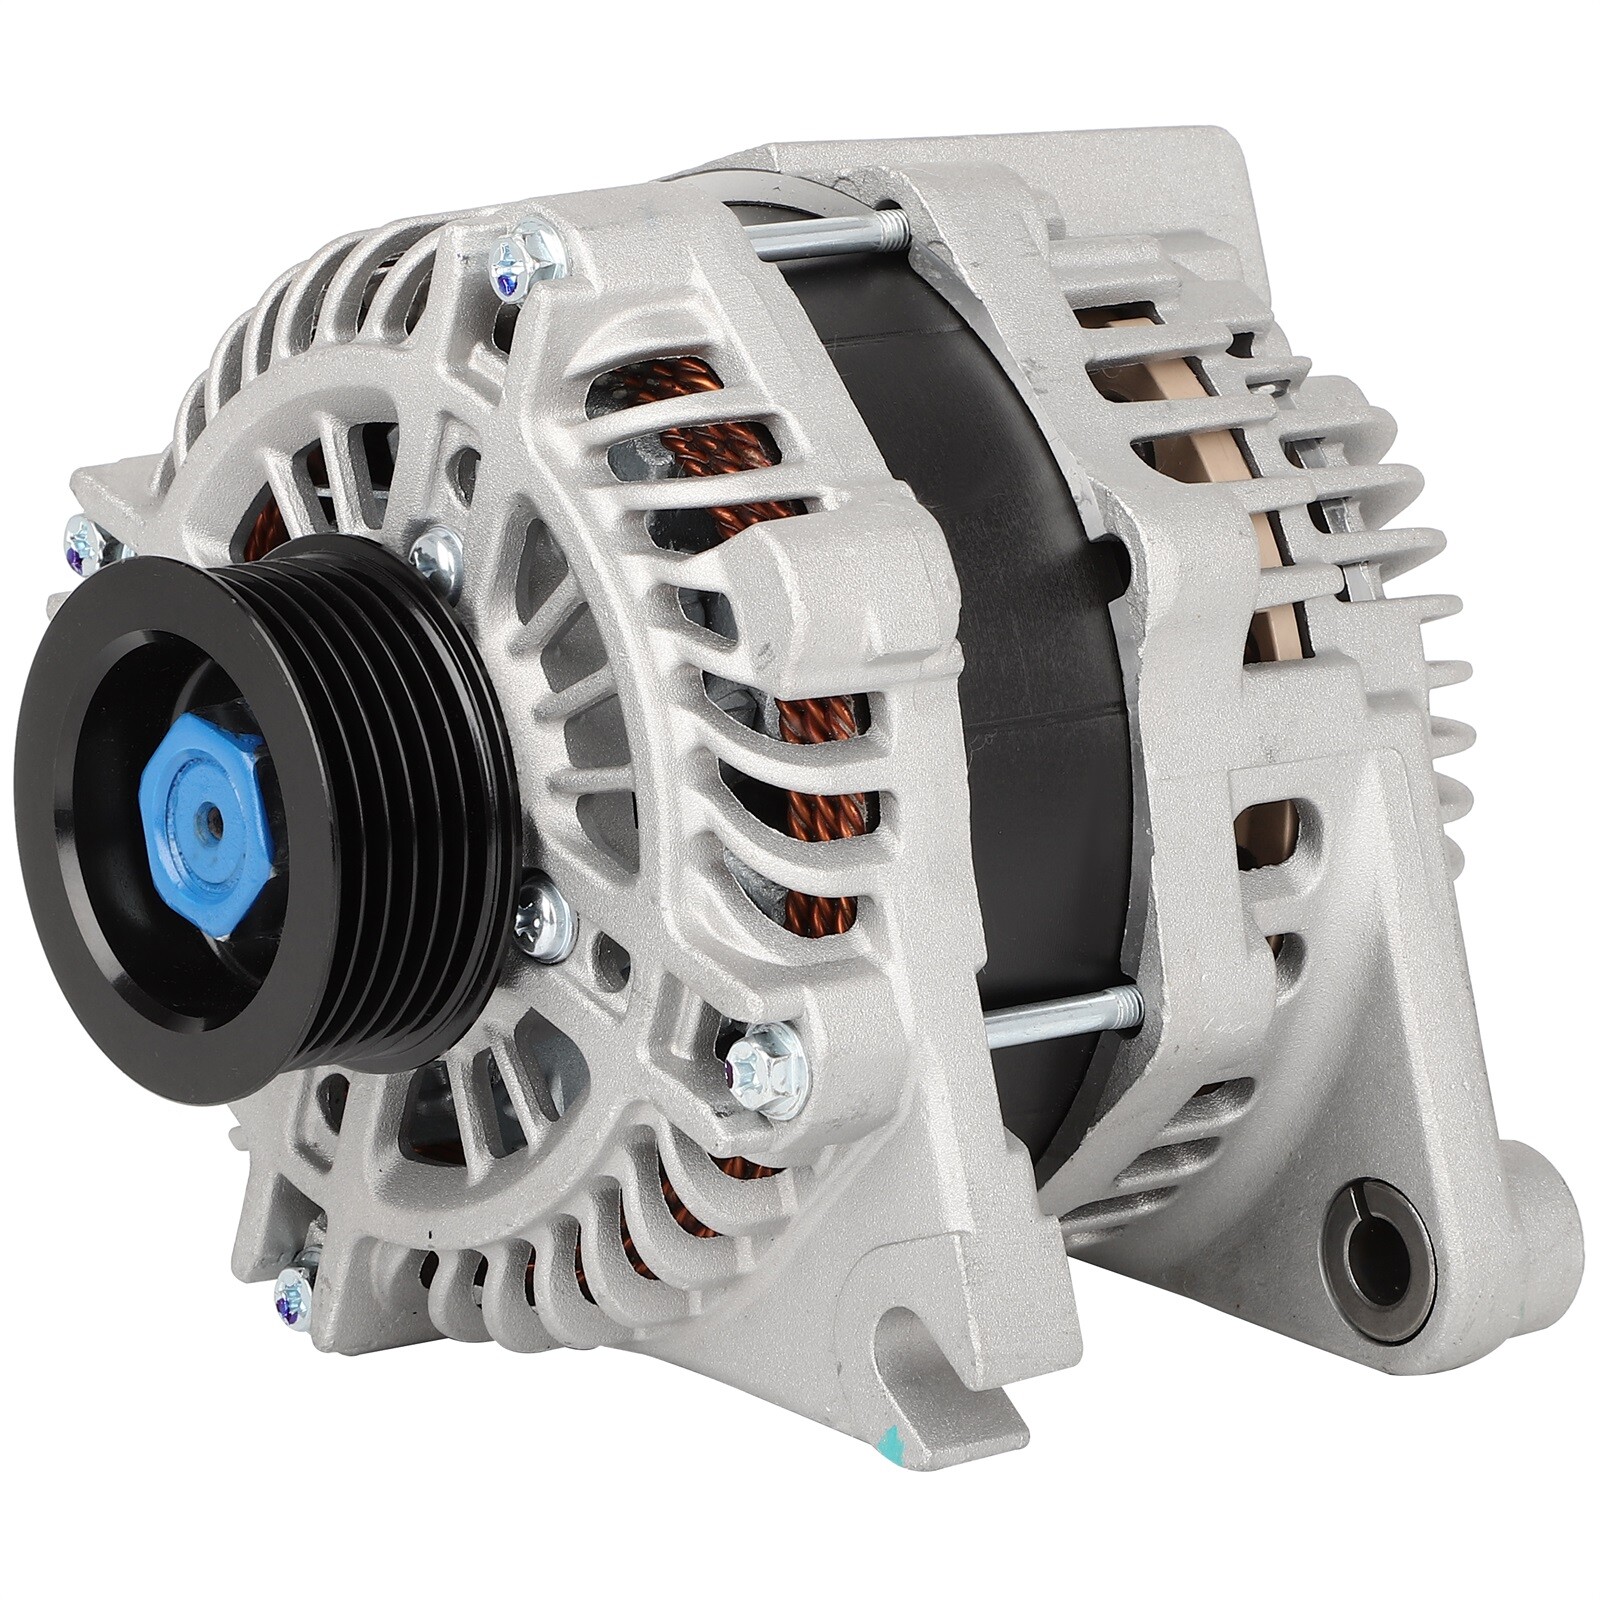
Alternator For Ford Van Transit-150 V6 3.5L A80749 90273465 CK4Z10346A GL8699
Features:
- Elaborately designed to provide just enough power
- Identical in specifications to the factory alternator
- Made to comply with strict OE quality requirements
- Enables precise fit and offers dependable operation
Reference Numbers:
Reference Part Number 3567 A2TX2991 A2TX2991ZC CK4T-10300-AB CK4Z-10346-A GL-8699 A-80749 90-27-3465 A002TX2991 A002TX2991ZC CK4T10300AB CK4Z10346A GL8699 A80749 90273465
Applications:
Ford Van Transit-150 V6 3.5L 3496cc 213cid 2015-2019
Transit-150 V6 3.7L 3726cc 227cid 2015-2019
Transit-250 V6 3.5L 3496cc 213cid 2015-2019
Transit-250 V6 3.7L 3726cc 227cid 2015-2019
Transit-350 V6 3.5L 3496cc 213cid 2015-2019
Transit-350 V6 3.7L 3726cc 227cid 2015-2019
Transit-350 HD V6 3.5L 3496cc 213cid 2015-2019
Transit-350 HD V6 3.7L 3726cc 227cid 2015-2019

Disconnecting the Alternator
1
Park the car on an even, level surface.
Any time you plan to work on your vehicle, safety is paramount. Because you may need to jack the vehicle up, make sure it’s parked on a surface that’s suitable for the work. It should be evenly paved and flat.
Even if you don’t have the jack the car up, it’s easier to work on an even surface.
Ensure the vehicle is park, or has the parking brake engaged (if equipped with a standard transmission).

2
Disconnect the battery.
Find the right socket to loosen the bolt that keeps the cable on the negative terminal tight. It’s the terminal of the battery with a visible (-) sign. Once it’s loose, slide the cable off the terminal to disconnect the battery. Never work in the engine bay of a vehicle without first disconnecting the battery for safety.
Working on the alternator without disconnecting the battery could result in getting shocked or damaging the vehicle.
You can leave the positive cable attached.

3
Jack the vehicle up if necessary.
Follow the serpentine or accessory belts to locate the alternator in your engine bay. Depending on the vehicle, it may be on the top closest to you, or it may be on one of the sides and difficult to access. If you can’t easily access it from the engine bay, you’ll need to jack up the vehicle.
Be sure the parking brake is on and the wheels are blocked before you jack it up.
Insert jack stands beneath the vehicle for safety once it’s jacked up.

4
Remove the main power cable from the alternator.
The main power cable will be the thick cable attached to the alternator that runs from the battery. Depending on how much space you have in your specific vehicle, you may be able to use a ratchet, but in some, you may only be able to fit an open-ended wrench. Unscrew the bolt holding it in place and pull it from where it’s connected.
The bolts will likely require standard sized sockets or wrenches in American made vehicles, and metric in most foreign applications.
The only other cable running to the alternator connects to a harness, so it will be easy to identify.
Set the bolt aside someplace safe until you install the new alternator.

5
Release the safety clip connecting the wiring harness.
The only other wiring heading into the alternator is the control harness. Use your finger or a flat head screwdriver to release the clip holding the harness together, then slide it apart.
Be careful if you use a screwdriver to get to hard to reach clips so you don’t break the plastic.
Tuck the loose wire aside so it doesn’t snag on the alternator when you remove it.

Removing the Old Alternator
1
Relieve tension on the belt with the auto-tensioner (if equipped).
Some vehicles use the alternator itself to apply tension to the serpentine or accessory belt, but others use an auto tensioner pulley. Insert the square drive from a breaker bar into the hole in the auto-tensioner pulley and apply pressure in a clockwise direction to relieve tension on the belt.
You can tell if your vehicle uses an auto-tensioner by looking at the alternator mounting bracket: if the bolts can slide from side to side in the bracket, it does not have an auto-tensioner.
You will need to slide the belt off the alternator pulley before you release the auto-tensioner.
Prior to making any changes, take photos of the belt set up so tha you know exactly how the belt should be routed around the various pulleys.
In some cars, you might need a friend to relieve the tension while you remove the belt.

2
Loosen the bolts on the alternator if there is no auto-tensioner.
In cars without an auto-tensioner pulley, you can relieve the tension on the belt simply by loosening the two bolts that secure the alternator to the engine. These will often require a 14mm or 1⁄2 inch (1.3 cm) socket, though you may need to try others.
As you loosen the bolts, the alternator will slide in the bracket under the tension of the belt.
Only loosen the bolts, but do not remove them!
You may not need to remove the serpentine or accessory belt if it’s not damaged.

3
Inspect the serpentine belt for damage.
Look for signs of glossing or glazing (shinier portions) on the edges and underside of the belt. Inspect both the top and underside for signs of cracking as well.
If you find any of those issues, you’ll need to replace it.

4
Remove the alternator from the engine bay.
With the belt pulled off of the alternator pulley and the wires disconnected, the alternator should come out freely.
You may need to wiggle the alternator around some things in order to remove it.
Keep track of how you worm the alternator out of the engine bay to help squeeze the new one in.

5
Compare the new alternator to the old one.
Before installing the new alternator, set it down on a table next to the old one you just removed. Make sure the mounting holes and wire connectors are in the same place and that the two parts are the same size.
Even if you provided specific information when purchasing the alternator, this step is important to make sure they provided you with the correct part.
If they don’t match, return the new alternator to the auto parts store to get the correct replacement.

Installing the New Alternator
1
Slide the new alternator into place.
You might have to wiggle the alternator around to squeeze it back into place in a crowded engine bay. Be sure to hold loose wires or the serpentine belt out of the way as you get it into place.
Be careful not to trap any wiring behind the alternator as you slide it into place.
Watch out for the serpentine belt as you slide the alternator into place to be sure you don’t damage it.

2
Insert the mounting bolts.
Slide the mounting bolts through the alternator and into the mounting bracket. Tighten them by hand until they’re snug. In cars with an auto-tensioner pulley, you can completely tighten the bolts at this point, otherwise keep the bolts loose.
You’ll need to tighten the belt using the alternator later if you don’t have an auto-tensioner.
Make sure the bolts are snug enough to hold the alternator in place, but loose enough to slide side to side in the bracket.

3
Run the belt over the new alternator pulley.
Either install the new belt or run the old belt back through all of the appropriate pulleys. If you aren’t sure how to properly route the belt, use the photos you have previously taken. You can also look for a diagram on the body of the car inside the engine bay to guide you. The belt will need to go around any accessories it is supposed to power in your specific vehicle.
Keep the tensioner loose with pressure on the ratchet. When the belt is properly seated in the various pulleys, slowly release the ratchet, allowing the tensioner to once again place tension on the belt.
If there is no diagram stuck in the engine bay, you may also be able to find the diagram in your vehicle owner’s manual.
You might also be able to find the diagram on the manufacturer’s website.

4
Apply tension to the alternator with a pry bar if necessary.
If your vehicle does not have an auto-tensioner pulley, apply pressure to the alternator using a large screwdriver or pry bar until the belt is tight. Place the pry bar between the alternator and the engine, and push the alternator out, away from the engine.
Be careful not pinch or cut any wires with the screwdriver or pry bar.
You or a friend will need to continue applying pressure until the bolts are tightened.

5
Tighten the bolts and the belt.
With tension on the belt applied via the alternator and pry bar, use the appropriate socket and a ratchet to tighten the two mounting bolts up the rest of the way. This will allow the alternator to keep the tension n the belt.
Make sure that the serpentine belt has less than an inch of play back and forth once installed.
If the belt is a little loose, loosen the bolts and apply pressure again using the pry bar while you tighten them up.
If you have taken photos of the belt, use them to make sure once again that the belt is positioned correctly.

6
Connect the power cable and monitor harness.
Reconnect the wire harness and insert the bolt that secures the main power cable to the alternator in the same order you removed them. They should install exactly as they were in the old alternator.
Make sure the primary power cable is tightened firmly onto the new alternator.
Be sure you hear an audible “click” from the wiring harness to ensure it’s seated snugly.

7
Reconnect the battery.
With the new alternator in place, all you have left to do is reconnect the negative lead to the battery. Make sure you tighten it firmly so it can’t shake loose while driving.
If the battery is dead, you may need to jump start it.
If the vehicle is jacked up, remove the jack stands and lower it.

FAQ:
What is a serpentine belt tool?
It's usually a long ratchet or "breaker bar" used to loosen the bolt on the belt tensioner so that the serpentine belt becomes loose.
How can I be sure that the alternator is the problem with my car?
If you aren't sure how to diagnose this problem yourself, you can take your car to the shop and have them check your alternator (even if you do the repairs yourself).
Do I have to leave the negative cable connected?
No, it is best to remove battery cables and clean the terminals while it is off.
Do I have to change my battery?
If your alternator is broken, it may have drained your battery, but that doesn't necessarily mean the battery is bad. If it's been completely drained repeatedly, however, it may need to be replaced. Pull the battery from the car and take it to your nearest auto parts store to be tested - they can determine if the battery can still hold a charge.
| Item Specifics | |
|---|---|
| Brand | AP1A |
| Type | Alternator |
| Voltage | 12 V |
| Features | Clockwise Rotation |
| Manufacturer Part Number | AP11944301P |
| OE/OEM Part Number | 20384N 90273465, 90-27-3465 ,CK4Z10346A |
| Amperage | 150A |
| Manufacturer Warranty | 1 Year |
| Performance Part | Yes |
| Country/Region of Manufacture | Unknown |
| Finish | Polished |
| Universal Fitment | No |
| Vintage Car Part | No |
| Interchange Part Number | A002TX2991 A002TX2991ZC CK4T10300AB |
| SPEC GENERAL | DENSO HAIRPIN IR/IF 100A 12V CW S7 |
| SPEC INTERNAL ID | PP11138N-E2 |
| Superseded Part Number | A-80749, A2TX2991ZC A2TX2991 GL8699 A80749 |
| SPEC INCLUDES | Mounting Hardware: No |
| SPEC CORE CHARGE | No Core Required |
| Fitment Type | Direct Replacement |
| Product Type | Starting & Charging |
| For | Ford Van Transit-150 V6 3.5L |
| Year | 2015 2016 2017 2018 2019 |
| Model | Ford Van Transit-150 Transit-250 Transit-350 |
| For 2 | Transit-250 V6 3.7L |
| For 3 | Transit-350 V6 3.5L |
| For 4 | Transit-350 V6 3.7L |
Payment
Payment must be received within 10 days as auction ended or order might be delayed.
Shipping
If you have not received your shipment within 15 days from payment , please contact us. We will track the shipment and get back to you as soon as possible with a reply. Our goal is customer satisfaction!
Returns
Return shipping is to be paid by the Buyer.
Contact Us
Please check the picture and the part number carefully to make sure that you bought the right part for your car.The only way to be 100% sure that the part will fit your vehicle is to check your original part,You can also email us before purchasing, we will check for you and reply soon within 24 hours.
Feedback
Positive Feedback is very important to us. We request that you contact us immediately BEFORE you give us neutral or negative feedback, so that we can satisfactorily address your concerns.
Shop Category Hot Item
Excellent Delivery
Help & Info Payment Policy Shipping Policy Return Policy FAQ About Us New List Item
|
Alternator For Ford Van Transit-150 V6 3.5L A80749 90273465 CK4Z10346A GL8699
Features:
Reference Part Number 3567 A2TX2991 A2TX2991ZC CK4T-10300-AB CK4Z-10346-A GL-8699 A-80749 90-27-3465 A002TX2991 A002TX2991ZC CK4T10300AB CK4Z10346A GL8699 A80749 90273465 Applications:
Ford Van Transit-150 V6 3.5L 3496cc 213cid 2015-2019
Disconnecting the Alternator
Park the car on an even, level surface.
2
Removing the Old Alternator
Some vehicles use the alternator itself to apply tension to the serpentine or accessory belt, but others use an auto tensioner pulley. Insert the square drive from a breaker bar into the hole in the auto-tensioner pulley and apply pressure in a clockwise direction to relieve tension on the belt.
In cars without an auto-tensioner pulley, you can relieve the tension on the belt simply by loosening the two bolts that secure the alternator to the engine. These will often require a 14mm or 1⁄2 inch (1.3 cm) socket, though you may need to try others.
Look for signs of glossing or glazing (shinier portions) on the edges and underside of the belt. Inspect both the top and underside for signs of cracking as well.
With the belt pulled off of the alternator pulley and the wires disconnected, the alternator should come out freely.
Before installing the new alternator, set it down on a table next to the old one you just removed. Make sure the mounting holes and wire connectors are in the same place and that the two parts are the same size.
You might have to wiggle the alternator around to squeeze it back into place in a crowded engine bay. Be sure to hold loose wires or the serpentine belt out of the way as you get it into place.
Slide the mounting bolts through the alternator and into the mounting bracket. Tighten them by hand until they’re snug. In cars with an auto-tensioner pulley, you can completely tighten the bolts at this point, otherwise keep the bolts loose.
Either install the new belt or run the old belt back through all of the appropriate pulleys. If you aren’t sure how to properly route the belt, use the photos you have previously taken. You can also look for a diagram on the body of the car inside the engine bay to guide you. The belt will need to go around any accessories it is supposed to power in your specific vehicle.
4 If your vehicle does not have an auto-tensioner pulley, apply pressure to the alternator using a large screwdriver or pry bar until the belt is tight. Place the pry bar between the alternator and the engine, and push the alternator out, away from the engine.
With tension on the belt applied via the alternator and pry bar, use the appropriate socket and a ratchet to tighten the two mounting bolts up the rest of the way. This will allow the alternator to keep the tension n the belt.
Reconnect the wire harness and insert the bolt that secures the main power cable to the alternator in the same order you removed them. They should install exactly as they were in the old alternator.
7 With the new alternator in place, all you have left to do is reconnect the negative lead to the battery. Make sure you tighten it firmly so it can’t shake loose while driving. If the battery is dead, you may need to jump start it.
FAQ:
What is a serpentine belt tool? It's usually a long ratchet or "breaker bar" used to loosen the bolt on the belt tensioner so that the serpentine belt becomes loose.
How can I be sure that the alternator is the problem with my car? If you aren't sure how to diagnose this problem yourself, you can take your car to the shop and have them check your alternator (even if you do the repairs yourself).
Do I have to leave the negative cable connected? No, it is best to remove battery cables and clean the terminals while it is off.
Do I have to change my battery? If your alternator is broken, it may have drained your battery, but that doesn't necessarily mean the battery is bad. If it's been completely drained repeatedly, however, it may need to be replaced. Pull the battery from the car and take it to your nearest auto parts store to be tested - they can determine if the battery can still hold a charge.
Payment must be received within 10 days as auction ended or order might be delayed. If you have not received your shipment within 15 days from payment , please contact us. We will track the shipment and get back to you as soon as possible with a reply. Our goal is customer satisfaction! Return shipping is to be paid by the Buyer. Please check the picture and the part number carefully to make sure that you bought the right part for your car.The only way to be 100% sure that the part will fit your vehicle is to check your original part,You can also email us before purchasing, we will check for you and reply soon within 24 hours. Positive Feedback is very important to us. We request that you contact us immediately BEFORE you give us neutral or negative feedback, so that we can satisfactorily address your concerns. All rights reserved. |

- UPC: Does not apply
- Brand: AP1A
- Type: Alternator
- Voltage: 12 V
- Features: Clockwise Rotation
- Manufacturer Part Number: AP11944301P
- OE/OEM Part Number: 20384N 90273465, 90-27-3465 ,CK4Z10346A
- Amperage: 150A
- Manufacturer Warranty: 1 Year
- Performance Part: Yes
- Country/Region of Manufacture: Unknown
- Finish: Polished
- Universal Fitment: No
- Vintage Part: No
- Interchange Part Number: A002TX2991 A002TX2991ZC CK4T10300AB
- SPEC GENERAL: DENSO HAIRPIN IR/IF 100A 12V CW S7
- SPEC INTERNAL ID: PP11138N-E2
- Superseded Part Number: A-80749, A2TX2991ZC A2TX2991 GL8699 A80749
- SPEC INCLUDES: Mounting Hardware: No
- SPEC CORE CHARGE: No Core Required
- Fitment Type: Direct Replacement
- Product Type: Starting & Charging
- For: Ford Van Transit-150 V6 3.5L
- Year: 2015 2016 2017 2018 2019
- Model: Ford Van Transit-150 Transit-250 Transit-350
- For 2: Transit-250 V6 3.7L
- For 3: Transit-350 V6 3.5L
- For 4: Transit-350 V6 3.7L
Processing Time
- We process and ship orders Monday through Friday, excluding holidays.
- Most orders are processed within 1–3 business days, depending on product availability.
- Processing time does not include delivery time, which varies based on your location and the product’s shipping origin.
Shipping Coverage
We currently ship to addresses within the United States only.
Products may ship from:
- Our U.S. warehouses, or
- Our international fulfillment centers (including Korea, Japan, China, Australia, Mexico, Canada, the United Kingdom, and the EU).
Each product page clearly displays the “Ships From” location before checkout.
Shipping Methods & Estimated Delivery
| Shipping Method | Estimated Delivery | Cost |
|---|---|---|
| Free Shipping (US) | 5–10 business days | Free, available on eligible items |
| Standard Shipping (US to US by Item) | 5–10 business days | $6.50 for the first item, $3.00 each additional |
| Standard Shipping (From US Warehouse by Weight) | 3–7 business days | Starts at $6.50, increasing by $2 for every additional 4 oz (0.25 lb) up to 1 lb, then by $4 for each additional pound beyond 1 lb. |
| Extended Delivery (Ships from Overseas Warehouse) | 10–15 business days | $14.50 for the first item, $4.00 each additional |
Shipping costs vary by product weight, quantity and origin. Exact rates and delivery estimates are displayed on each product page and confirmed during checkout.
Free Shipping
We offer free standard shipping on select products or during promotional periods. Availability of free shipping will be displayed on the product page and at checkout.
Carriers
We primarily use USPS and UPS for U.S. deliveries. Items shipped from international warehouses may be handled by partner carriers depending on the country of origin.
Import Duties & Taxes
All import duties and taxes for goods imported into the United States are included in the product price. There are no hidden fees or additional charges at checkout.
Tracking & Notifications
Every order is fully trackable. You will receive a tracking number via email once your order ships. If your order ships in multiple packages, each package will have its own tracking number. If you don’t receive a shipping confirmation immediately, your order is still being processed and will arrive within the estimated timeframe shown at checkout.
You can track your shipment anytime using the Track Your Order page on our website.
Order Changes & Cancellations
If you need to modify or cancel an order, please contact our customer support team as soon as possible. Orders can only be canceled before they ship. Once shipped, cancellations are not possible, but you may request a return after the item is delivered.
Contact: support@ibspot.com
Item Not Received
If your tracking number shows “Delivered” but you haven’t received your package:
- Check with your local USPS or UPS office.
- Confirm that the shipping address provided was correct.
- If the issue remains unresolved, contact support@ibspot.com for assistance.
Damaged or Lost Parcels
If your package arrives damaged or fails to arrive, please contact us immediately. For deliveries to P.O. boxes, ibspot is not responsible for damage caused by weather, temperature, or theft.
Customer Support
For any questions about shipping, tracking, or delivery, our customer support team is here to help.
Email: support@ibspot.com
We’re always happy to help.
Please read our policy carefully before making a purchase.
We aim to ensure every customer has a smooth and transparent experience with ibspot.com.
Order Cancellation Policy
Customers may request to cancel an order before it has been shipped.
Once the package has been shipped, cancellations are no longer possible; however, you may still request a return after receiving your order.
How to Request a Cancellation
You can contact us through:
-
Email: support@ibspot.com
-
Contact Form: Submit a request through our Contact Us page
Please submit your cancellation request as soon as possible after placing the order to allow us to process it before shipment.
Return Policy
We accept returns for most items within 30 days of delivery for a full refund.
To be eligible for a return:
-
The item must be unused, in the same condition as received, and in its original packaging.
-
A tracking number must be provided to confirm the return shipment.
Non-Returnable Items
Certain products cannot be returned, including:
-
Perishable goods (for example, food, flowers, newspapers, magazines)
-
Intimate or sanitary goods
-
Hazardous materials or flammable liquids/gases
-
Gift cards
-
Downloadable software
-
Some health and personal care items
Partial Refunds (If Applicable)
Partial refunds may be granted in specific situations, such as:
-
Books with obvious signs of use
-
Opened CDs, DVDs, software, or vinyl records
-
Items not in their original condition, damaged, or missing parts not due to our error
-
Items returned more than 30 days after delivery
How to Return an Item
To initiate a return, please contact us at support@ibspot.com with your order number and details about the product you wish to return.
Our team will provide you with return instructions and a prepaid return label.
Shipping Cost for Returns
Please contact us before returning any item.
We will provide a free return shipping label.
If a return is sent back without prior contact or without our provided label, we cannot be held responsible for return shipping costs.
For items valued over $75, we recommend using a trackable shipping service or purchasing shipping insurance.
We cannot guarantee that we will receive your returned item if shipped independently.
Refund Processing
Once your return is received and inspected:
-
In-store returns are refunded to the original form of payment or issued as a gift card.
-
Mail-in returns using our prepaid label are refunded to the original payment method within 3–5 business days after we receive your return.
Please allow:
-
5–7 business days for the return to reach our Returns Center.
-
An additional 3–10 business days for your bank to post the refund to your account.
Damages, Issues & Claims
Please inspect your order immediately upon receipt.
If you receive a defective, damaged, or incorrect item, contact us right away at support@ibspot.com.
We’ll evaluate the issue promptly and make it right.
Product Claims
Before purchasing, please review product details carefully.
If there is a problem with your order upon arrival, visit our Support Center or contact us directly to arrange return shipping or replacement.
Exchanges
We do not process direct exchanges.
The fastest way to get what you need is to return the original item and place a new order once your return is accepted.
Return Address
IBSPOT Return Center
15 Sawmill Ln
Dover Plains, NY 12522
United States
Customer Support
Our support team is available 24/7 to assist with cancellations, returns, or general inquiries.
Email: support@ibspot.com
Contact Form: Contact Us page
Oops!
Sorry, it looks like some products are not available in selected quantity.