afpaparts20 Fuel Pump Module Assembly Fits 1990 1991 1992 1993 Honda Accord 2.2L E8322H
afpaparts20 Fuel Pump Module Assembly Fits 1990 1991 1992 1993 Honda Accord 2.2L E8322H


afpaparts20 Fuel Pump Module Assembly Fits 1990 1991 1992 1993 Honda Accord 2.2L E8322H
|
|
|
|
|
|
|
|
|
|
|
|
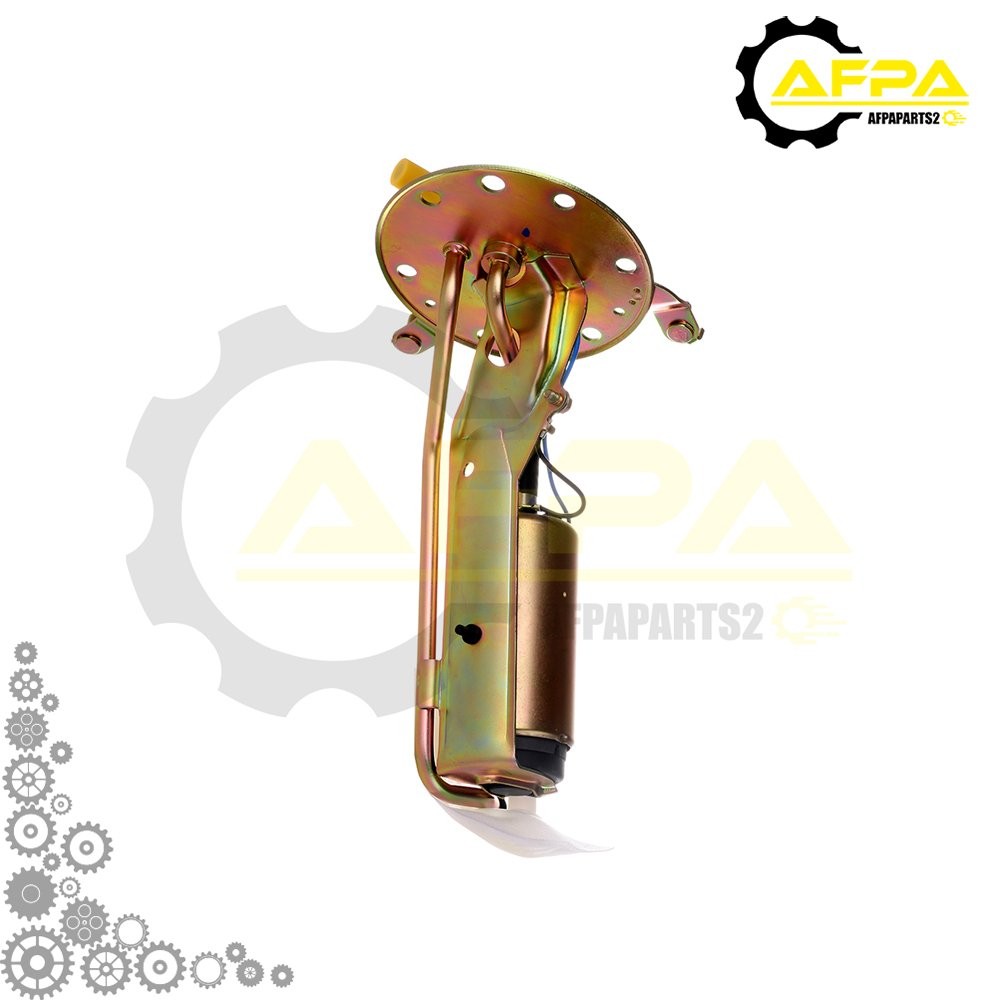
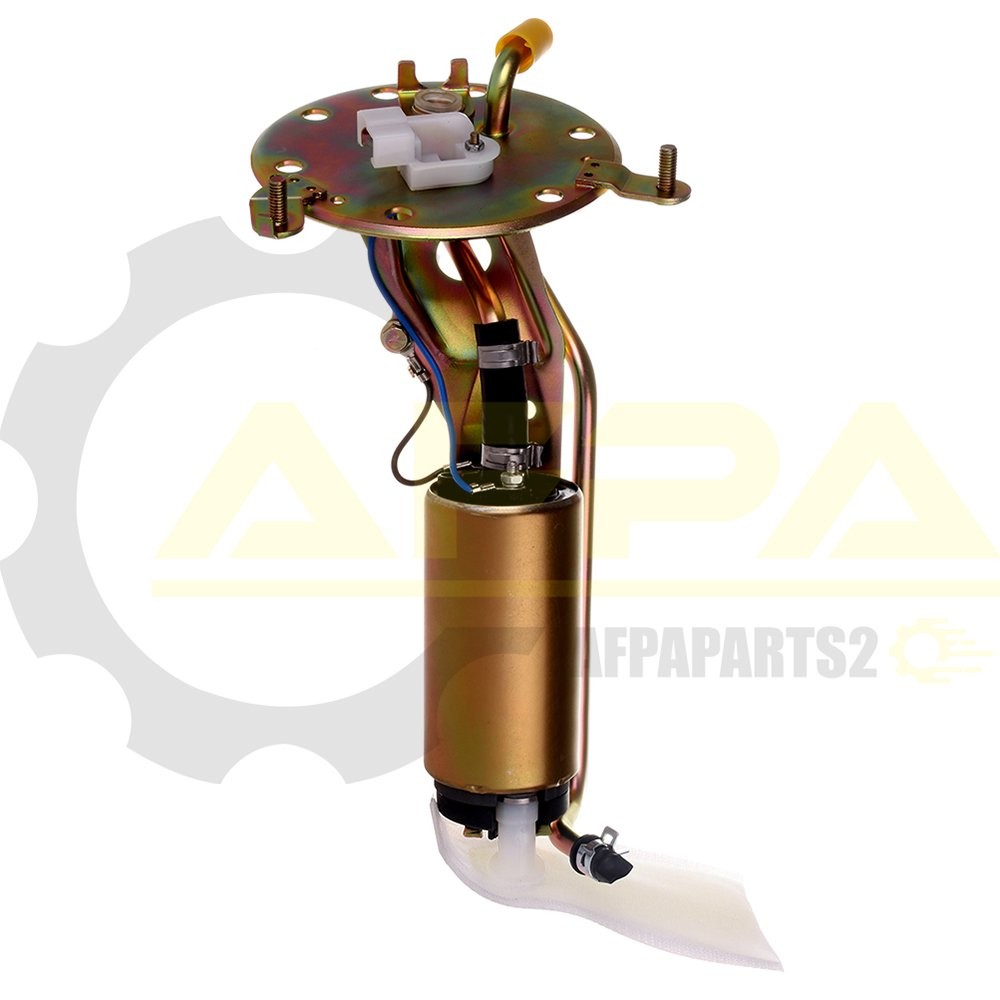
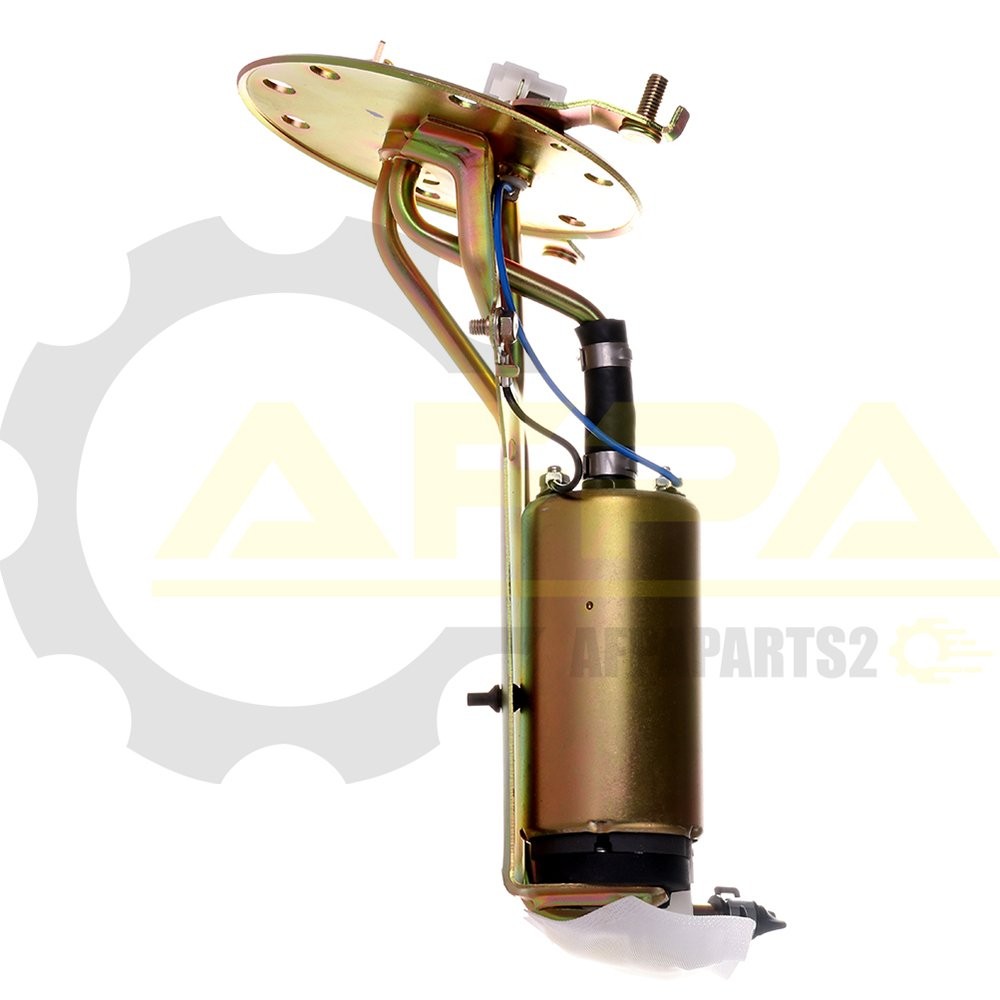
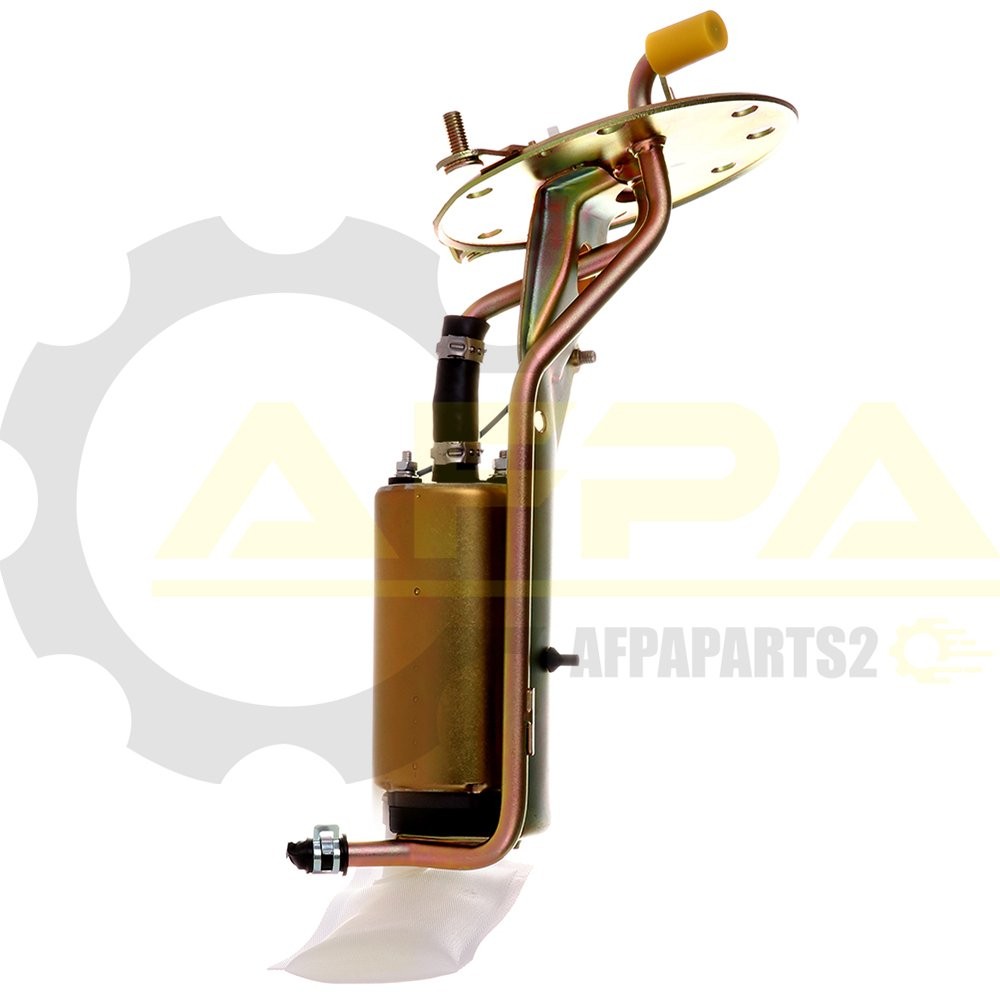
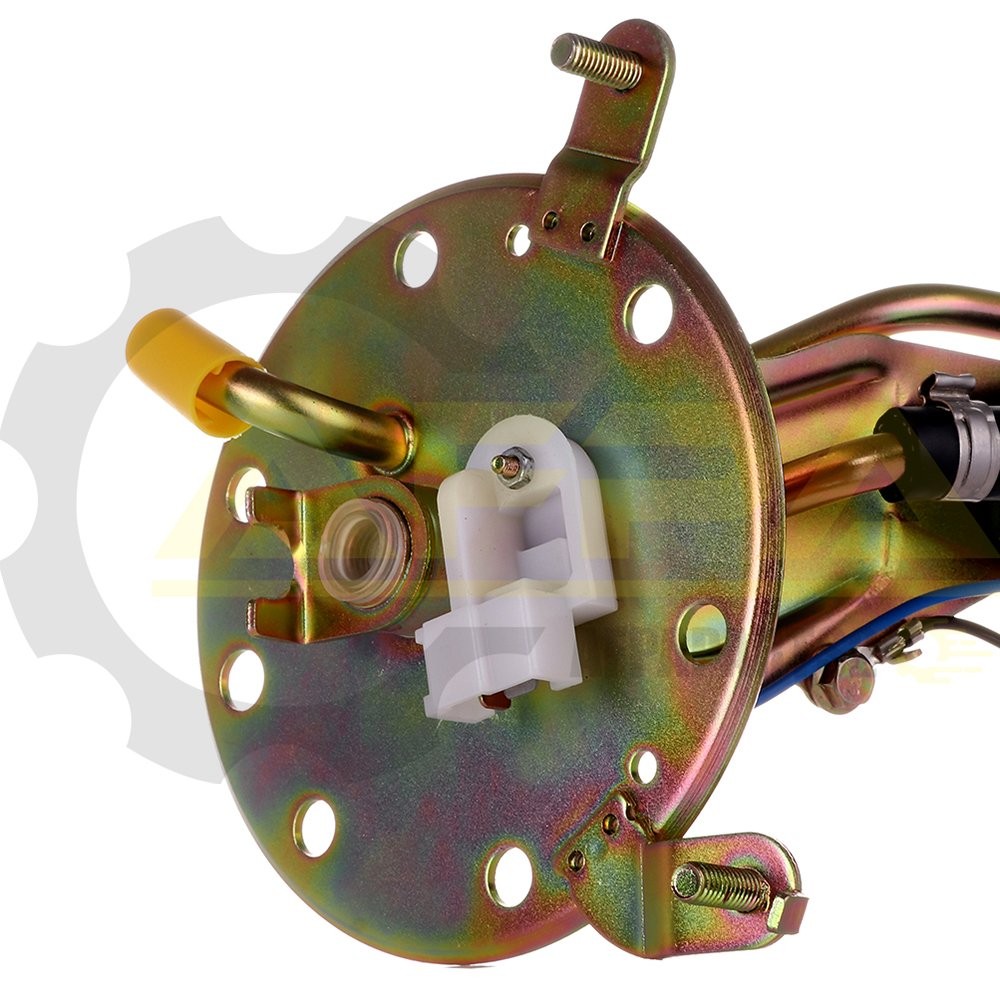
Fuel Pump Module Assembly Fits 1990 1991 1992 1993 Honda Accord 2.2L E8322H
How to Check Your Fuel Pump
Method 1 Performing an Electrical Test
1.Check the fuel pump fuse. Often, it's not the pump itself that fails to function, but the power that supplies it. Check in your owner's manual for the location of the fuse box, then find the fuse that corresponds to the fuel pump. Pull it out and inspect it for signs of failure. If the fuse is blown, it will be broken or burned. If it looks good, check the rest of the fuses related to the fuel system for signs of being blown and replace them, if necessary. If no fuses are blown, have a helper turn the key while you listen for fuel pump relay clicking on.
- If you need to replace a fuse, make sure you use one with a proper amp rating, never installing one with more amps than necessary.
- If you find a blown fuse, that might be a sign that you've got a high amp draw and you need to check the individual circuits.Try to replace the blown fuel fuse and try and start vehicle. If the fuse blows again, a direct short is present and will need to be diagnosed. Take your car into the shop to get it checked out.
2.Check the voltage at the pump itself. Just because you're getting juice from the circuit doesn't mean that it's getting to the pump itself, which makes it important to check the voltage there as well. Check out your vehicle's service manual to find out where to check and the proper procedure for checking it.
- Test for source voltage, to determine whether or not the good charge that's leaving the fuse is getting to the pump. If no power is making it to the fuel pump, then check the fuel pump relay circuit. You could have a bad relay.
3. Perform a drop test using a voltmeter. Check to make sure that the power wire shows the full voltage and the grounding wire shows that it's grounded properly. If this electrical test reveals nothing, it's likely that your fuel pump is the problem and it will need to be replaced, though you can check more thoroughly by completing an additional pressure test.
- If you show more than one volt difference, that means you've got a problem with corroded wires, or that you've got issues with the circuit on either the positive or negative side.Take it into the shop for further testing and advice.
Method 2 Performing a Fuel Pressure Test
1.Eliminate the filter as a possibility. If the filter gets clogged with sediment, you can have trouble accelerating and might suspect your fuel pump has got a problem. To check it, remove the filter from the vehicle and drain excessive fuel from the filter. Use a short piece of rubber hose on the filter inlet. Blow through the filter inlet, paying attention to the resistance, which should be minimal. Inspect the screen for debris and replace the filter if necessary by blowing through the outlet side of filter into a white rag or towel.
2.Get a fuel pressure gauge. Commonly available at most auto parts stores for $20-30, a pressure gauge is a good investment, useful on most makes and models of cars. If you don’t want to buy one, you can also often borrow one from machine shops or auto shops who have them to lend. The test only takes a few minutes.
3.Hook the pressure gauge to the fuel pump test fitting. Locate your fuel pump test point, which is usually near the fuel injectors, and locate the point at which the pump hooks up with the filter injector rail. There should be a separation joint or a test port, where the pressure gauge attaches.
- Different gauges may have slightly different instructions, and the location of the fuel pump varies from vehicle to vehicle, so consult your owner’s manual for more specific instructions.
4.Have a helper rev the engine while you check the gauge. Let the engine warm up slightly, then check the pressure both at idle speed and at the rated speed listed in your pump specifications. If you don’t know the rated speed, just rev the engine and see how the pressure reacts. If you have a serious problem, the needle won’t go anywhere or goes down below specifications, meaning the fuel pump needs to be replaced.
- The pressure should match the specifications listed in the repair manual, and should increase as you rev the engine. If it doesn’t, you need to replace your fuel pump and filter.
Tips
-
If your fuel pump does needs replacing, a rebuilt one is often as good as a new one, and a lot less expensive. If you’re feeling adventurous, some manufacturers supply rebuild kits. You can take your pump apart with a screwdriver and rebuilt it yourself, following directions on the kit. If that idea doesn’t enchant you, ask your service facility to locate and install a rebuilt fuel pump. It should be guaranteed at least three months.
-
Proper precautions should be taken for safe testing and diagnosis. Keep a fire extinguisher nearby while working on or testing the fuel system.
How can I prevent my fuel pump from going bad?
There are several things you can do to help prevent your fuel pump from going bad:
- Regularly maintain your vehicle: This includes things like changing the oil and air filter, as well as making sure the engine is tuned up.
- Avoid running your vehicle low on fuel: This can cause the fuel pump to overwork and wear out prematurely.
- If you notice any issues with engine performance, it is important to take your vehicle to a mechanic as soon as possible to have it diagnosed and repaired. A bad fuel pump can lead to engine performance issues and even cause your vehicle to break down.
- Use good-quality gasoline: Using low-quality gasoline can shorten the life of your fuel pump. Be sure to use a good quality gasoline that has the correct octane rating for your vehicle.
- Keep your fuel tank full: Keeping your fuel tank full can help prevent condensation from forming inside the fuel tank. This can water down the gasoline and cause corrosion.
- Use a fuel stabilizer: Adding a fuel stabilizer to your gas can help prevent it from going bad. Fuel stabilizers keep the gasoline fresh and help prevent corrosion.
- Avoid extended idling: Extended idling can overheat the fuel pump and shorten its life. Try to avoid extended idling whenever possible.
| Item Specifics | |
|---|---|
| Drive Type | Electrical |
| Fuel Type | Gasoline |
| Pressure | 70-85 |
| Flow Rate | 45-55 |
| Placement on Vehicle | Fuel Tank |
| Type | Turbine |
| Outlet Type | Hose Barb |
| Outlet Size | 5/16" |
| Inlet Type | Strainer |
| Outlet Quantity | 1 |
| Terminal Type | Flat |
| Pin Quantity | 2 |
| Terminal Gender | Female |
| Connector Shape | Square |
| Connector Gender | Male |
| Internal Or External Strainer | External |
| Placement on Vehicle | In Tank |
| Wiring Harness Included | No |
| Voltage | 12 V |
| Condition | New |
| Gasket or Seal Included | Yes |
| Float Included | No |
| Package Included | Fuel Pump Module Assembly w/Seal |
| OE/OEM Part Number | E8322H |
| Interchange Part Number | 67830 |
| Cross Part Number | HP10203 |
| Superseded Part Number | 17040SM4A30 |
| Weight | 4 LB |
| Fitment Type | Direct Replacement |
| Manufacturer Warranty | 1 Year |
| Black Pressure Sensor Included | No |
| Color | Brown |
| Custom Bundle | No |
| Feature | ESCP |
| Modified Item | No |
| Mounting Hardware Included | No |
| Brand | afpaparts20 |
| Manufacturer Part Number | AF114169P03 |
Payment
Please make sure your address is verified and up to date before sending payment. We cannot change any address after checkout has been completed. Please make sure you submit your correct address!
Shipping
1. Items will be shipped within 24 hours after getting your verified payment.
2.US Storage& UNITED STATES by fast shipping.We offer 24 hours dispatch and estimated delivery time is 3-5 business days.except weekend and other irresistible factors.Please feel free to contact us if you haven't receive the item after the estimated shipping time
Returns
1.Defective products can be exchanged or returned for full price refund within 30days after you receive the item.
2.Any returning or exchanging item must be in new condition and cannot be tempered.
3.Please contact us by eBay email first before you return the item Every week we have new items put on sale , if the items you don't need now ,you also cam often come to visit my store, maybe one day you can buy the items in our stores which you need.
Feedback
We will leave positive feedback to buyer as soon as buyer pays for the item. Leaving Negative feedback or Netural Feedback is never a good way to resolve problem .We hightly appreciate that you can refer to us before you leaving Negative feedback or Neutral feedback .We will offer help to resolve your problems as fast as possible.
Contact Us
Any questions, pls contact us
DESCRIPTION PAYMENT SHIPPING RETURN POLICY CONTACT US |
Shop Category Help & Info Payment Policy Shipping Policy Return Policy FAQ About Us |
Fuel Pump Module Assembly Fits 1990 1991 1992 1993 Honda Accord 2.2L E8322H
How to Check Your Fuel Pump
Method 1 Performing an Electrical Test
1.Check the fuel pump fuse. Often, it's not the pump itself that fails to function, but the power that supplies it. Check in your owner's manual for the location of the fuse box, then find the fuse that corresponds to the fuel pump. Pull it out and inspect it for signs of failure. If the fuse is blown, it will be broken or burned. If it looks good, check the rest of the fuses related to the fuel system for signs of being blown and replace them, if necessary. If no fuses are blown, have a helper turn the key while you listen for fuel pump relay clicking on.
2.Check the voltage at the pump itself. Just because you're getting juice from the circuit doesn't mean that it's getting to the pump itself, which makes it important to check the voltage there as well. Check out your vehicle's service manual to find out where to check and the proper procedure for checking it.
3. Perform a drop test using a voltmeter. Check to make sure that the power wire shows the full voltage and the grounding wire shows that it's grounded properly. If this electrical test reveals nothing, it's likely that your fuel pump is the problem and it will need to be replaced, though you can check more thoroughly by completing an additional pressure test.
Method 2 Performing a Fuel Pressure Test
1.Eliminate the filter as a possibility. If the filter gets clogged with sediment, you can have trouble accelerating and might suspect your fuel pump has got a problem. To check it, remove the filter from the vehicle and drain excessive fuel from the filter. Use a short piece of rubber hose on the filter inlet. Blow through the filter inlet, paying attention to the resistance, which should be minimal. Inspect the screen for debris and replace the filter if necessary by blowing through the outlet side of filter into a white rag or towel.
2.Get a fuel pressure gauge. Commonly available at most auto parts stores for $20-30, a pressure gauge is a good investment, useful on most makes and models of cars. If you don’t want to buy one, you can also often borrow one from machine shops or auto shops who have them to lend. The test only takes a few minutes.
3.Hook the pressure gauge to the fuel pump test fitting. Locate your fuel pump test point, which is usually near the fuel injectors, and locate the point at which the pump hooks up with the filter injector rail. There should be a separation joint or a test port, where the pressure gauge attaches.
4.Have a helper rev the engine while you check the gauge. Let the engine warm up slightly, then check the pressure both at idle speed and at the rated speed listed in your pump specifications. If you don’t know the rated speed, just rev the engine and see how the pressure reacts. If you have a serious problem, the needle won’t go anywhere or goes down below specifications, meaning the fuel pump needs to be replaced.
Tips
How can I prevent my fuel pump from going bad?
There are several things you can do to help prevent your fuel pump from going bad:
All rights reserved. |
|||||||||||||||||||||||||||||||||||||||||||||||||||||||||||||||||||||||||||||||||||||||||
| Brand: | afpaparts20 |
|---|---|
| Isin: | ICQKW6JFDC3C |
Out of Stock
In Stock
Backordered
Out of Stock


IBspot Buyer Protection
Shop confidently on IBspot, receive your item as described or your money back for eligible orders. Learn Program Terms
GUARANTEED SAFE CHECKOUT
-

MONEY BACK GUARANTEE
30 days money back guarantee, no additional fee charged.
-

EXCELLENT SUPPORT
We provide 24/7 online customer support via email.
-

Fast Shipping
One week domestic shipping. Global delivery to the US in 2 weeks.

|
|
|
|
|
|
|
|
|
|
Fuel Pump Module Assembly Fits 1990 1991 1992 1993 Honda Accord 2.2L E8322H
How to Check Your Fuel Pump
Method 1 Performing an Electrical Test
1.Check the fuel pump fuse. Often, it's not the pump itself that fails to function, but the power that supplies it. Check in your owner's manual for the location of the fuse box, then find the fuse that corresponds to the fuel pump. Pull it out and inspect it for signs of failure. If the fuse is blown, it will be broken or burned. If it looks good, check the rest of the fuses related to the fuel system for signs of being blown and replace them, if necessary. If no fuses are blown, have a helper turn the key while you listen for fuel pump relay clicking on.
- If you need to replace a fuse, make sure you use one with a proper amp rating, never installing one with more amps than necessary.
- If you find a blown fuse, that might be a sign that you've got a high amp draw and you need to check the individual circuits.Try to replace the blown fuel fuse and try and start vehicle. If the fuse blows again, a direct short is present and will need to be diagnosed. Take your car into the shop to get it checked out.
2.Check the voltage at the pump itself. Just because you're getting juice from the circuit doesn't mean that it's getting to the pump itself, which makes it important to check the voltage there as well. Check out your vehicle's service manual to find out where to check and the proper procedure for checking it.
- Test for source voltage, to determine whether or not the good charge that's leaving the fuse is getting to the pump. If no power is making it to the fuel pump, then check the fuel pump relay circuit. You could have a bad relay.
3. Perform a drop test using a voltmeter. Check to make sure that the power wire shows the full voltage and the grounding wire shows that it's grounded properly. If this electrical test reveals nothing, it's likely that your fuel pump is the problem and it will need to be replaced, though you can check more thoroughly by completing an additional pressure test.
- If you show more than one volt difference, that means you've got a problem with corroded wires, or that you've got issues with the circuit on either the positive or negative side.Take it into the shop for further testing and advice.
Method 2 Performing a Fuel Pressure Test
1.Eliminate the filter as a possibility. If the filter gets clogged with sediment, you can have trouble accelerating and might suspect your fuel pump has got a problem. To check it, remove the filter from the vehicle and drain excessive fuel from the filter. Use a short piece of rubber hose on the filter inlet. Blow through the filter inlet, paying attention to the resistance, which should be minimal. Inspect the screen for debris and replace the filter if necessary by blowing through the outlet side of filter into a white rag or towel.
2.Get a fuel pressure gauge. Commonly available at most auto parts stores for $20-30, a pressure gauge is a good investment, useful on most makes and models of cars. If you don’t want to buy one, you can also often borrow one from machine shops or auto shops who have them to lend. The test only takes a few minutes.
3.Hook the pressure gauge to the fuel pump test fitting. Locate your fuel pump test point, which is usually near the fuel injectors, and locate the point at which the pump hooks up with the filter injector rail. There should be a separation joint or a test port, where the pressure gauge attaches.
- Different gauges may have slightly different instructions, and the location of the fuel pump varies from vehicle to vehicle, so consult your owner’s manual for more specific instructions.
4.Have a helper rev the engine while you check the gauge. Let the engine warm up slightly, then check the pressure both at idle speed and at the rated speed listed in your pump specifications. If you don’t know the rated speed, just rev the engine and see how the pressure reacts. If you have a serious problem, the needle won’t go anywhere or goes down below specifications, meaning the fuel pump needs to be replaced.
- The pressure should match the specifications listed in the repair manual, and should increase as you rev the engine. If it doesn’t, you need to replace your fuel pump and filter.
Tips
-
If your fuel pump does needs replacing, a rebuilt one is often as good as a new one, and a lot less expensive. If you’re feeling adventurous, some manufacturers supply rebuild kits. You can take your pump apart with a screwdriver and rebuilt it yourself, following directions on the kit. If that idea doesn’t enchant you, ask your service facility to locate and install a rebuilt fuel pump. It should be guaranteed at least three months.
-
Proper precautions should be taken for safe testing and diagnosis. Keep a fire extinguisher nearby while working on or testing the fuel system.
How can I prevent my fuel pump from going bad?
There are several things you can do to help prevent your fuel pump from going bad:
- Regularly maintain your vehicle: This includes things like changing the oil and air filter, as well as making sure the engine is tuned up.
- Avoid running your vehicle low on fuel: This can cause the fuel pump to overwork and wear out prematurely.
- If you notice any issues with engine performance, it is important to take your vehicle to a mechanic as soon as possible to have it diagnosed and repaired. A bad fuel pump can lead to engine performance issues and even cause your vehicle to break down.
- Use good-quality gasoline: Using low-quality gasoline can shorten the life of your fuel pump. Be sure to use a good quality gasoline that has the correct octane rating for your vehicle.
- Keep your fuel tank full: Keeping your fuel tank full can help prevent condensation from forming inside the fuel tank. This can water down the gasoline and cause corrosion.
- Use a fuel stabilizer: Adding a fuel stabilizer to your gas can help prevent it from going bad. Fuel stabilizers keep the gasoline fresh and help prevent corrosion.
- Avoid extended idling: Extended idling can overheat the fuel pump and shorten its life. Try to avoid extended idling whenever possible.
| Item Specifics | |
|---|---|
| Drive Type | Electrical |
| Fuel Type | Gasoline |
| Pressure | 70-85 |
| Flow Rate | 45-55 |
| Placement on Vehicle | Fuel Tank |
| Type | Turbine |
| Outlet Type | Hose Barb |
| Outlet Size | 5/16" |
| Inlet Type | Strainer |
| Outlet Quantity | 1 |
| Terminal Type | Flat |
| Pin Quantity | 2 |
| Terminal Gender | Female |
| Connector Shape | Square |
| Connector Gender | Male |
| Internal Or External Strainer | External |
| Placement on Vehicle | In Tank |
| Wiring Harness Included | No |
| Voltage | 12 V |
| Condition | New |
| Gasket or Seal Included | Yes |
| Float Included | No |
| Package Included | Fuel Pump Module Assembly w/Seal |
| OE/OEM Part Number | E8322H |
| Interchange Part Number | 67830 |
| Cross Part Number | HP10203 |
| Superseded Part Number | 17040SM4A30 |
| Weight | 4 LB |
| Fitment Type | Direct Replacement |
| Manufacturer Warranty | 1 Year |
| Black Pressure Sensor Included | No |
| Color | Brown |
| Custom Bundle | No |
| Feature | ESCP |
| Modified Item | No |
| Mounting Hardware Included | No |
| Brand | afpaparts20 |
| Manufacturer Part Number | AF114169P03 |
Payment
Please make sure your address is verified and up to date before sending payment. We cannot change any address after checkout has been completed. Please make sure you submit your correct address!
Shipping
1. Items will be shipped within 24 hours after getting your verified payment.
2.US Storage& UNITED STATES by fast shipping.We offer 24 hours dispatch and estimated delivery time is 3-5 business days.except weekend and other irresistible factors.Please feel free to contact us if you haven't receive the item after the estimated shipping time
Returns
1.Defective products can be exchanged or returned for full price refund within 30days after you receive the item.
2.Any returning or exchanging item must be in new condition and cannot be tempered.
3.Please contact us by eBay email first before you return the item Every week we have new items put on sale , if the items you don't need now ,you also cam often come to visit my store, maybe one day you can buy the items in our stores which you need.
Feedback
We will leave positive feedback to buyer as soon as buyer pays for the item. Leaving Negative feedback or Netural Feedback is never a good way to resolve problem .We hightly appreciate that you can refer to us before you leaving Negative feedback or Neutral feedback .We will offer help to resolve your problems as fast as possible.
Contact Us
Any questions, pls contact us
DESCRIPTION PAYMENT SHIPPING RETURN POLICY CONTACT US |
Shop Category Hot Item
New List Item
Help & Info Payment Policy Shipping Policy Return Policy FAQ About Us |
Fuel Pump Module Assembly Fits 1990 1991 1992 1993 Honda Accord 2.2L E8322H
How to Check Your Fuel Pump
Method 1 Performing an Electrical Test
1.Check the fuel pump fuse. Often, it's not the pump itself that fails to function, but the power that supplies it. Check in your owner's manual for the location of the fuse box, then find the fuse that corresponds to the fuel pump. Pull it out and inspect it for signs of failure. If the fuse is blown, it will be broken or burned. If it looks good, check the rest of the fuses related to the fuel system for signs of being blown and replace them, if necessary. If no fuses are blown, have a helper turn the key while you listen for fuel pump relay clicking on.
2.Check the voltage at the pump itself. Just because you're getting juice from the circuit doesn't mean that it's getting to the pump itself, which makes it important to check the voltage there as well. Check out your vehicle's service manual to find out where to check and the proper procedure for checking it.
3. Perform a drop test using a voltmeter. Check to make sure that the power wire shows the full voltage and the grounding wire shows that it's grounded properly. If this electrical test reveals nothing, it's likely that your fuel pump is the problem and it will need to be replaced, though you can check more thoroughly by completing an additional pressure test.
Method 2 Performing a Fuel Pressure Test
1.Eliminate the filter as a possibility. If the filter gets clogged with sediment, you can have trouble accelerating and might suspect your fuel pump has got a problem. To check it, remove the filter from the vehicle and drain excessive fuel from the filter. Use a short piece of rubber hose on the filter inlet. Blow through the filter inlet, paying attention to the resistance, which should be minimal. Inspect the screen for debris and replace the filter if necessary by blowing through the outlet side of filter into a white rag or towel.
2.Get a fuel pressure gauge. Commonly available at most auto parts stores for $20-30, a pressure gauge is a good investment, useful on most makes and models of cars. If you don’t want to buy one, you can also often borrow one from machine shops or auto shops who have them to lend. The test only takes a few minutes.
3.Hook the pressure gauge to the fuel pump test fitting. Locate your fuel pump test point, which is usually near the fuel injectors, and locate the point at which the pump hooks up with the filter injector rail. There should be a separation joint or a test port, where the pressure gauge attaches.
4.Have a helper rev the engine while you check the gauge. Let the engine warm up slightly, then check the pressure both at idle speed and at the rated speed listed in your pump specifications. If you don’t know the rated speed, just rev the engine and see how the pressure reacts. If you have a serious problem, the needle won’t go anywhere or goes down below specifications, meaning the fuel pump needs to be replaced.
Tips
How can I prevent my fuel pump from going bad?
There are several things you can do to help prevent your fuel pump from going bad:
All rights reserved. |
|||||||||||||||||||||||||||||||||||||||||||||||||||||||||||||||||||||||||||||||||||||||||||||||||||||||||||||||||||||||||||||||||


- Drive Type: Electrical
- Fuel Type: Gasoline
- Pressure: 70-85
- Flow Rate: 45-55
- Placement on Vehicle: In Tank
- Type: Turbine
- Outlet Type: Hose Barb
- Outlet Size: 5/16"
- Inlet Type: Strainer
- Outlet Quantity: 1
- Terminal Type: Flat
- Pin Quantity: 2
- Terminal Gender: Female
- Connector Shape: Square
- Connector Gender: Male
- Internal Or External Strainer: External
- Wiring Harness Included: No
- Voltage: 12 V
- Gasket or Seal Included: Yes
- Float Included: No
- Package Included: Fuel Pump Module Assembly w/Seal
- OE/OEM Part Number: E8322H
- Interchange Part Number: 67830
- Cross Part Number: HP10203
- Superseded Part Number: 17040SM4A30
- Fitment Type: Direct Replacement
- Manufacturer Warranty: 1 Year
- Black Pressure Sensor Included: No
- Color: Brown
- Custom Bundle: No
- Feature: ESCP
- Modified Item: No
- Mounting Hardware Included: No
- Brand: afpaparts20
- UPC: Does not apply
- Manufacturer Part Number: AF114169P03
Processing Time
- We process and ship orders Monday through Friday, excluding holidays.
- Most orders are processed within 1–3 business days, depending on product availability.
- Processing time does not include delivery time, which varies based on your location and the product’s shipping origin.
Shipping Coverage
We currently ship to addresses within the United States only.
Products may ship from:
- Our U.S. warehouses, or
- Our international fulfillment centers (including Korea, Japan, China, Australia, Mexico, Canada, the United Kingdom, and the EU).
Each product page clearly displays the “Ships From” location before checkout.
Shipping Methods & Estimated Delivery
| Shipping Method | Estimated Delivery | Cost |
|---|---|---|
| Free Shipping (US) | 5–10 business days | Free, available on eligible items |
| Standard Shipping (US to US by Item) | 5–10 business days | $6.50 for the first item, $3.00 each additional |
| Standard Shipping (From US Warehouse by Weight) | 3–7 business days | Starts at $6.50, increasing by $2 for every additional 4 oz (0.25 lb) up to 1 lb, then by $4 for each additional pound beyond 1 lb. |
| Extended Delivery (Ships from Overseas Warehouse) | 10–15 business days | $14.50 for the first item, $4.00 each additional |
Shipping costs vary by product weight, quantity and origin. Exact rates and delivery estimates are displayed on each product page and confirmed during checkout.
Free Shipping
We offer free standard shipping on select products or during promotional periods. Availability of free shipping will be displayed on the product page and at checkout.
Carriers
We primarily use USPS and UPS for U.S. deliveries. Items shipped from international warehouses may be handled by partner carriers depending on the country of origin.
Import Duties & Taxes
All import duties and taxes for goods imported into the United States are included in the product price. There are no hidden fees or additional charges at checkout.
Tracking & Notifications
Every order is fully trackable. You will receive a tracking number via email once your order ships. If your order ships in multiple packages, each package will have its own tracking number. If you don’t receive a shipping confirmation immediately, your order is still being processed and will arrive within the estimated timeframe shown at checkout.
You can track your shipment anytime using the Track Your Order page on our website.
Order Changes & Cancellations
If you need to modify or cancel an order, please contact our customer support team as soon as possible. Orders can only be canceled before they ship. Once shipped, cancellations are not possible, but you may request a return after the item is delivered.
Contact: support@ibspot.com
Item Not Received
If your tracking number shows “Delivered” but you haven’t received your package:
- Check with your local USPS or UPS office.
- Confirm that the shipping address provided was correct.
- If the issue remains unresolved, contact support@ibspot.com for assistance.
Damaged or Lost Parcels
If your package arrives damaged or fails to arrive, please contact us immediately. For deliveries to P.O. boxes, ibspot is not responsible for damage caused by weather, temperature, or theft.
Customer Support
For any questions about shipping, tracking, or delivery, our customer support team is here to help.
Email: support@ibspot.com
We’re always happy to help.
Please read our policy carefully before making a purchase.
We aim to ensure every customer has a smooth and transparent experience with ibspot.com.
Order Cancellation Policy
Customers may request to cancel an order before it has been shipped.
Once the package has been shipped, cancellations are no longer possible; however, you may still request a return after receiving your order.
How to Request a Cancellation
You can contact us through:
-
Email: support@ibspot.com
-
Contact Form: Submit a request through our Contact Us page
Please submit your cancellation request as soon as possible after placing the order to allow us to process it before shipment.
Return Policy
We accept returns for most items within 30 days of delivery for a full refund.
To be eligible for a return:
-
The item must be unused, in the same condition as received, and in its original packaging.
-
A tracking number must be provided to confirm the return shipment.
Non-Returnable Items
Certain products cannot be returned, including:
-
Perishable goods (for example, food, flowers, newspapers, magazines)
-
Intimate or sanitary goods
-
Hazardous materials or flammable liquids/gases
-
Gift cards
-
Downloadable software
-
Some health and personal care items
Partial Refunds (If Applicable)
Partial refunds may be granted in specific situations, such as:
-
Books with obvious signs of use
-
Opened CDs, DVDs, software, or vinyl records
-
Items not in their original condition, damaged, or missing parts not due to our error
-
Items returned more than 30 days after delivery
How to Return an Item
To initiate a return, please contact us at support@ibspot.com with your order number and details about the product you wish to return.
Our team will provide you with return instructions and a prepaid return label.
Shipping Cost for Returns
Please contact us before returning any item.
We will provide a free return shipping label.
If a return is sent back without prior contact or without our provided label, we cannot be held responsible for return shipping costs.
For items valued over $75, we recommend using a trackable shipping service or purchasing shipping insurance.
We cannot guarantee that we will receive your returned item if shipped independently.
Refund Processing
Once your return is received and inspected:
-
In-store returns are refunded to the original form of payment or issued as a gift card.
-
Mail-in returns using our prepaid label are refunded to the original payment method within 3–5 business days after we receive your return.
Please allow:
-
5–7 business days for the return to reach our Returns Center.
-
An additional 3–10 business days for your bank to post the refund to your account.
Damages, Issues & Claims
Please inspect your order immediately upon receipt.
If you receive a defective, damaged, or incorrect item, contact us right away at support@ibspot.com.
We’ll evaluate the issue promptly and make it right.
Product Claims
Before purchasing, please review product details carefully.
If there is a problem with your order upon arrival, visit our Support Center or contact us directly to arrange return shipping or replacement.
Exchanges
We do not process direct exchanges.
The fastest way to get what you need is to return the original item and place a new order once your return is accepted.
Return Address
IBSPOT Return Center
15 Sawmill Ln
Dover Plains, NY 12522
United States
Customer Support
Our support team is available 24/7 to assist with cancellations, returns, or general inquiries.
Email: support@ibspot.com
Contact Form: Contact Us page
Oops!
Sorry, it looks like some products are not available in selected quantity.